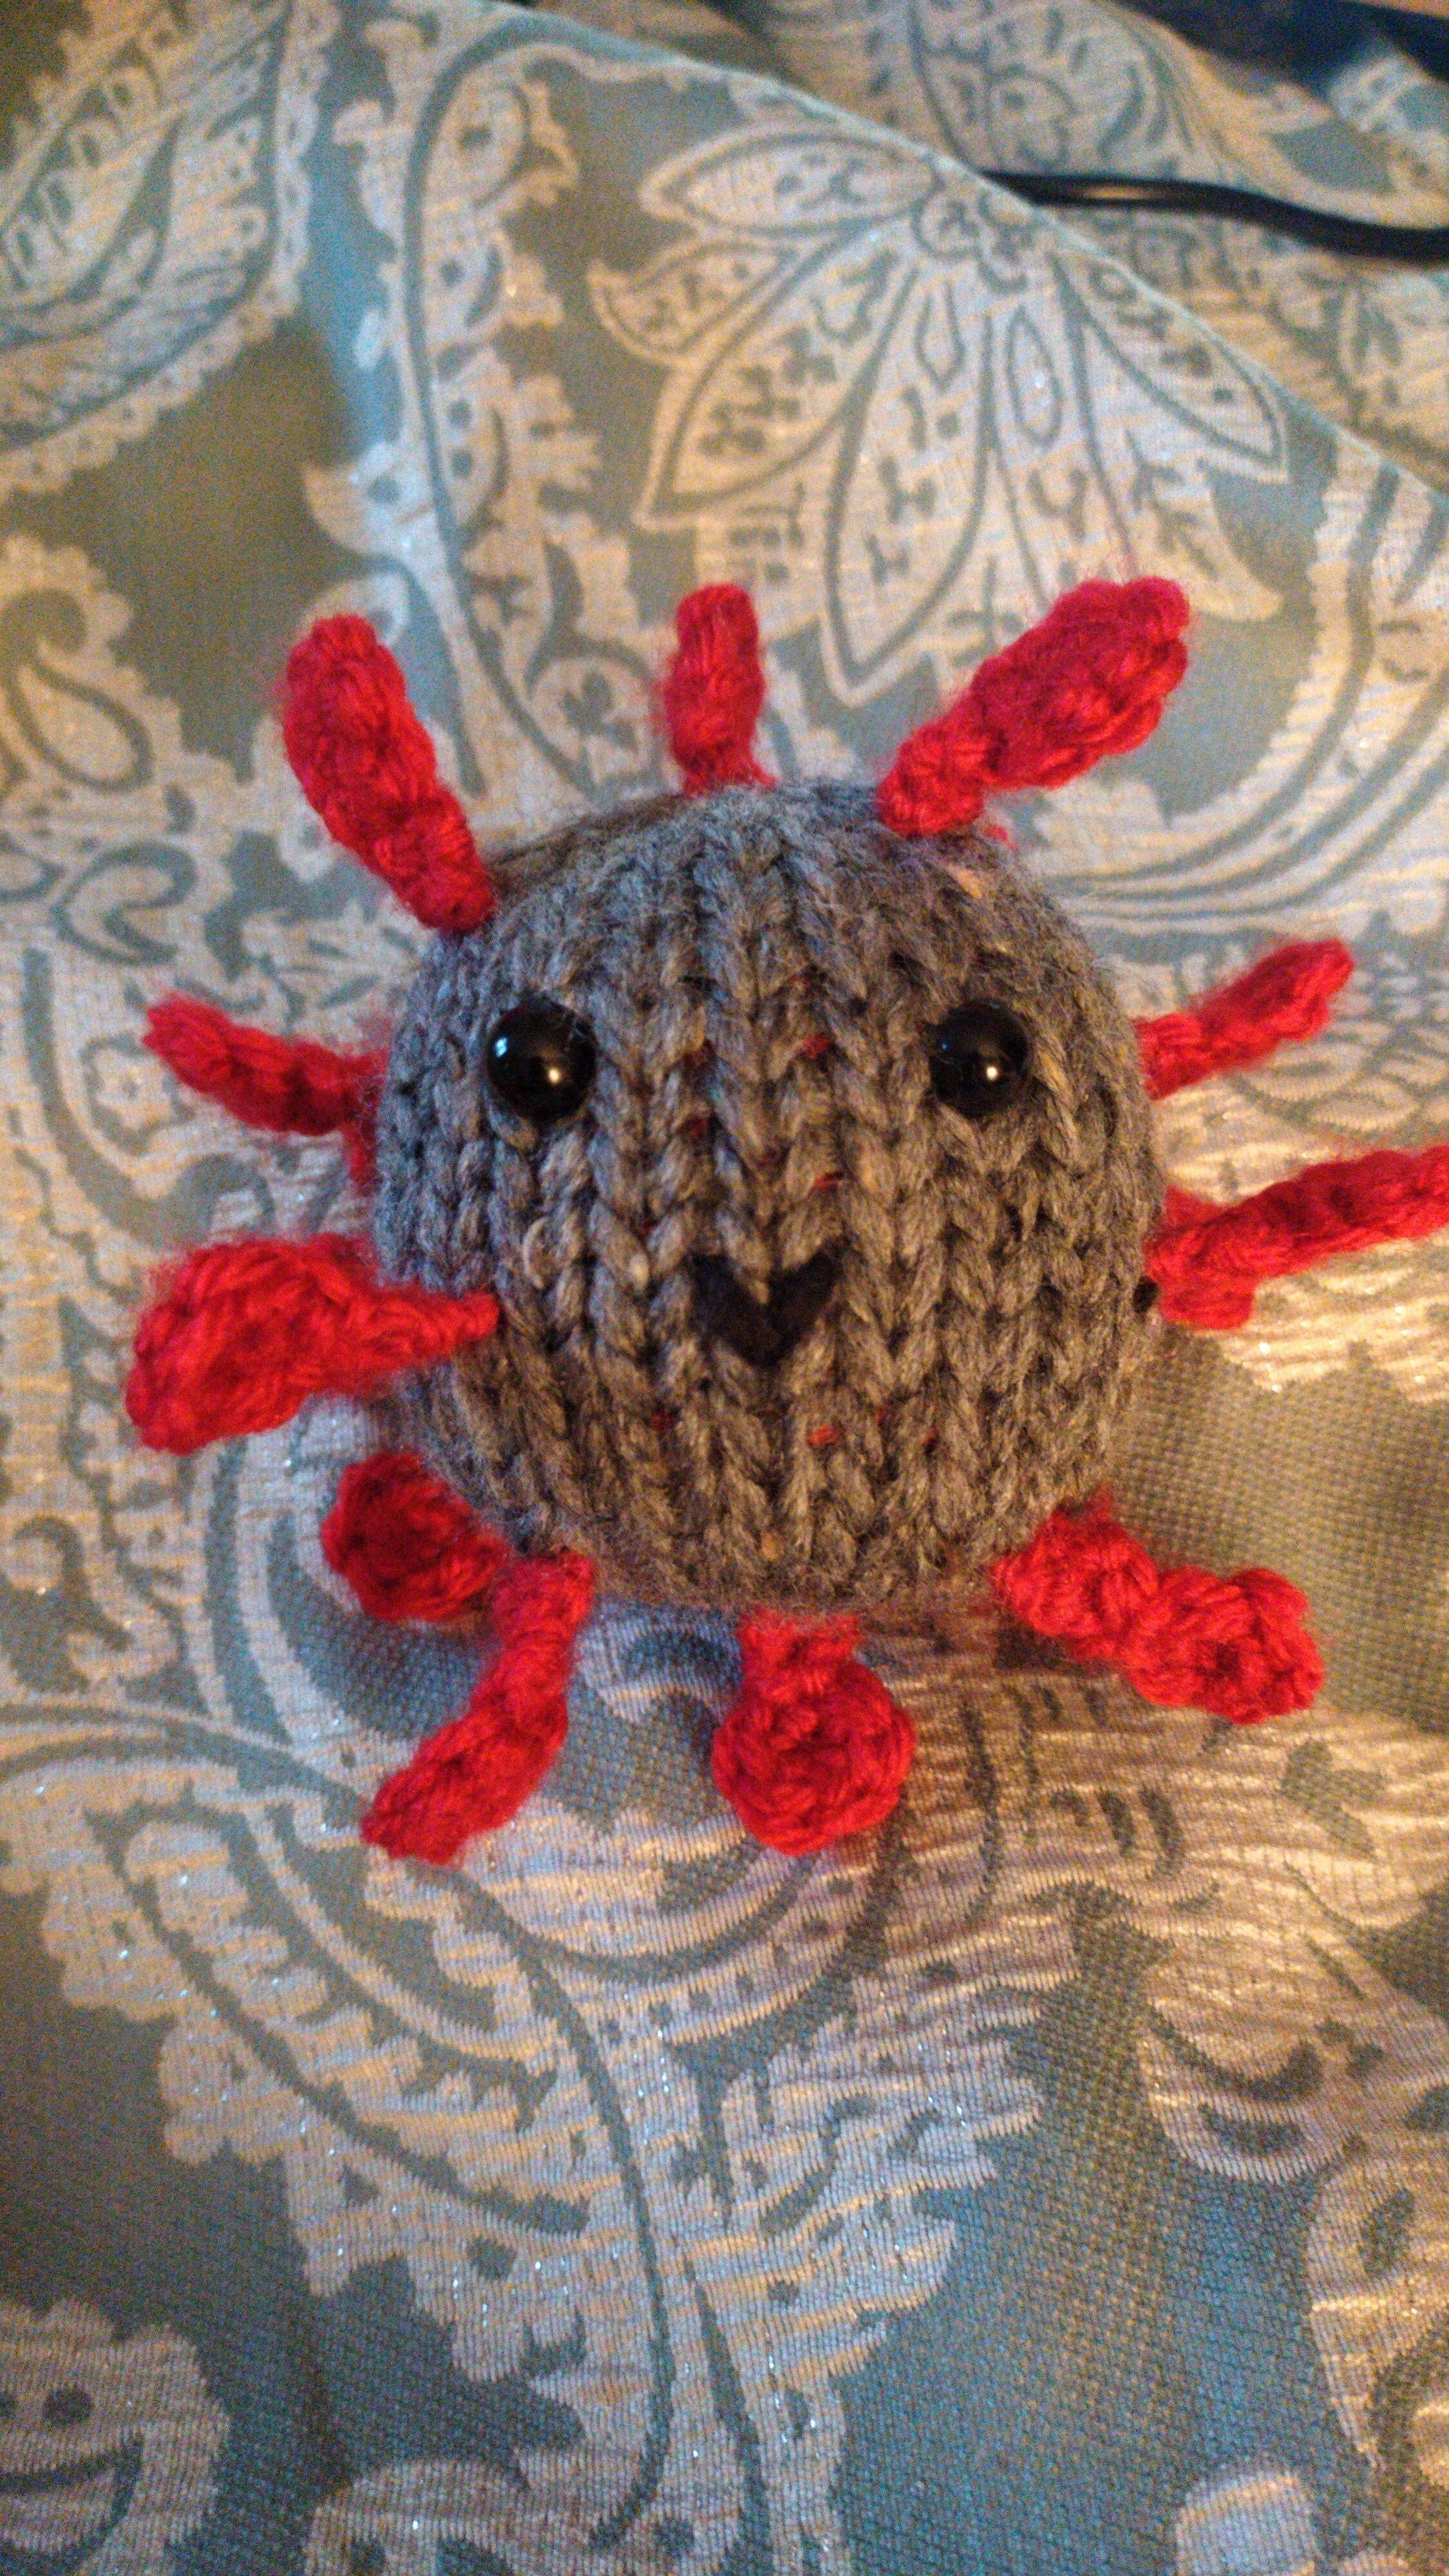
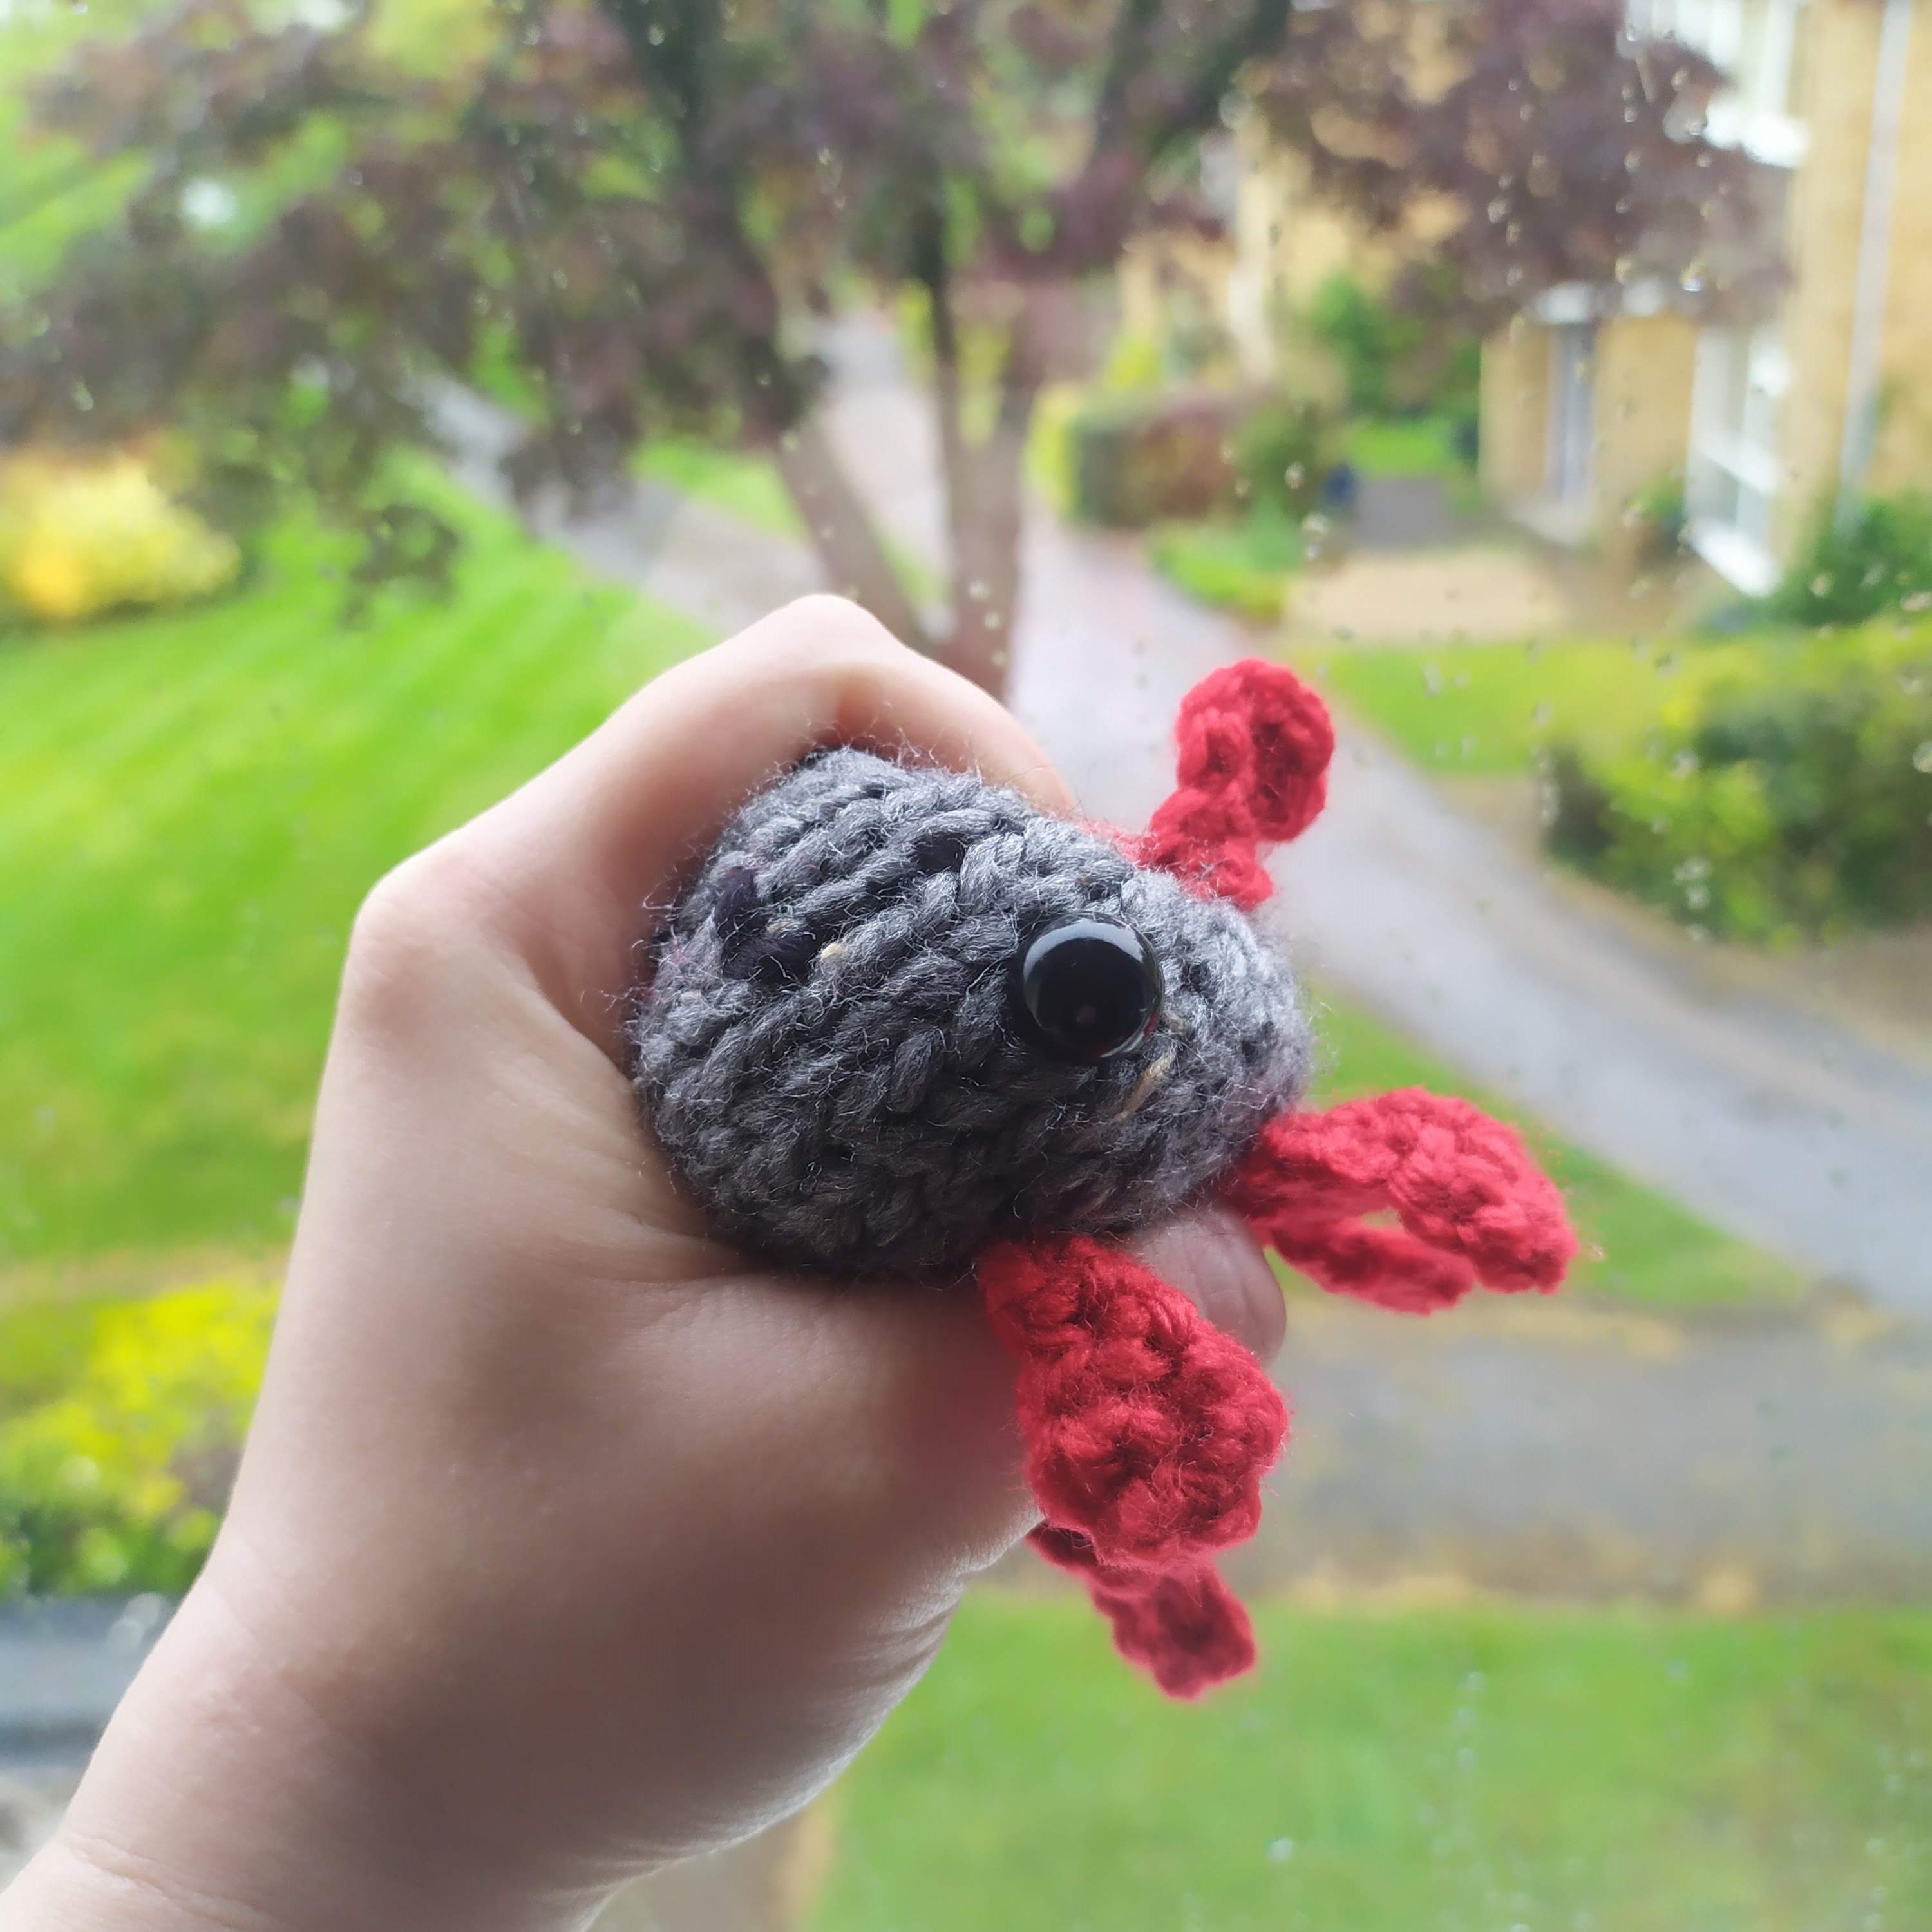
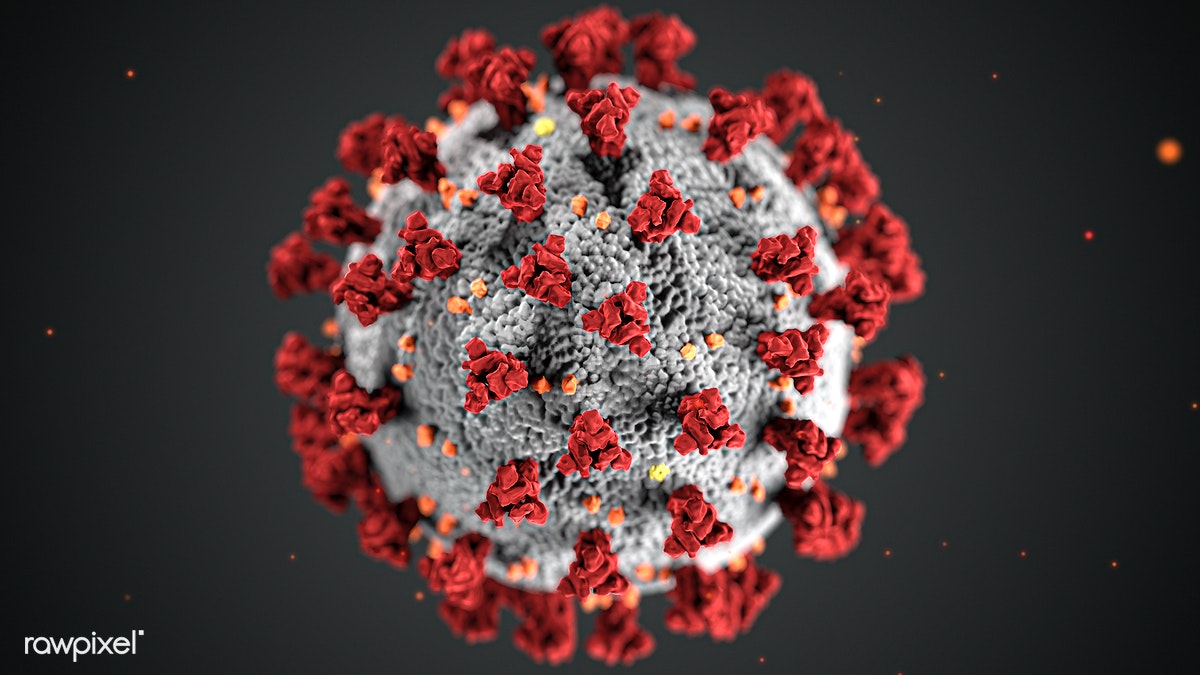
In these strange times, knitting and crochet are a form of meditation for me. So when I heard that my neighbour’s son had his 8th birthday party cancelled due to Covid19 I had a flash of inspiration to knit him a Coronavirus that he could take his frustrations out on.
A Coronavirus!
I hear he has been playing Covid dodgeball!
My cousin, on the otherhand, is finding it really stressful being in lockdown. She has definitely benefitted from an antibody to keep her company.
They are super easy to make!
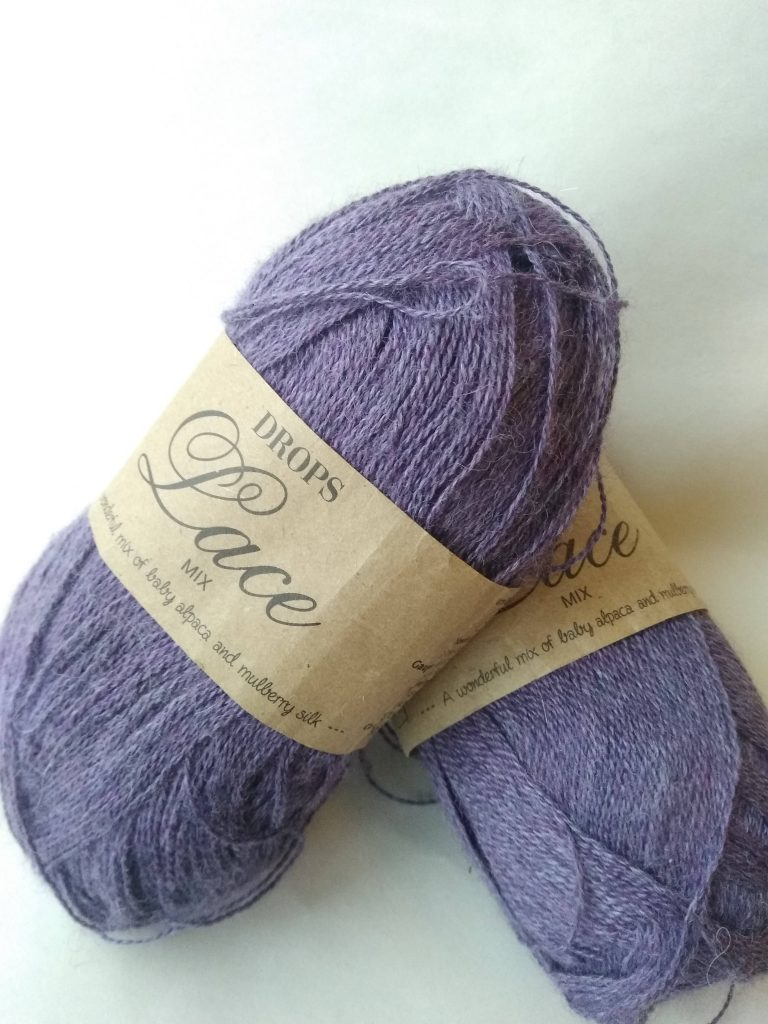
I have used a mixture of knitting (using my addi pro express) and crochet to make these.
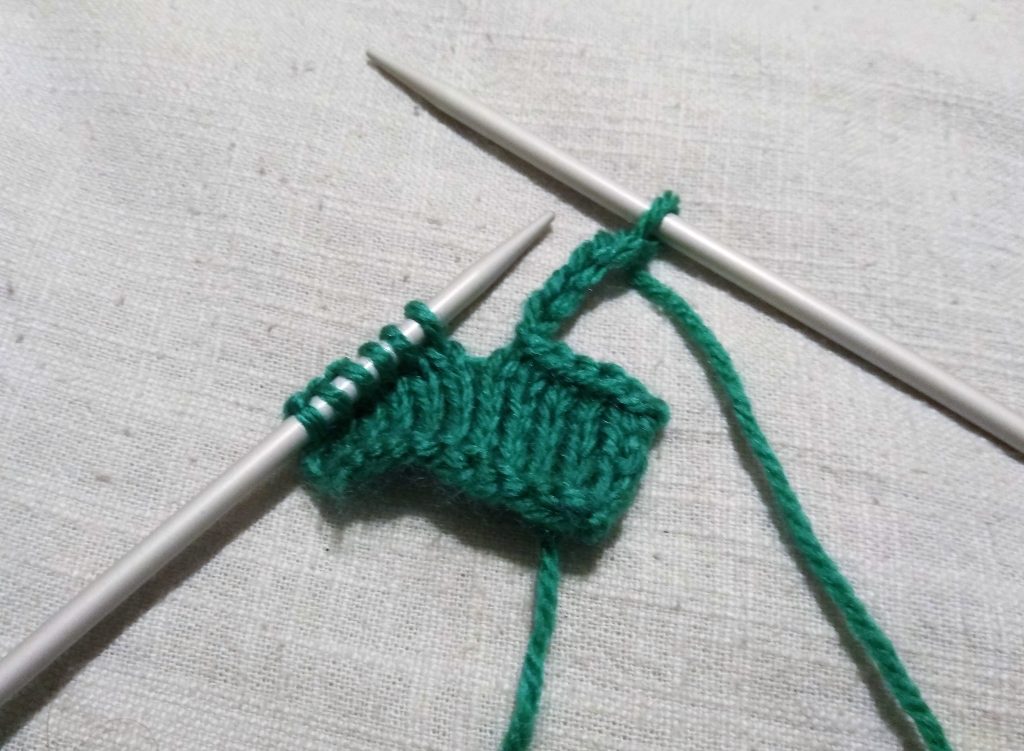
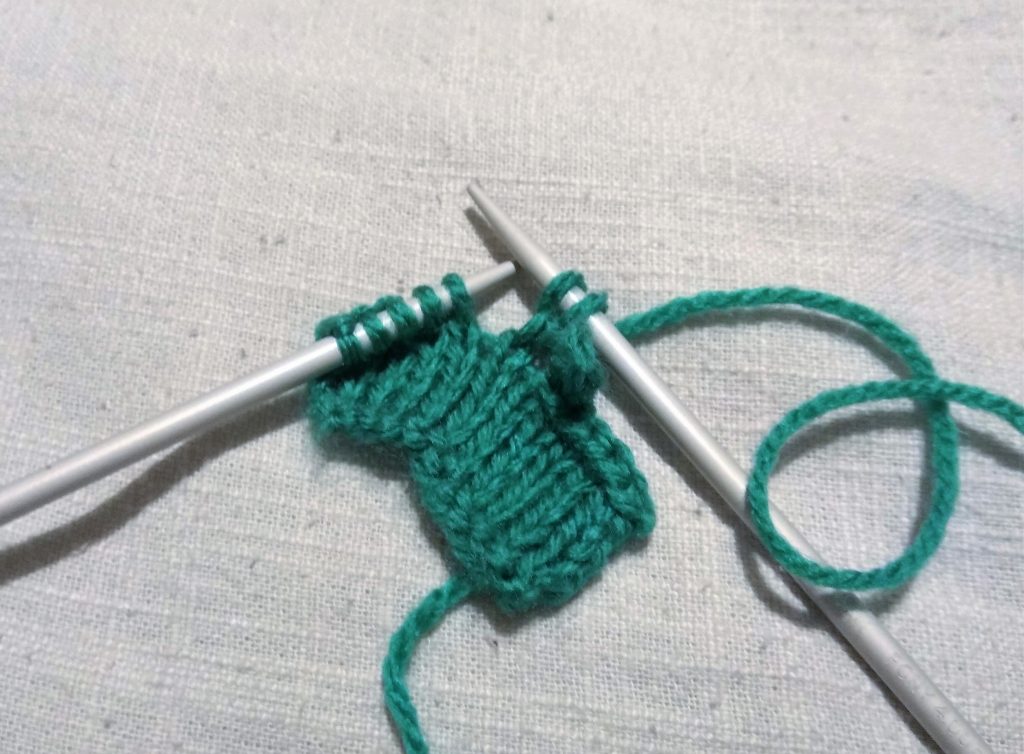
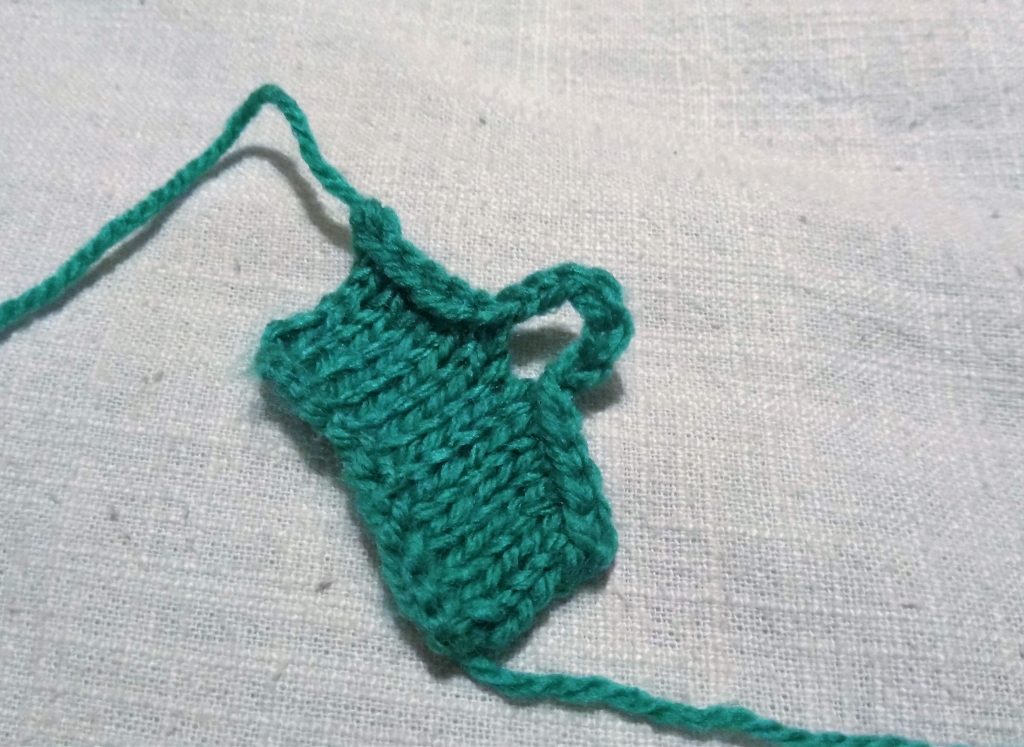
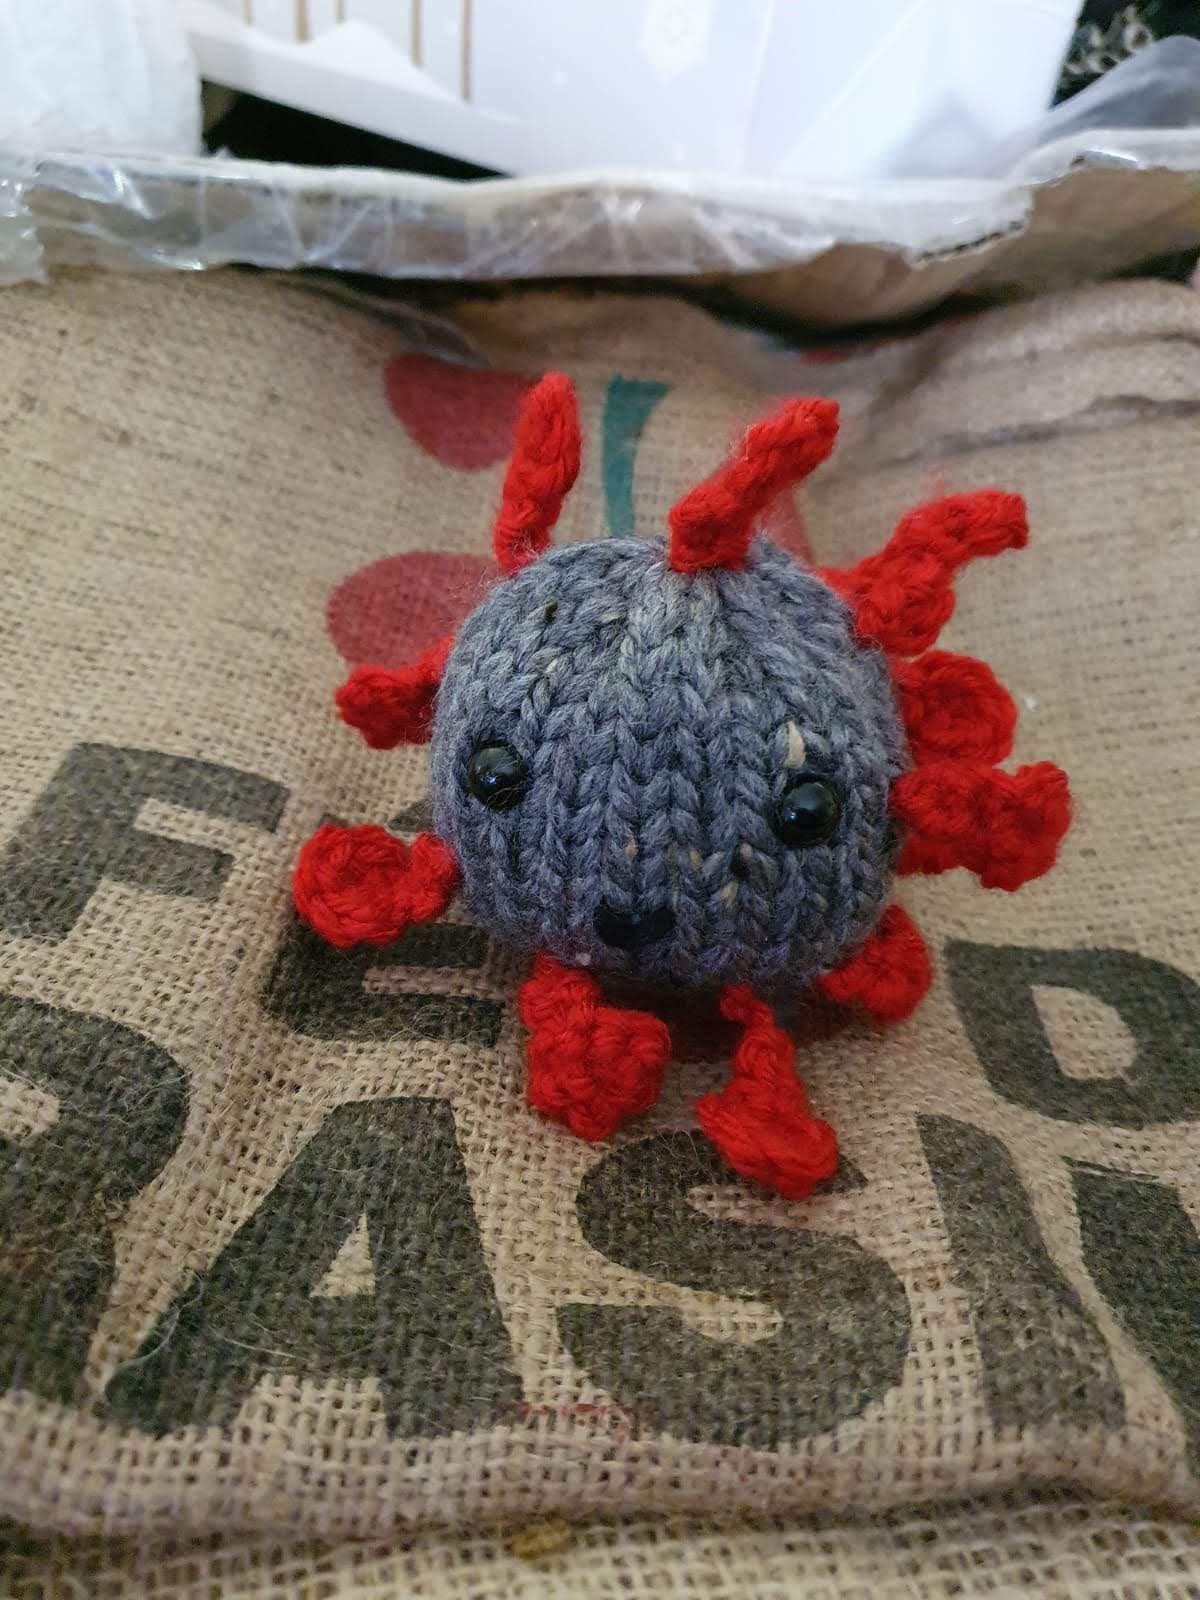
Kevin the Covid:
Body (addi express):
Using Aran Weight wool in grey
Cast on and knit 17 rows.
Cut the yarn and pick up all the stitches from the machine
Pull tight.
You can make a ball in whatever way makes sense to you. Some ideas here for crochet , knitting or loom knitting
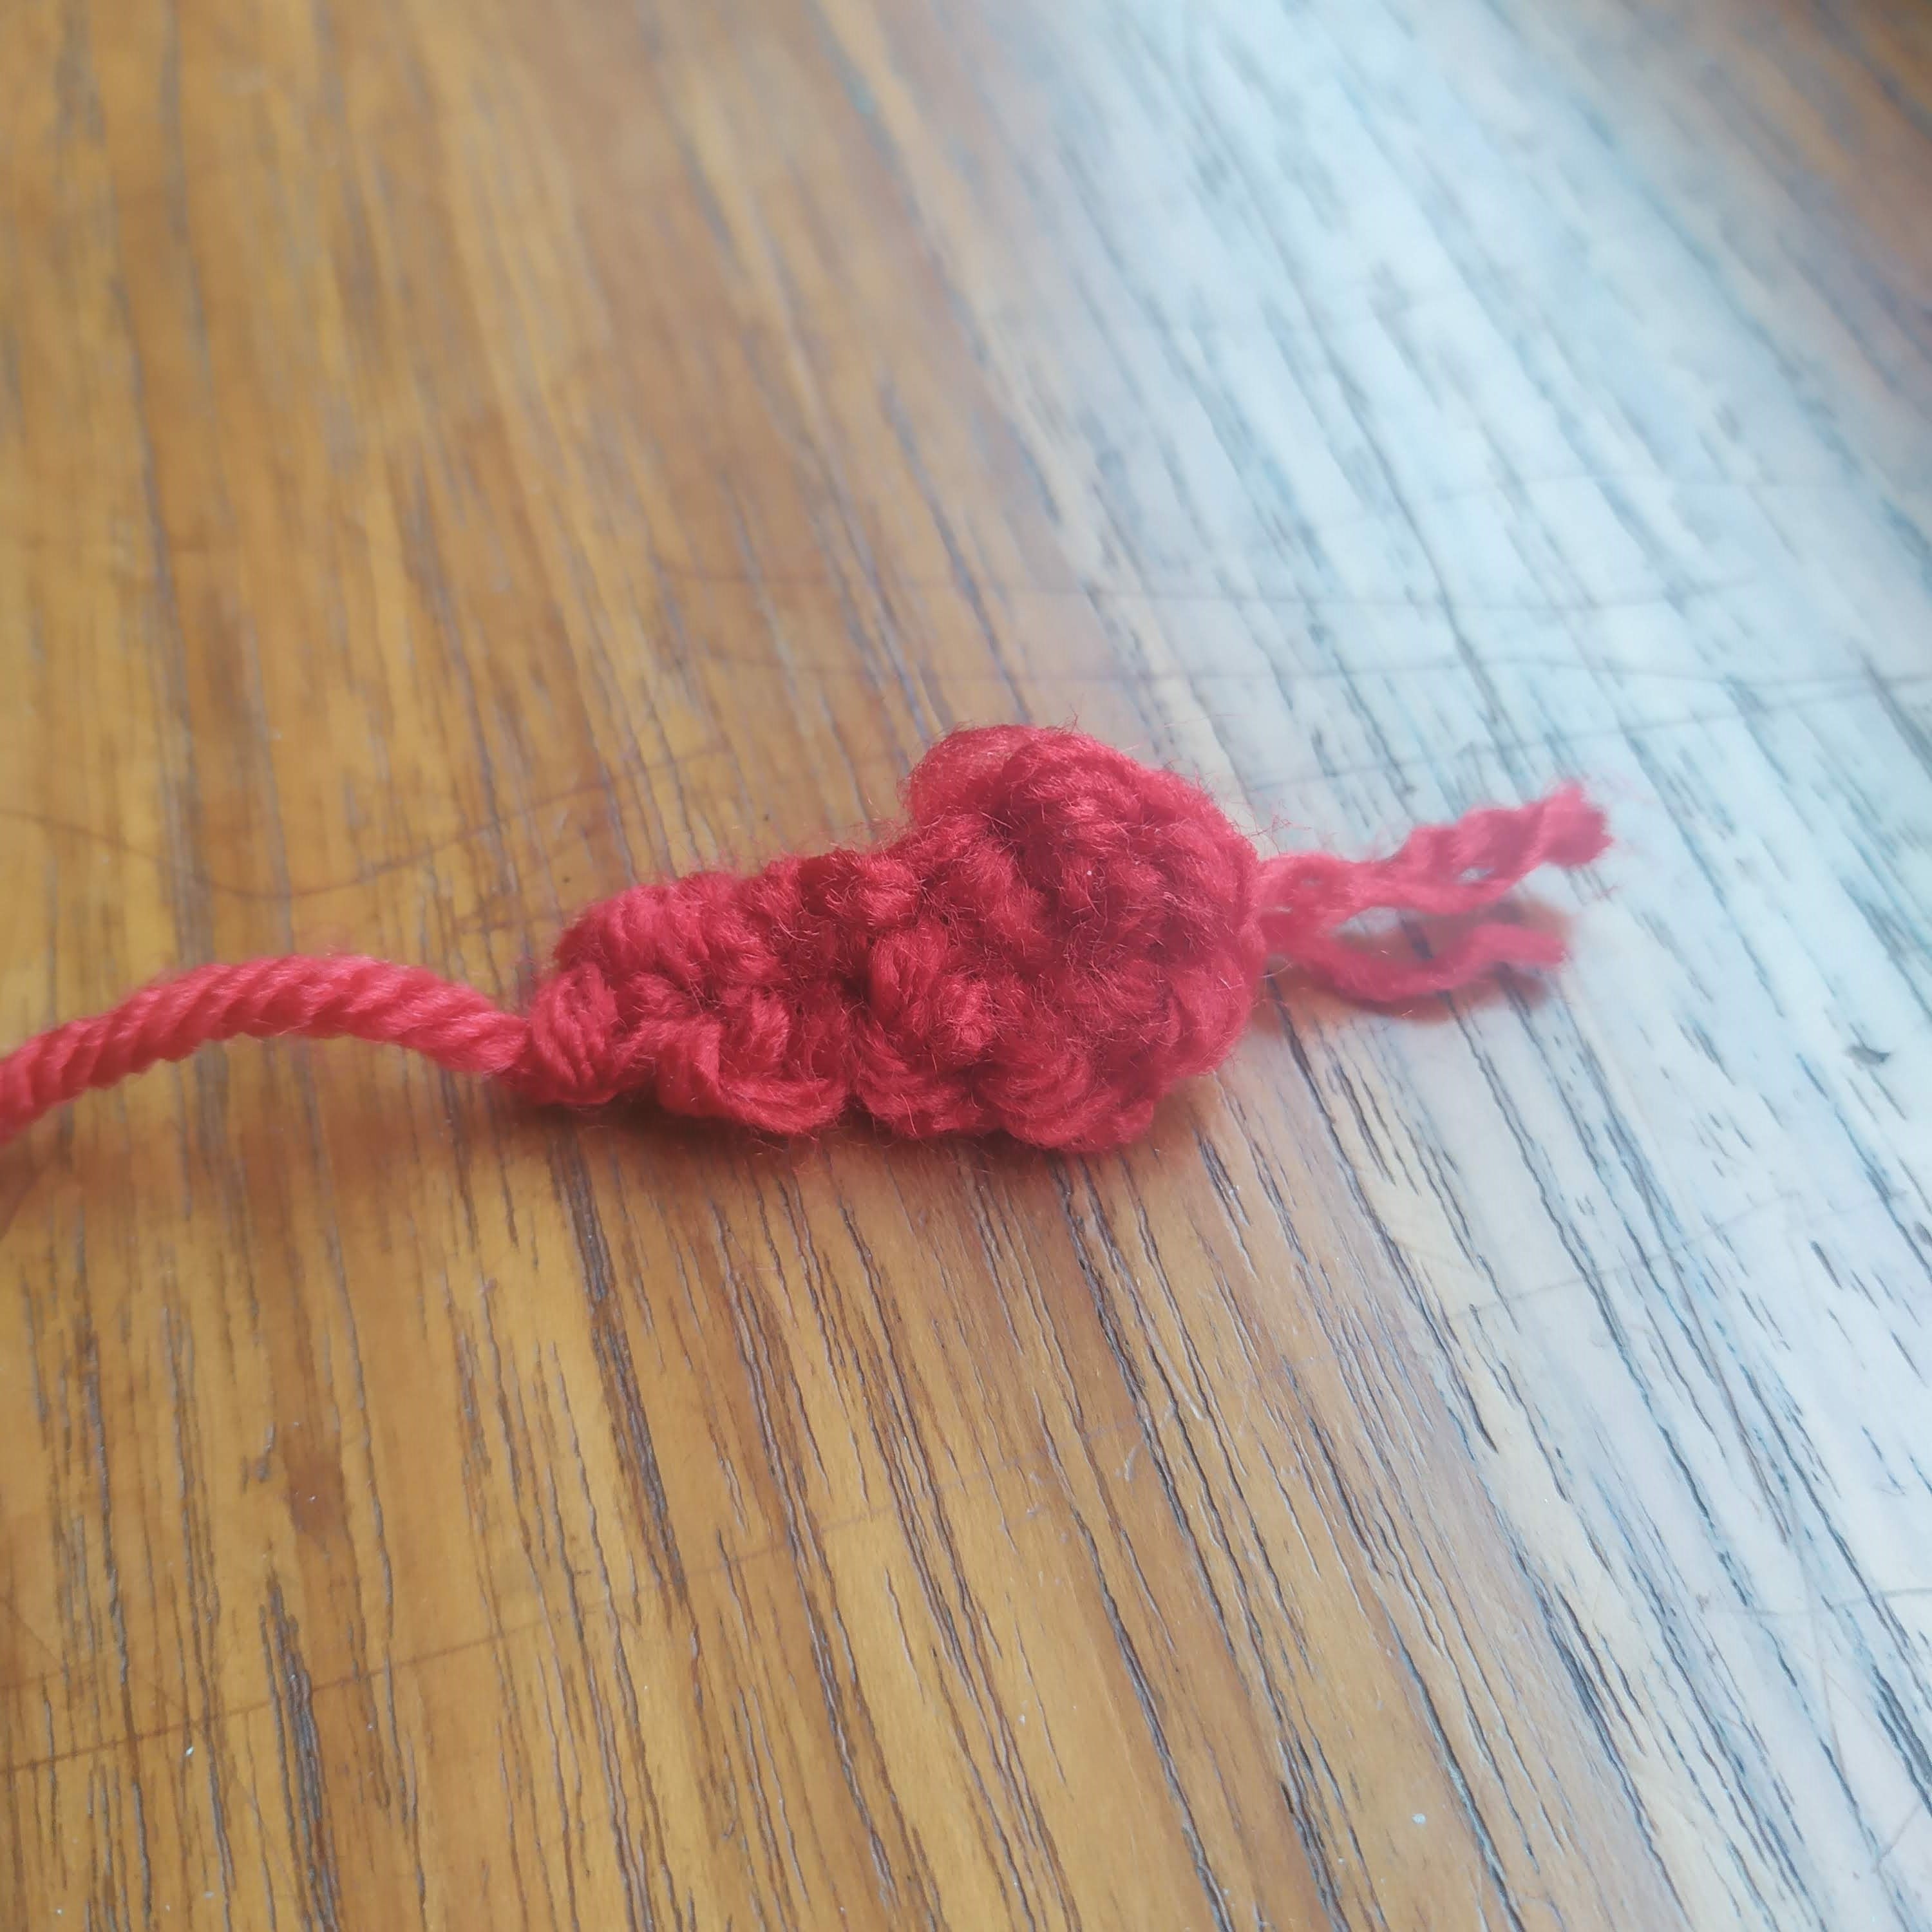
Antigens: I made 19 because, you know, Covid 19…..
Using Red Aran weight and a 6mm hook
MR 6SC. Slst to join, ch 1
*SC 1 c1 and turn repeat 3 times
Cast off leaving a long enough tail to attach to the body
Use safety eyes or sew on some eyes, add a smile by going over a knit stitch with black yarn
Sew the Antigens on at random intervals.
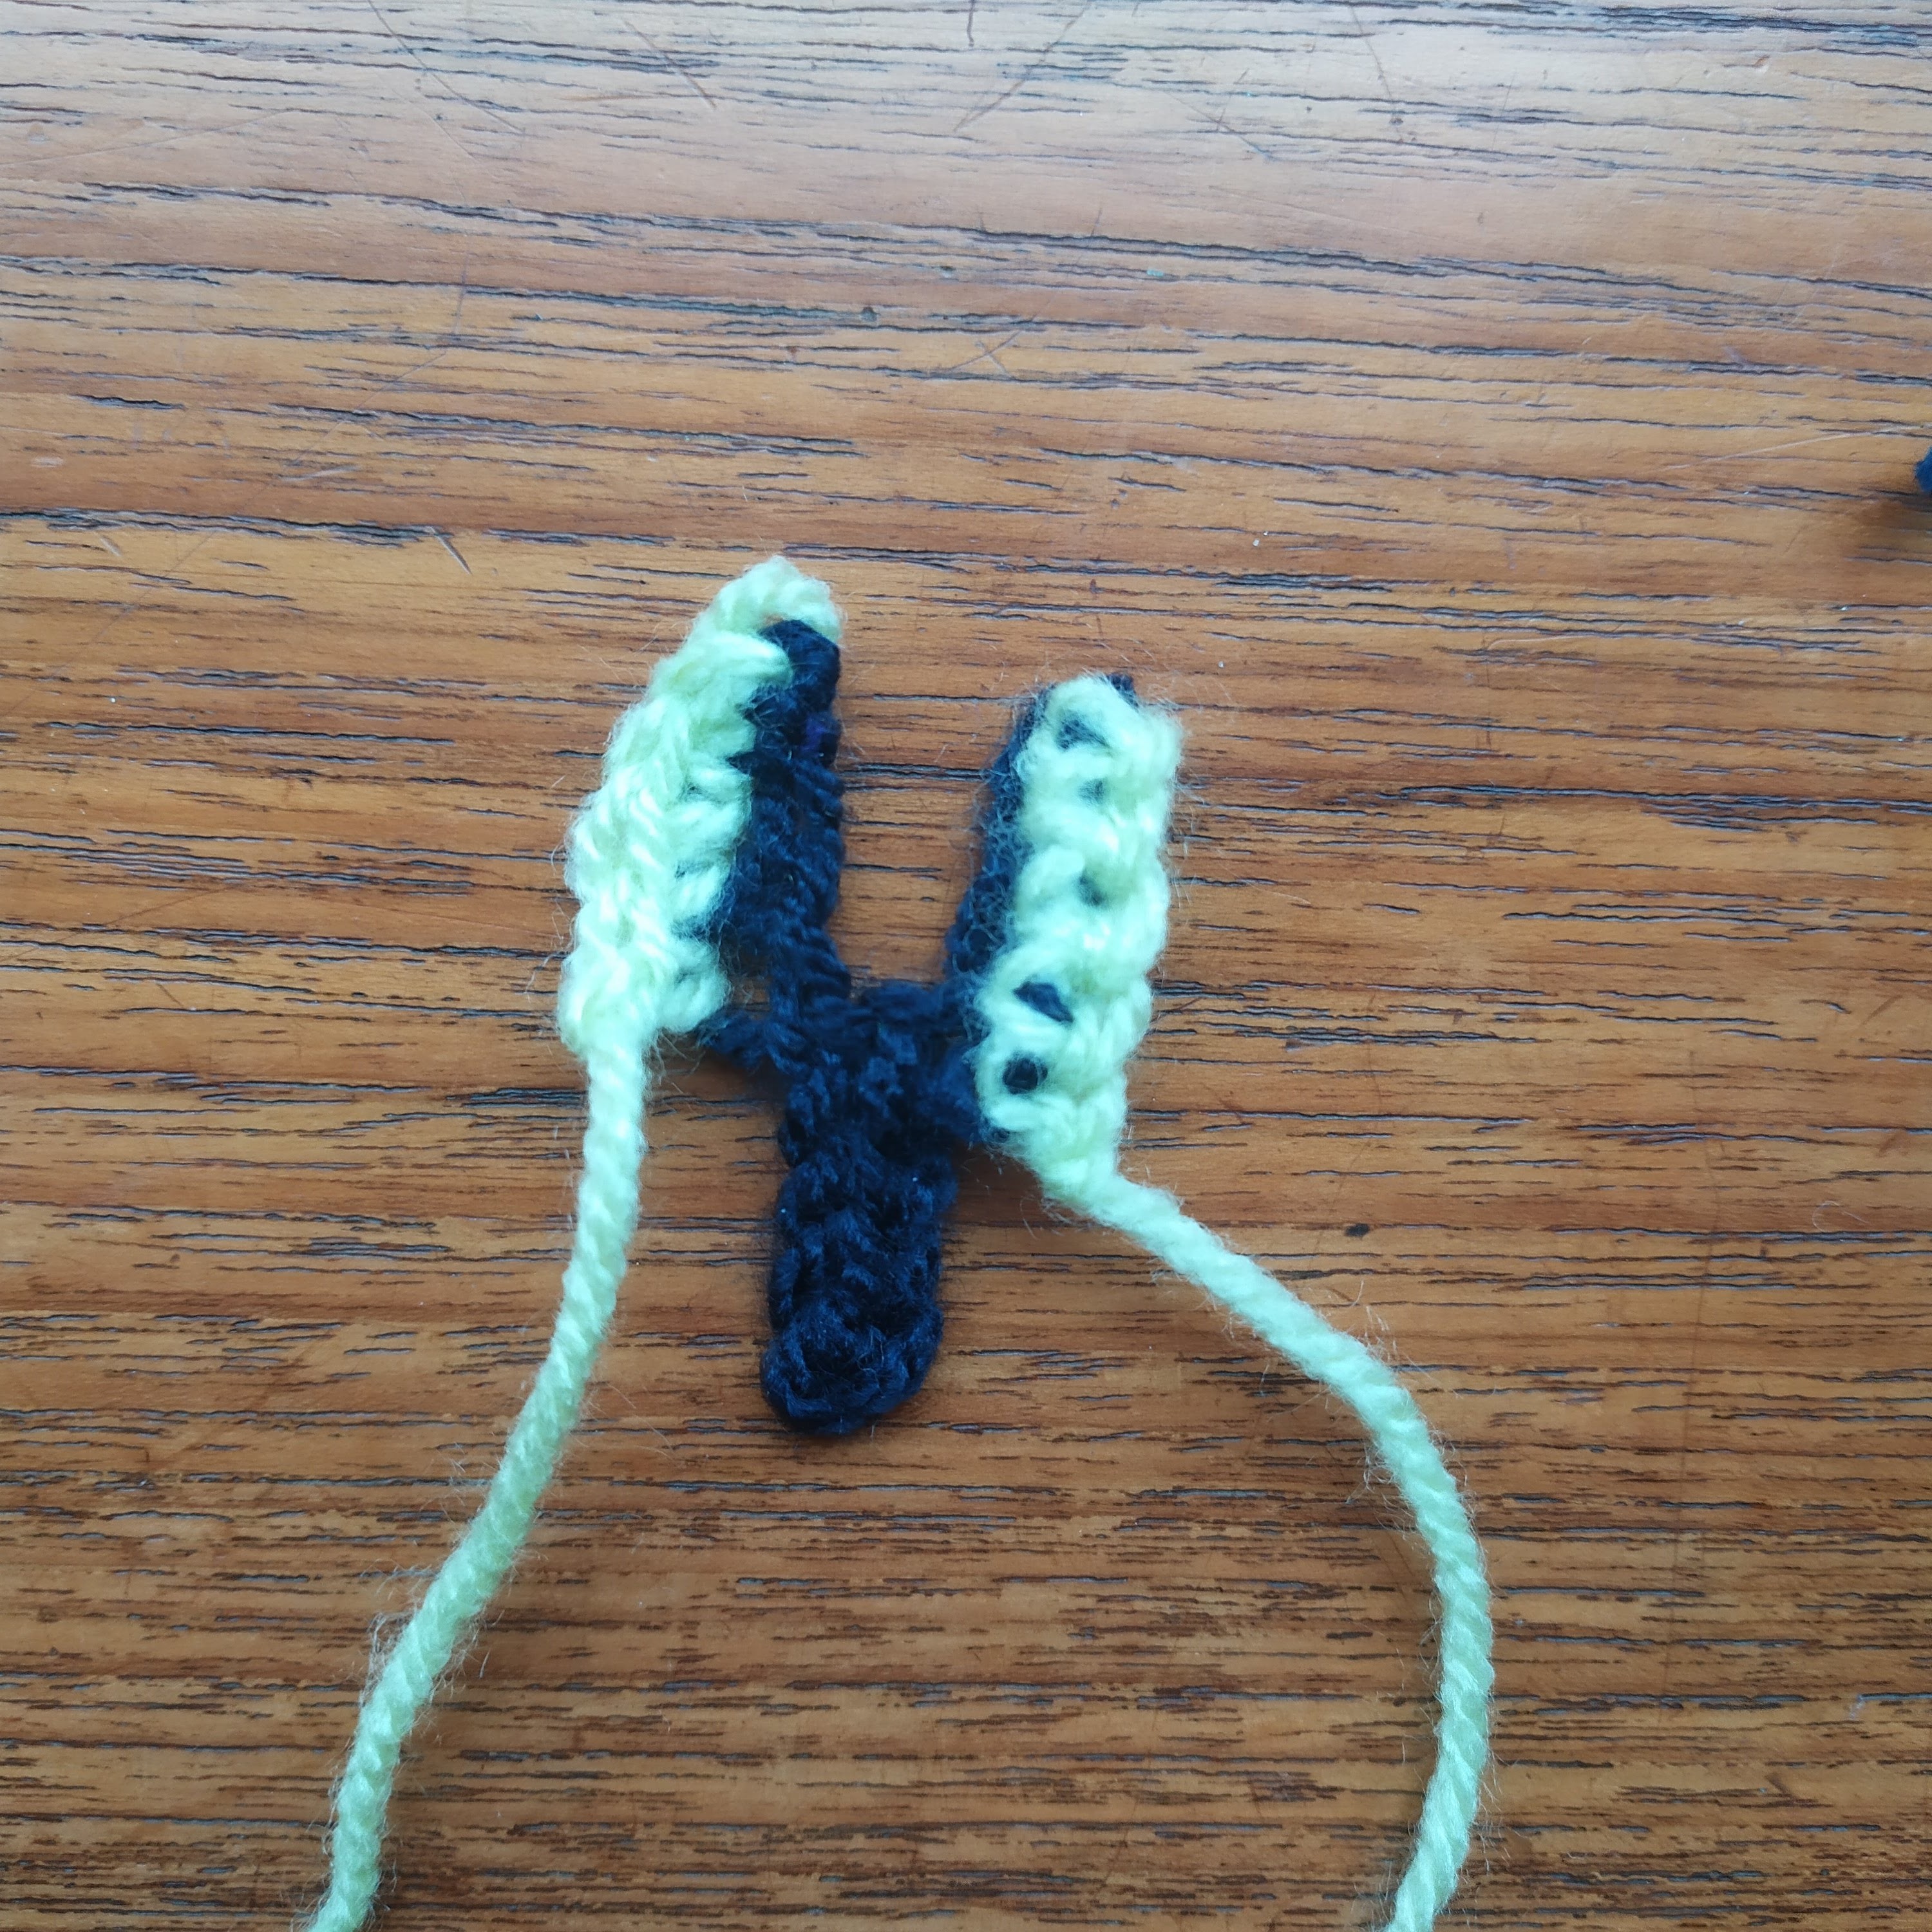
Antibody
You can adapt this pattern to make an Adam Ant(ibody).
In Navy DK weight and 4mm hook
Chain 9, sl st in to 2nd chain from hook and slst 3 more loop, ch4.
Use a bright green yarn and join to the top of one side of the Y shape, add 4 SC (weave in your ends as you go). Do the same to the other side of the Y.
(I found these much more time consuming so I stick to a Covid usually)
I hope you have a bit a fun making these…
Keep smiling through the lock-down and help make others smile….
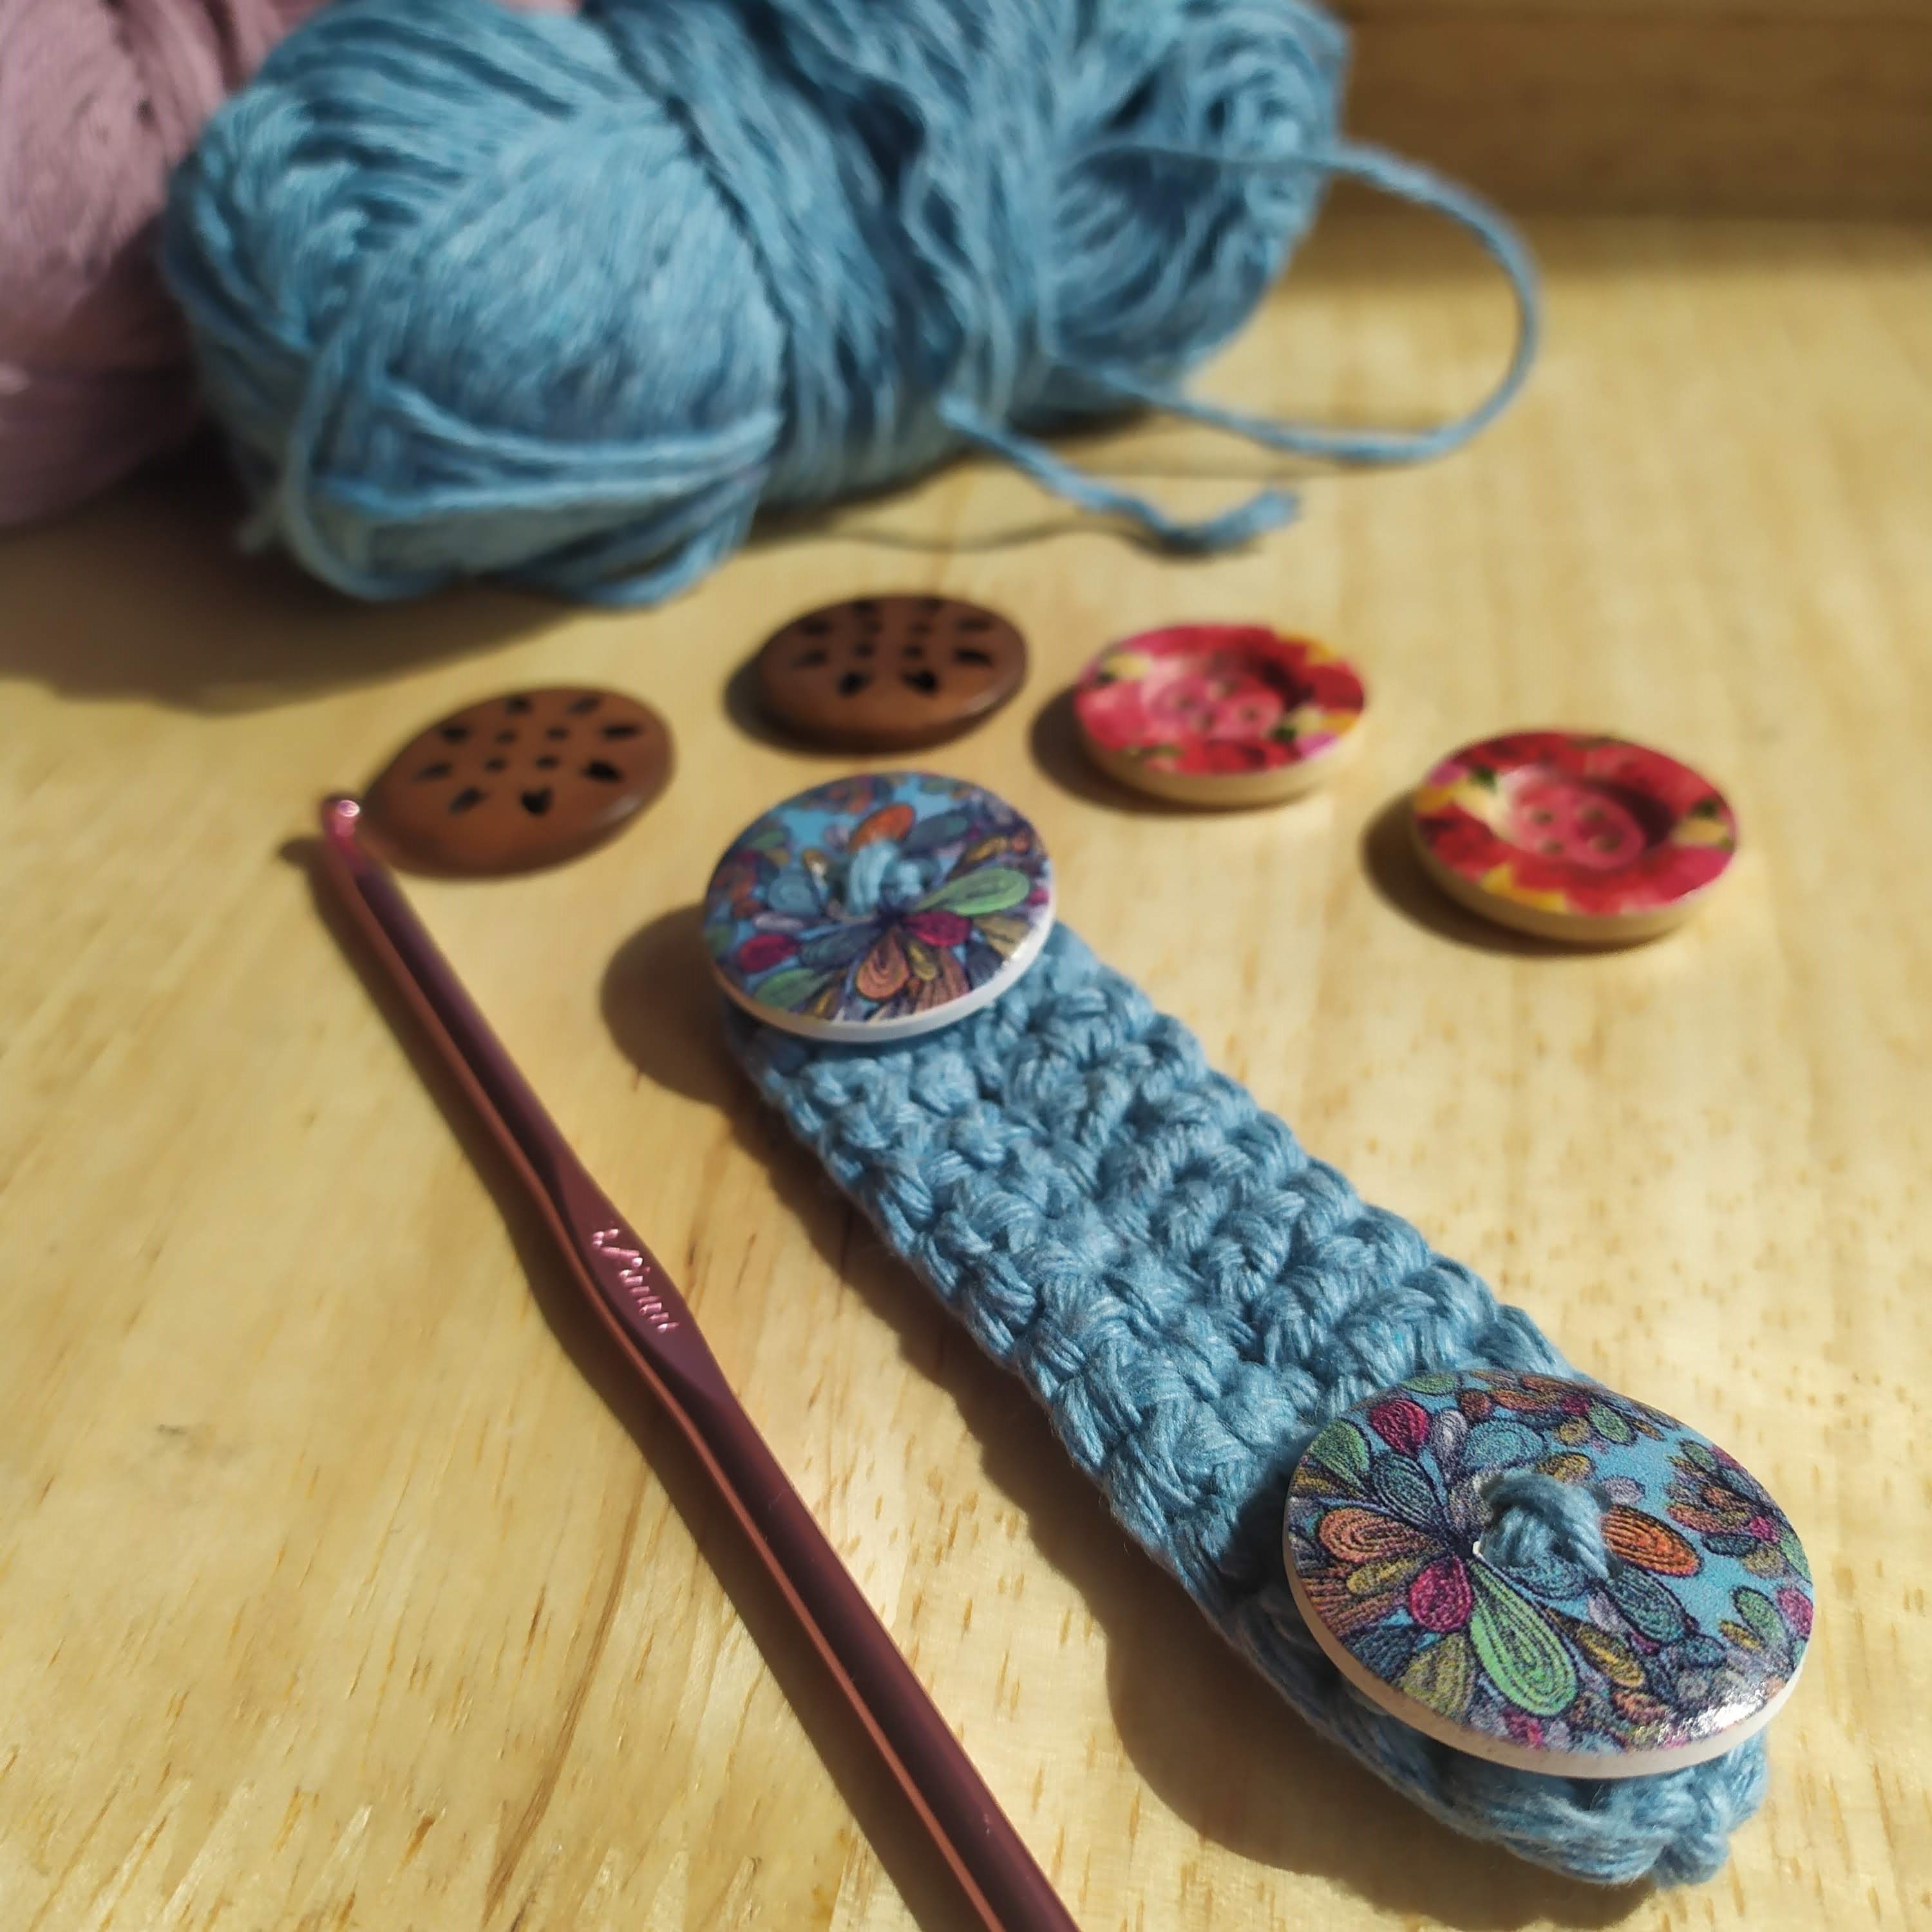
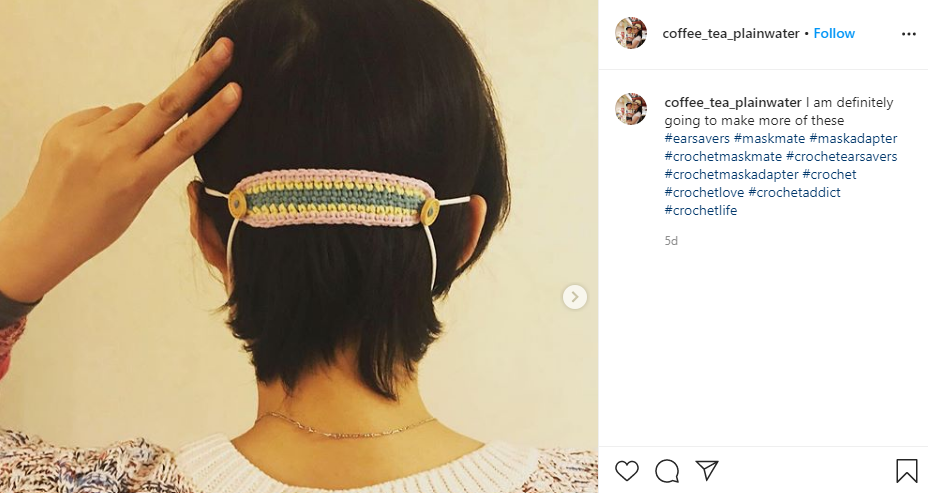
A friend told me yesterday that his ears hurt from wearing PPE while caring for people in his role within the NHS. I was reminded of a Insta tag #crochetmaskadapters.
So now I’m crocheting them in bulk for friends of friends.
I knew I had been hoarding buttons for a reason!!
They are so easy to make:
I used oddments of Drops Paris 100% cotton yarn left over from my Face Scrubbies. The cotton has a little stretch but not so much that it will become misshapen on a 12 hour shift. It’s also washable!!
I used a 3.75 hook to get a good thickness to the fabric.
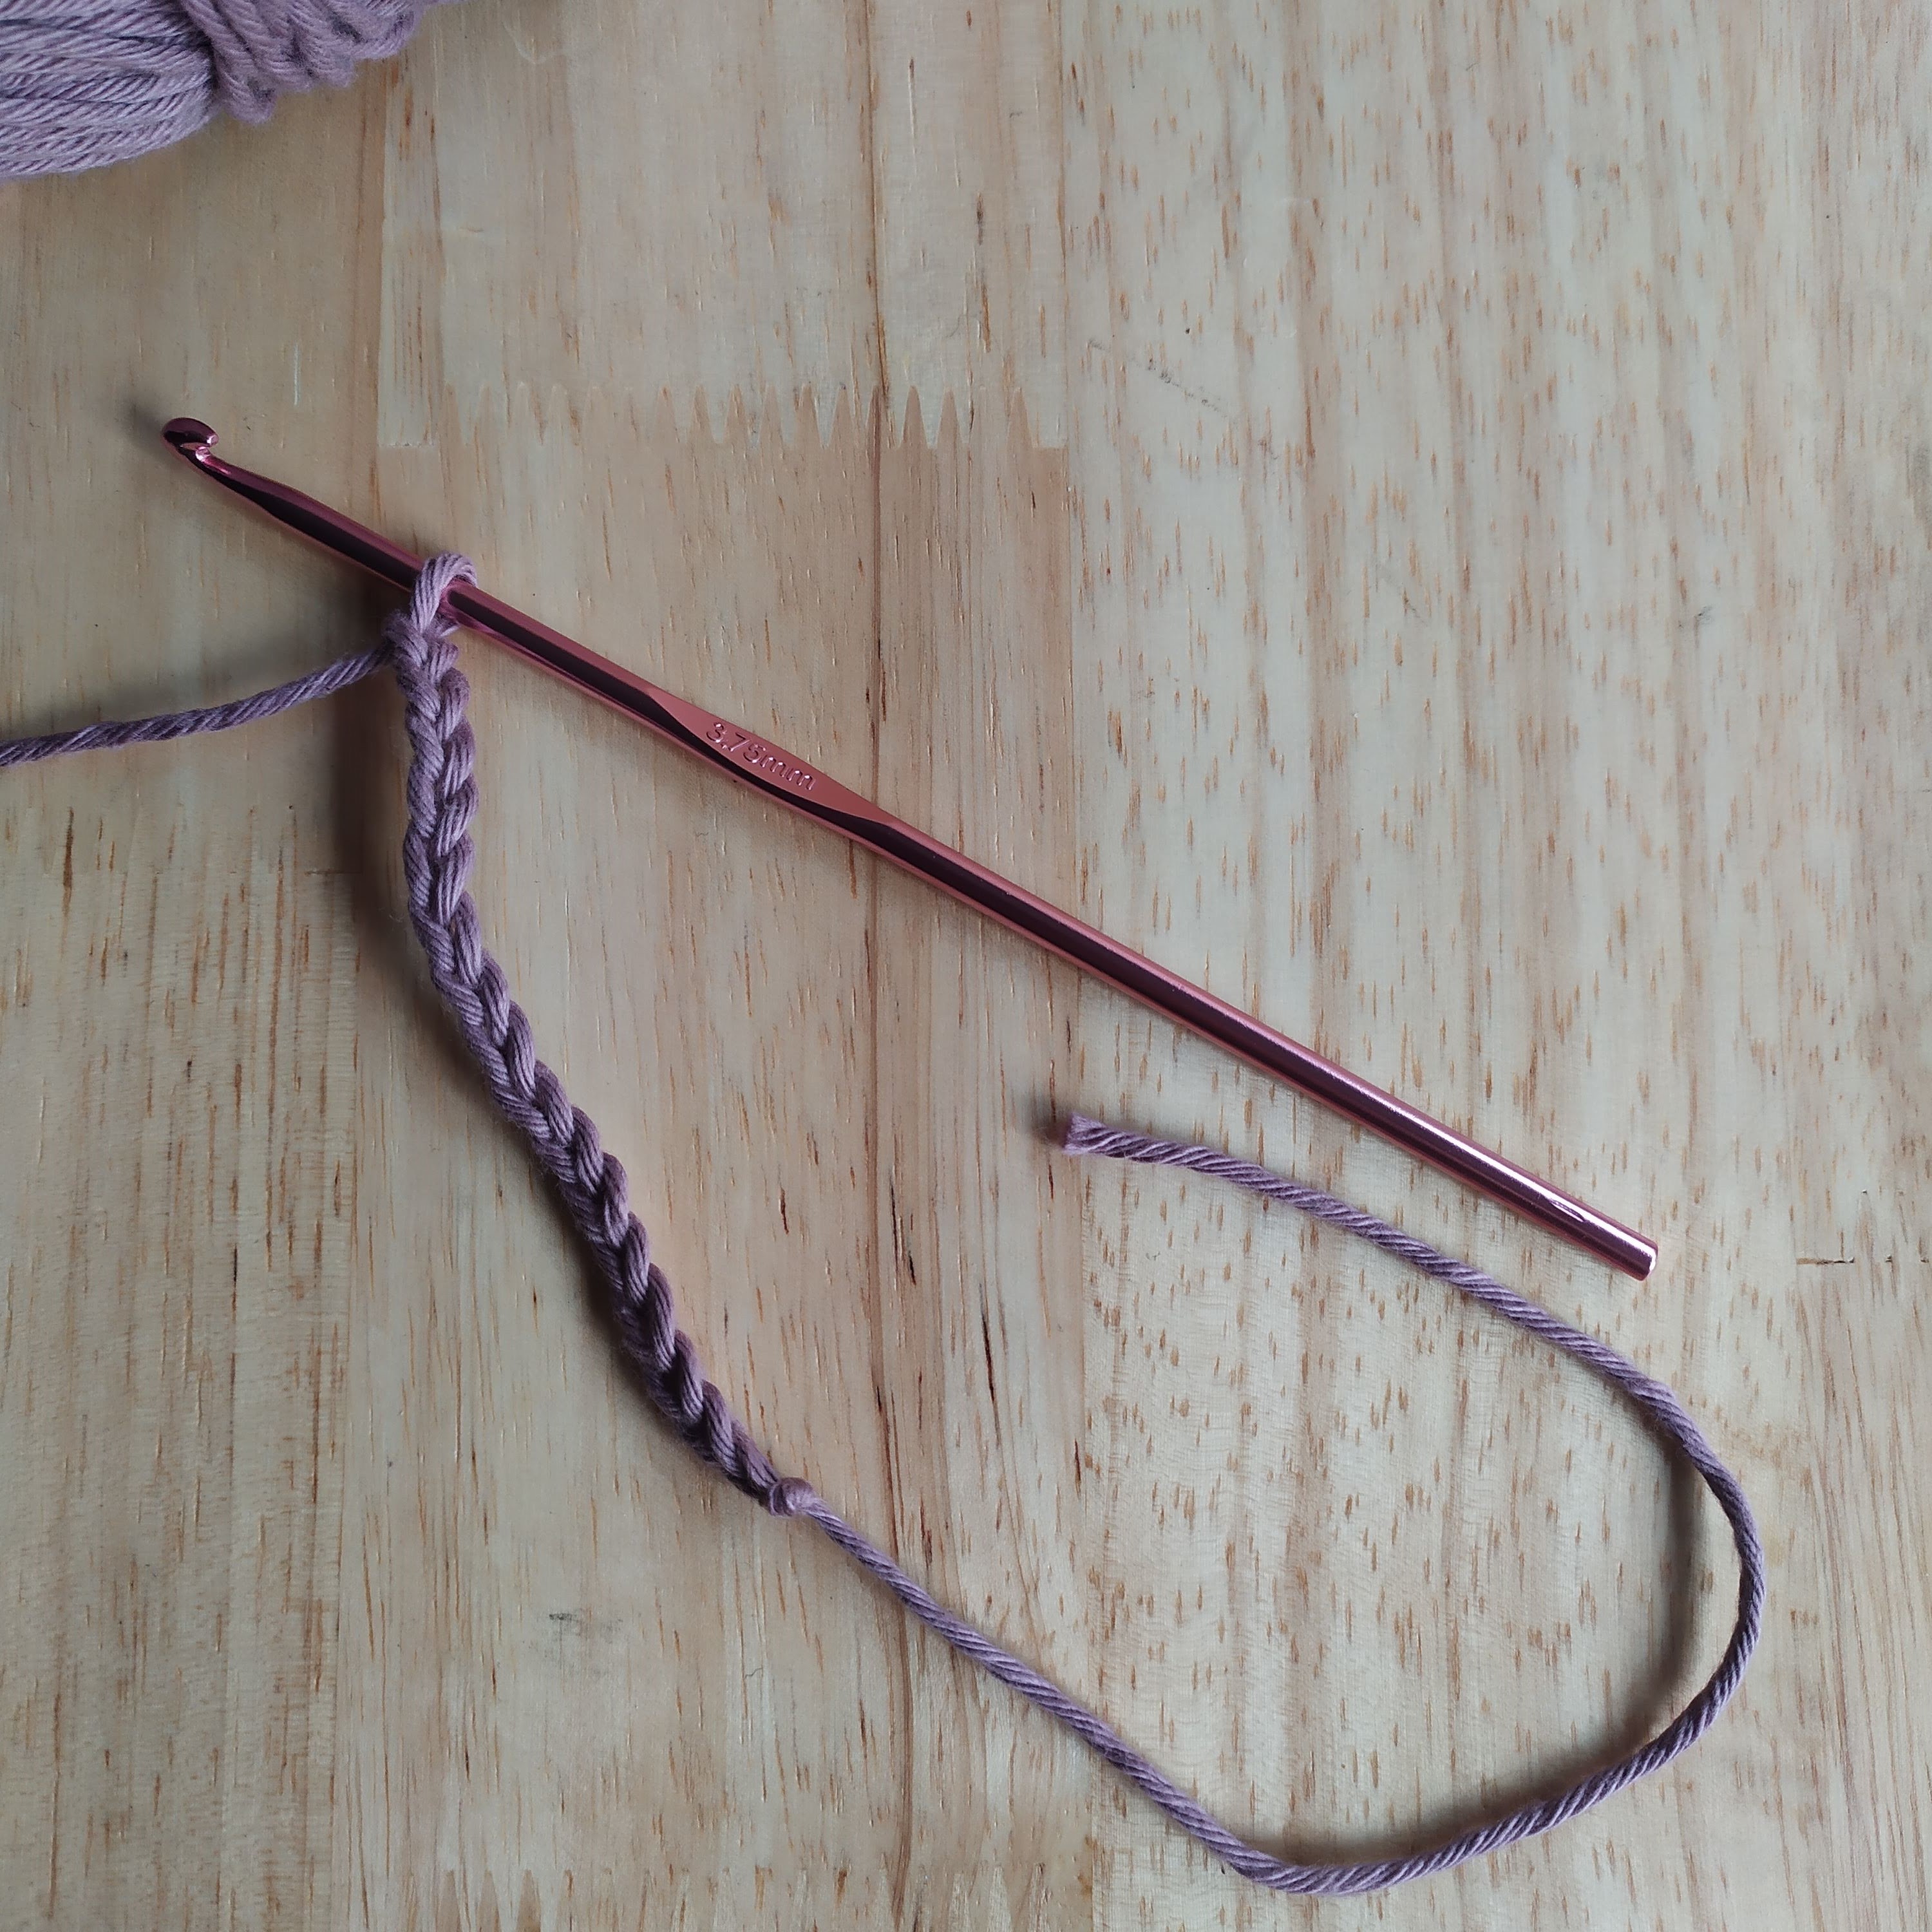
Pattern:
Chain 16 (more for a longer adapter , fewer for a shorter one)
Dc in 2nd chain from hook, DC to 1 before last chain
3DC in last chain
Turn work and DC back to first loop
2DC into first loop (3 in total with the first stitch),
Continuing in a spiral 3DC into very first DC
DC across
3DC in the centre stitch of 3DC below
DC across and slip stitch to join
Sew a button on either end.
Done!
Can’t wait to send these off to their deserving new owners!
I really enjoy the speed with which things knit up on the Addi. I like that all the boringness of a scarf is gone and I can whip up a quick gift in no time.
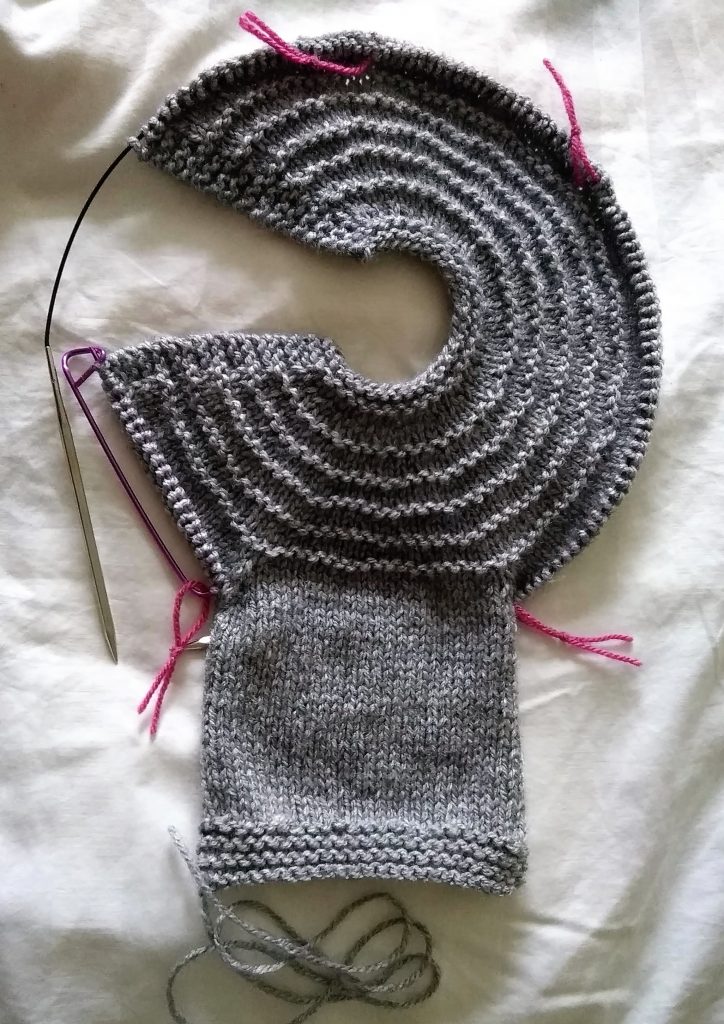
By far, the biggest challenge I have faced is sizing. I diligently follow patterns and yet what comes out is rarely fit for a normally proportion human.
It’s so upsetting to put in all the time and effort required for all the separate pieces, only to stitch them together and find you’ve made…….. nothing!
The cycle was never ending: look up a pattern, knit the pattern, realise it looks nothing like a jumper, compare to average “newborn jumper” measurements, compare these measurements to test knit squares…. and so on. Very time consuming.
Only very late in this process did it occur to me to get an actual jumper.
Thankfully, my neighbour recently (and rather conveniently) had a baby. And so, no sooner had this thought occurred to me than she lent me clothes to fit a newborn and a 3-6 month old.
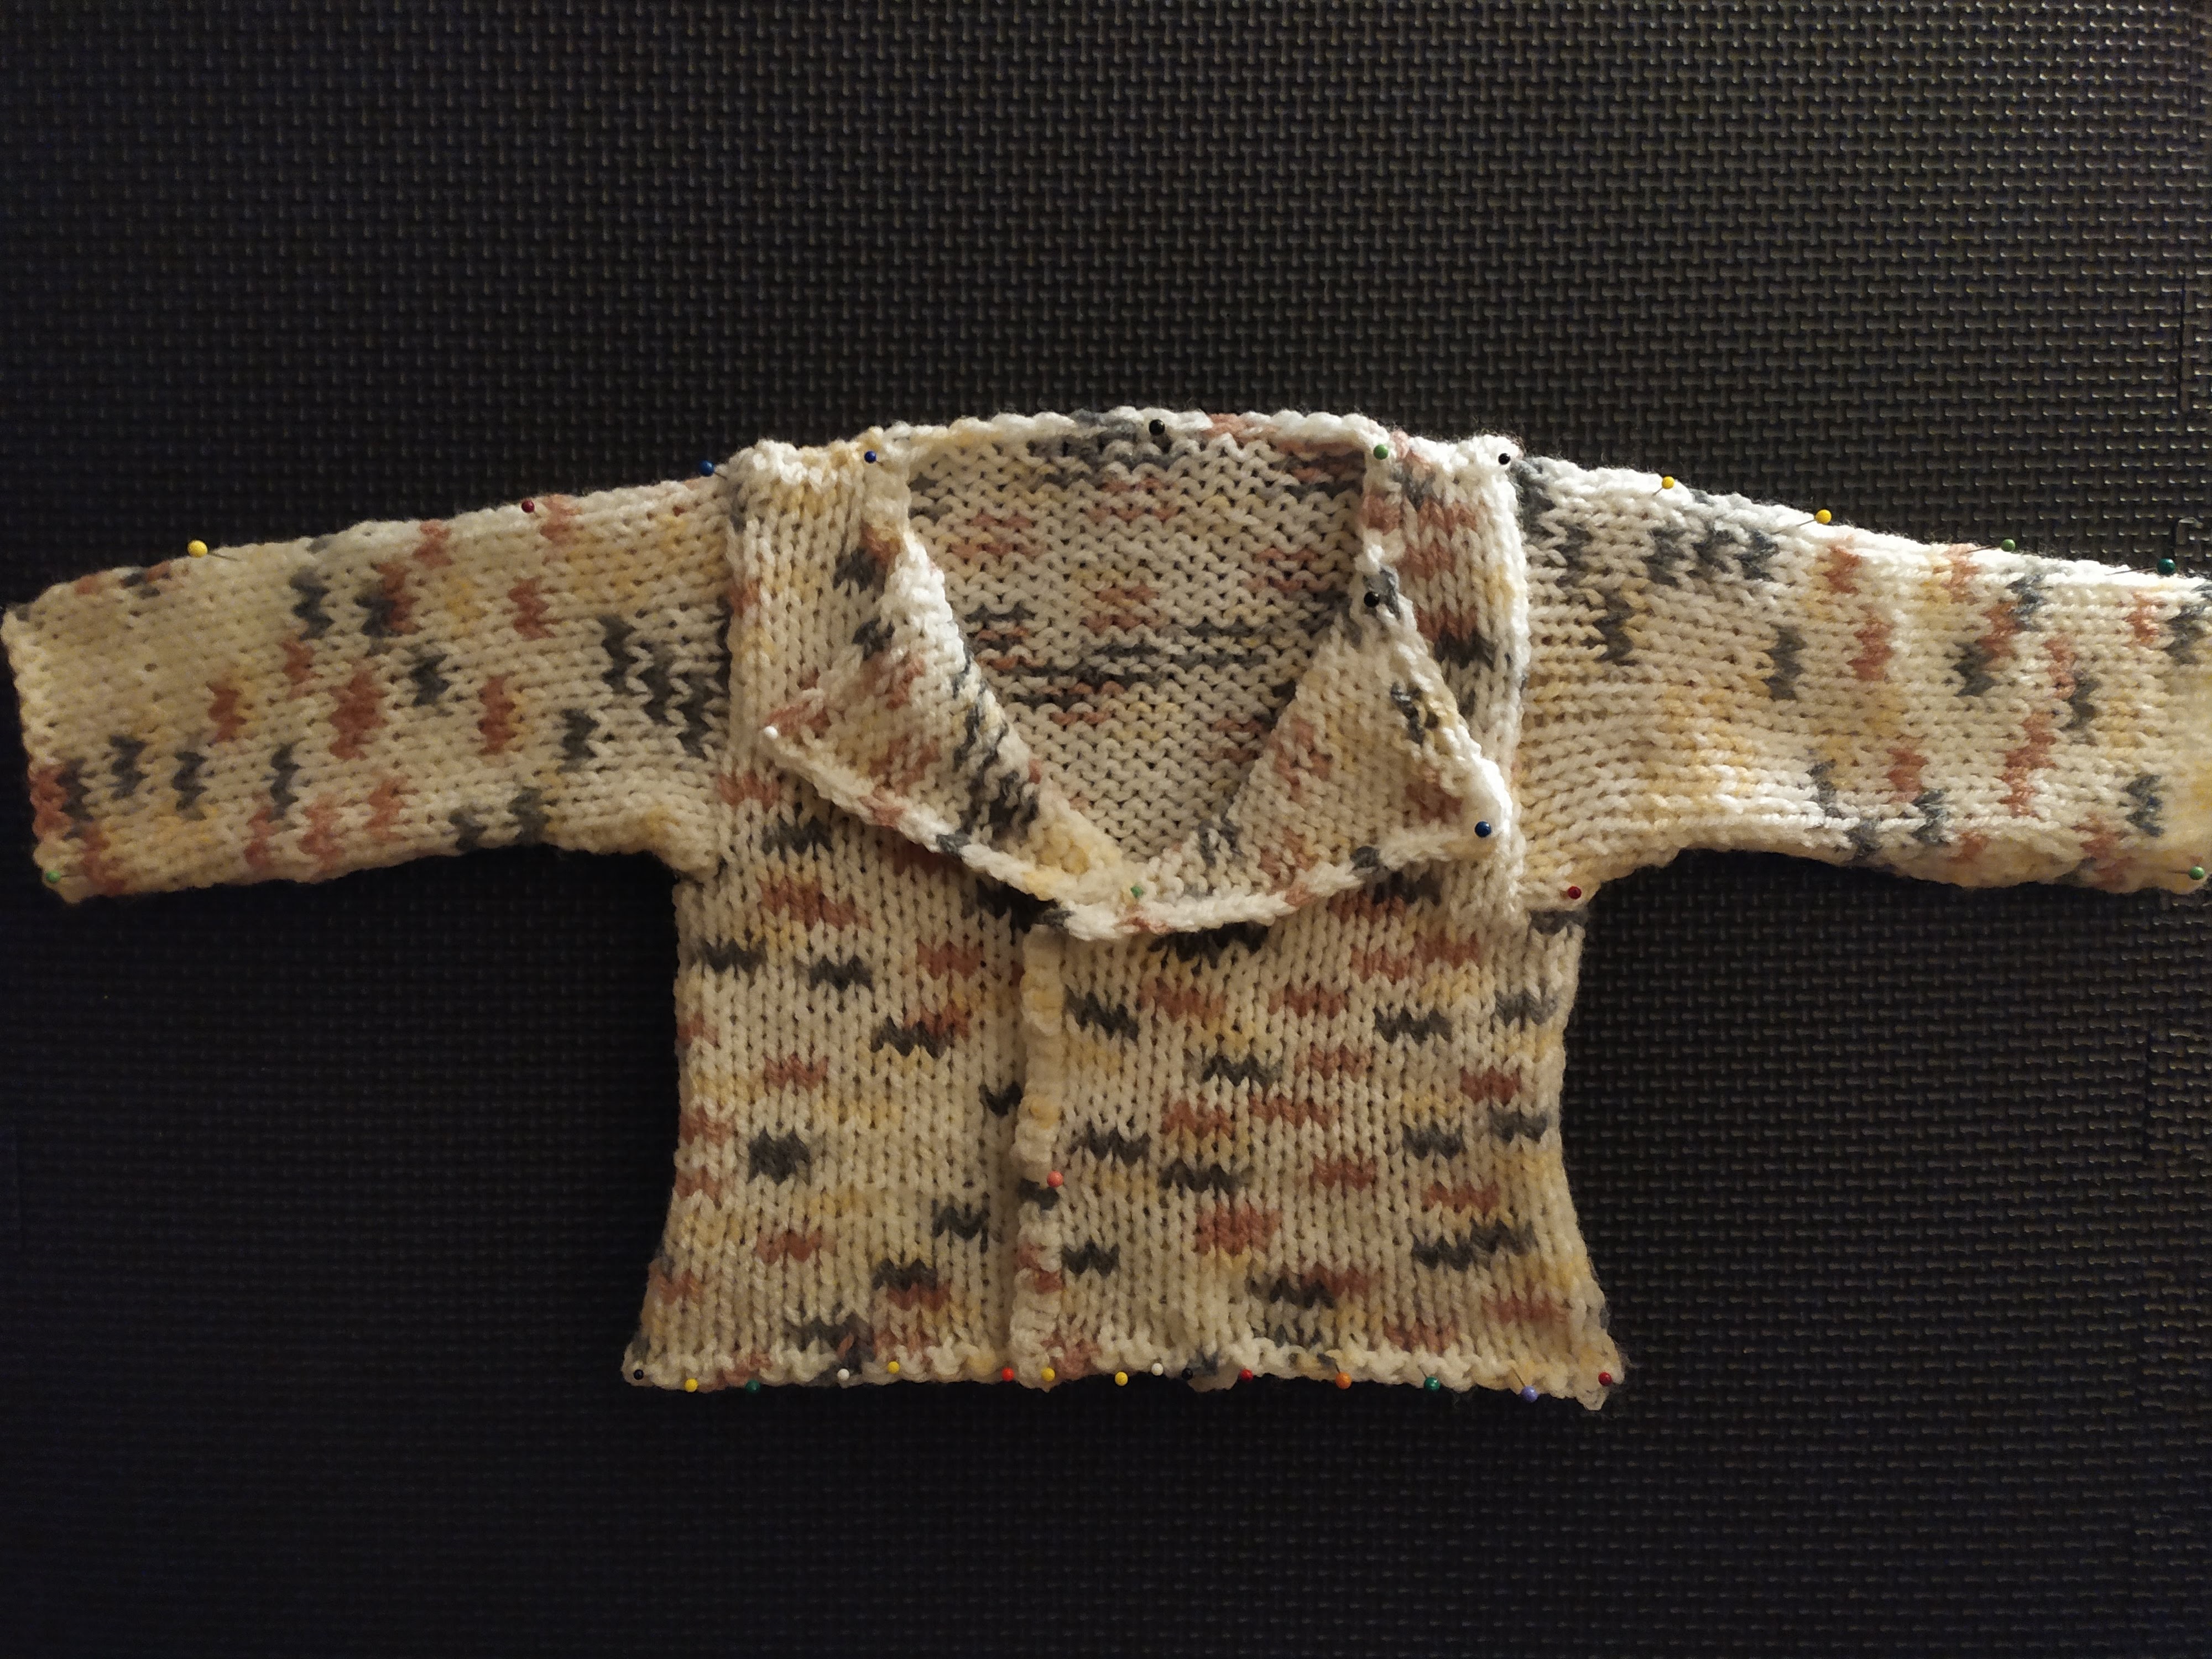
So with a real 3-6m baby sized jumper in my hand and accurately measured, I designed a simple pattern, knitted a test “back” piece on the Addi, compared it to the real top, made the necessary adjustments, re-knitted the back and……
I’d finally done it! A jumper that would fit a real human baby!!!
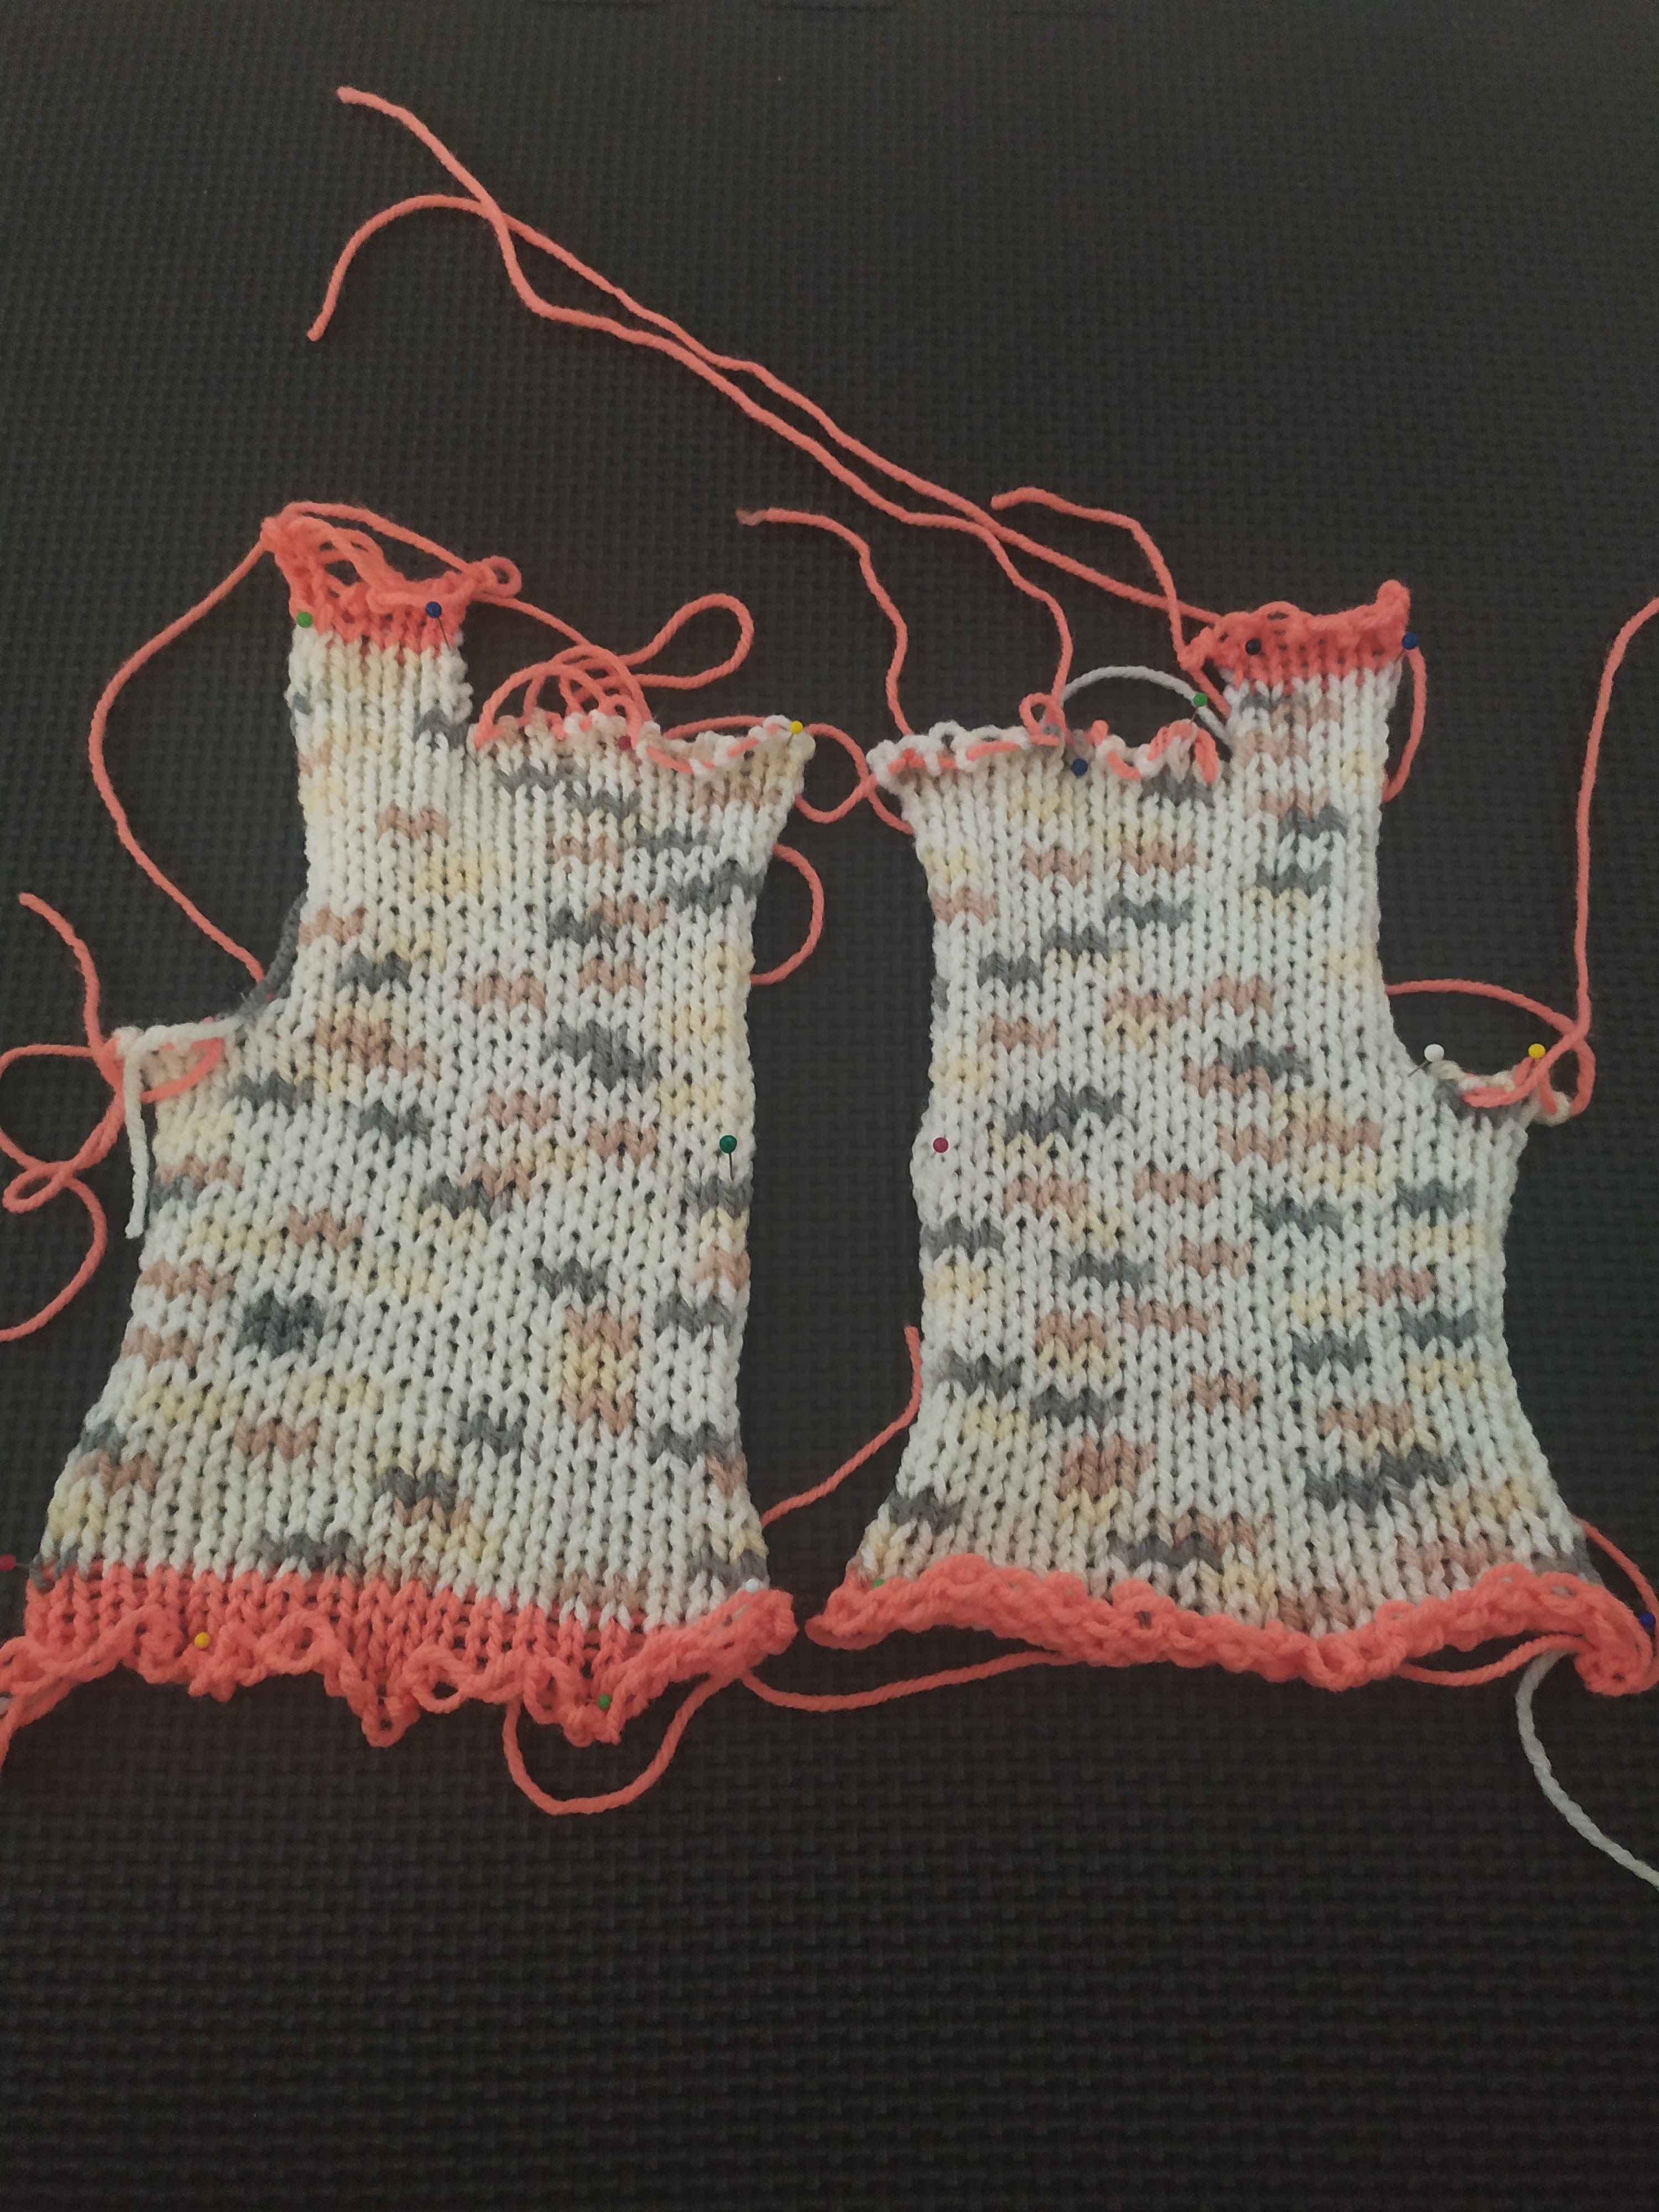
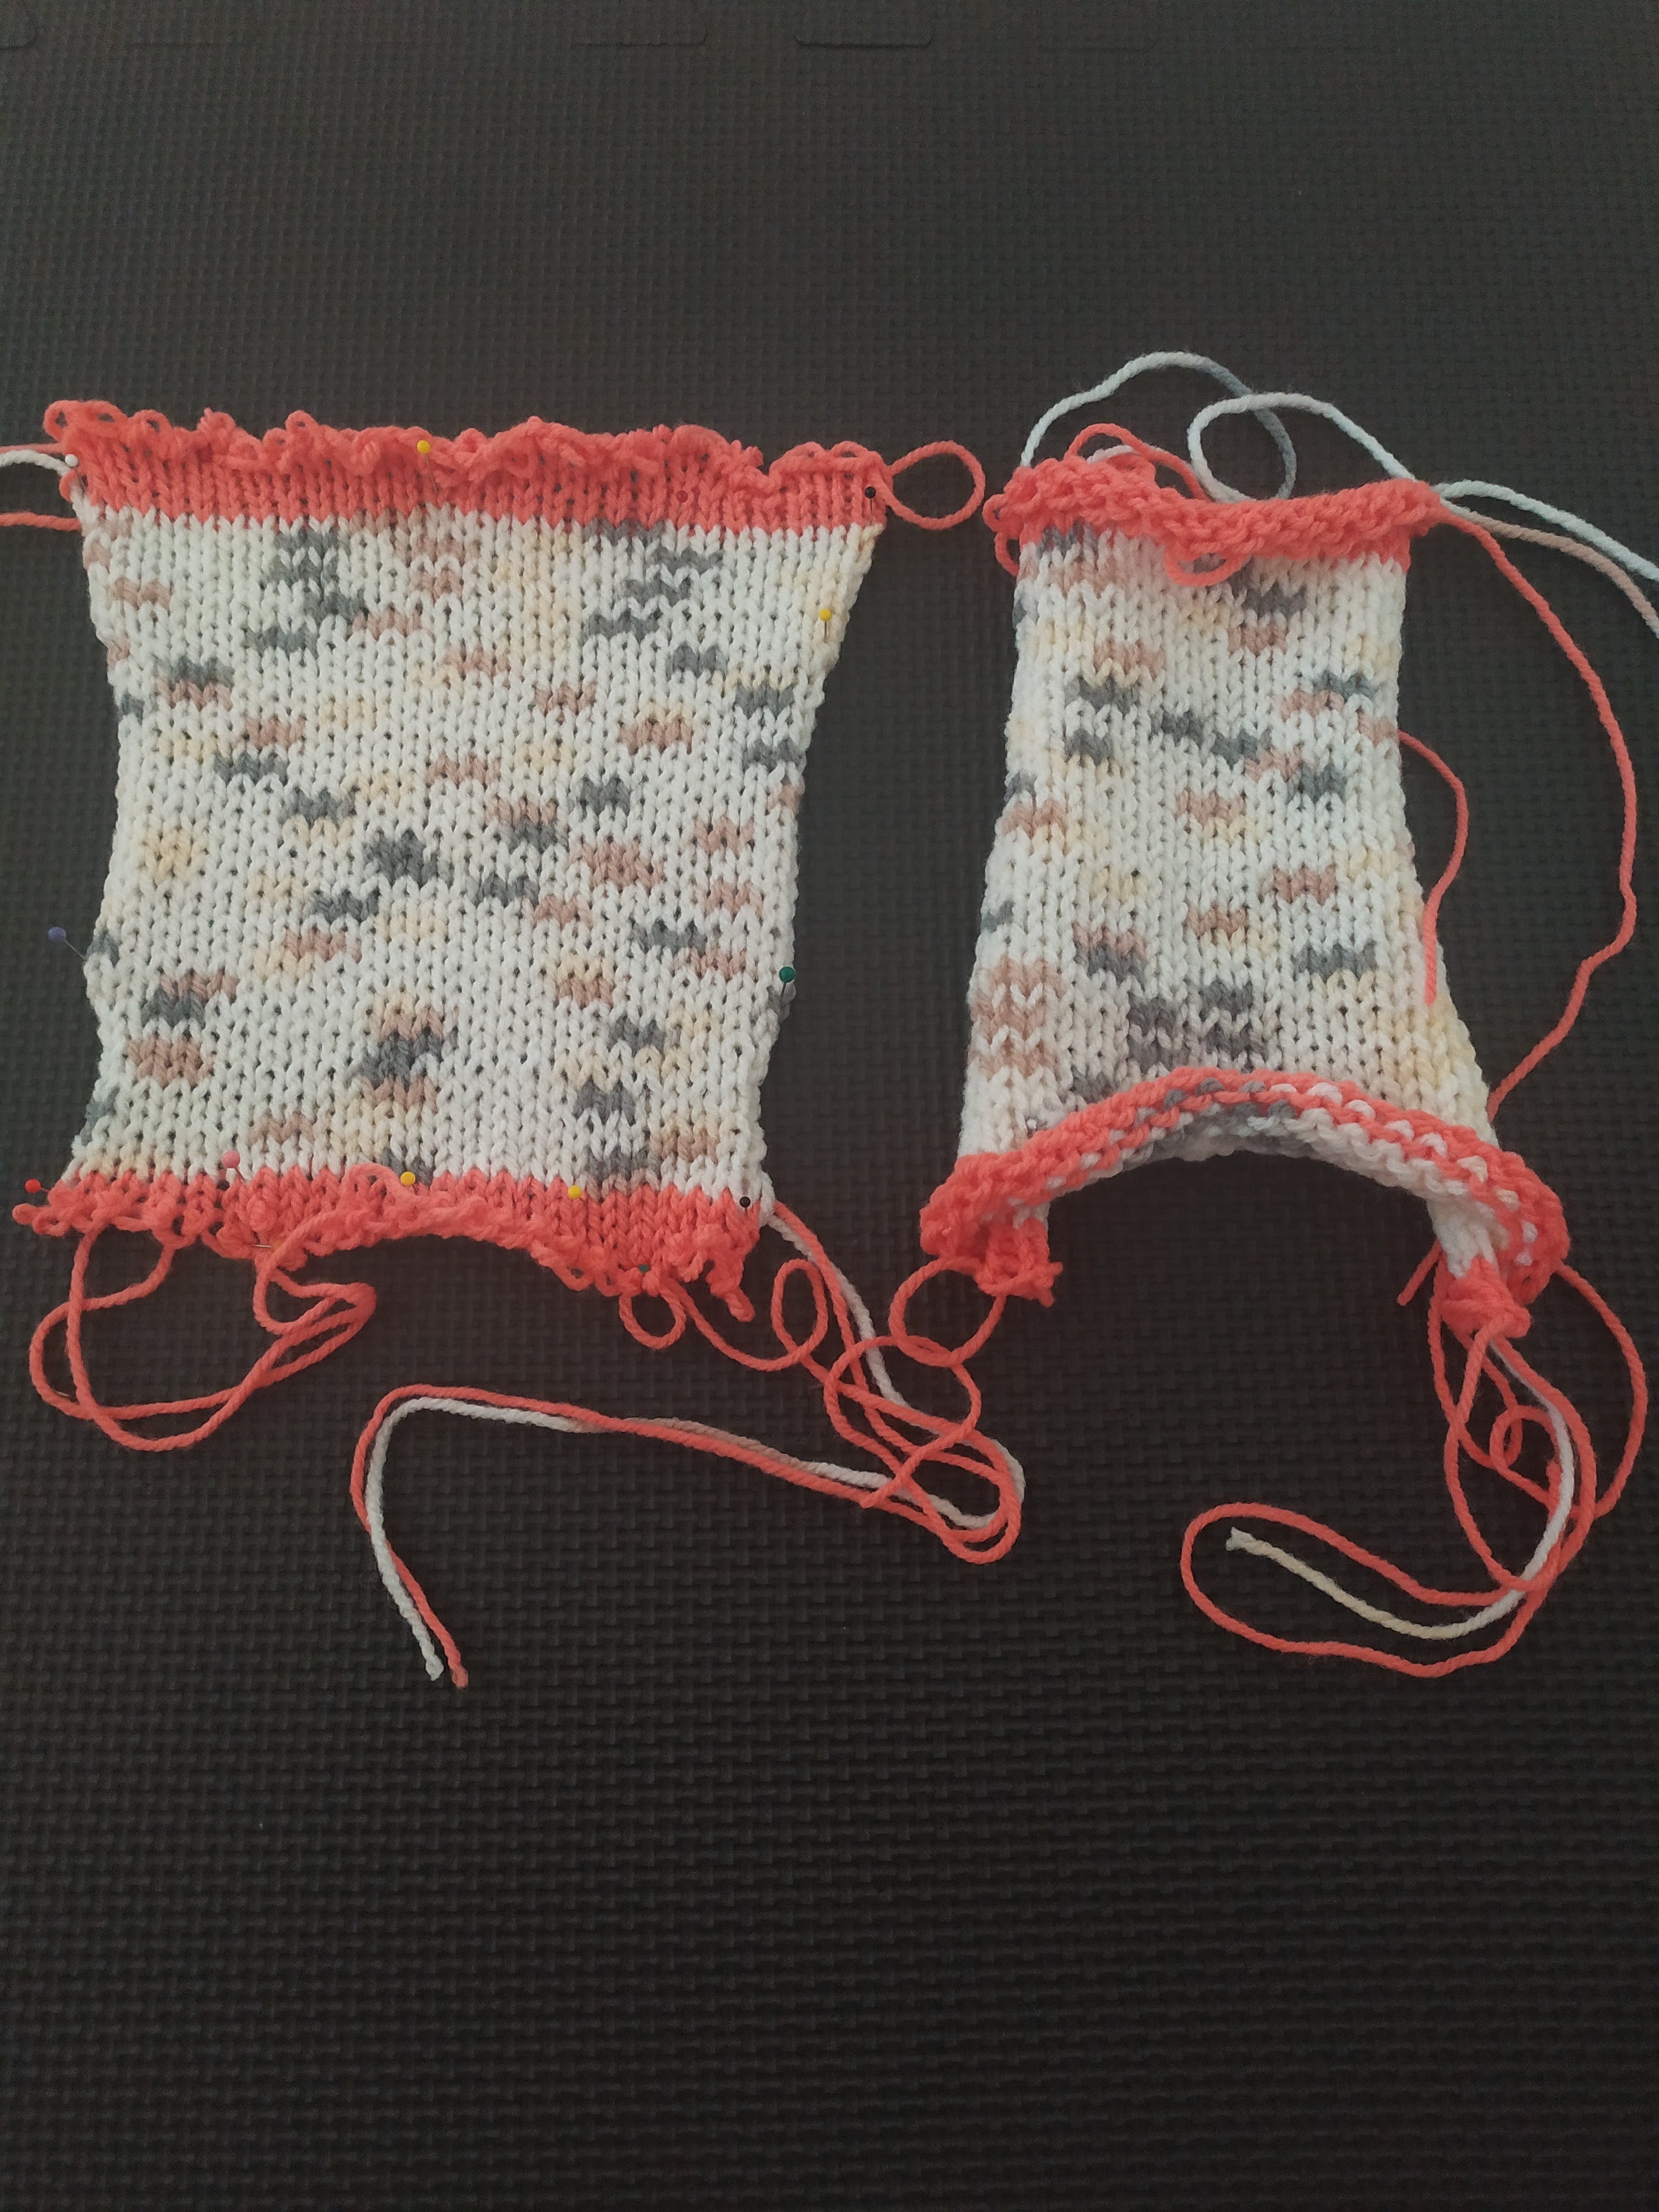
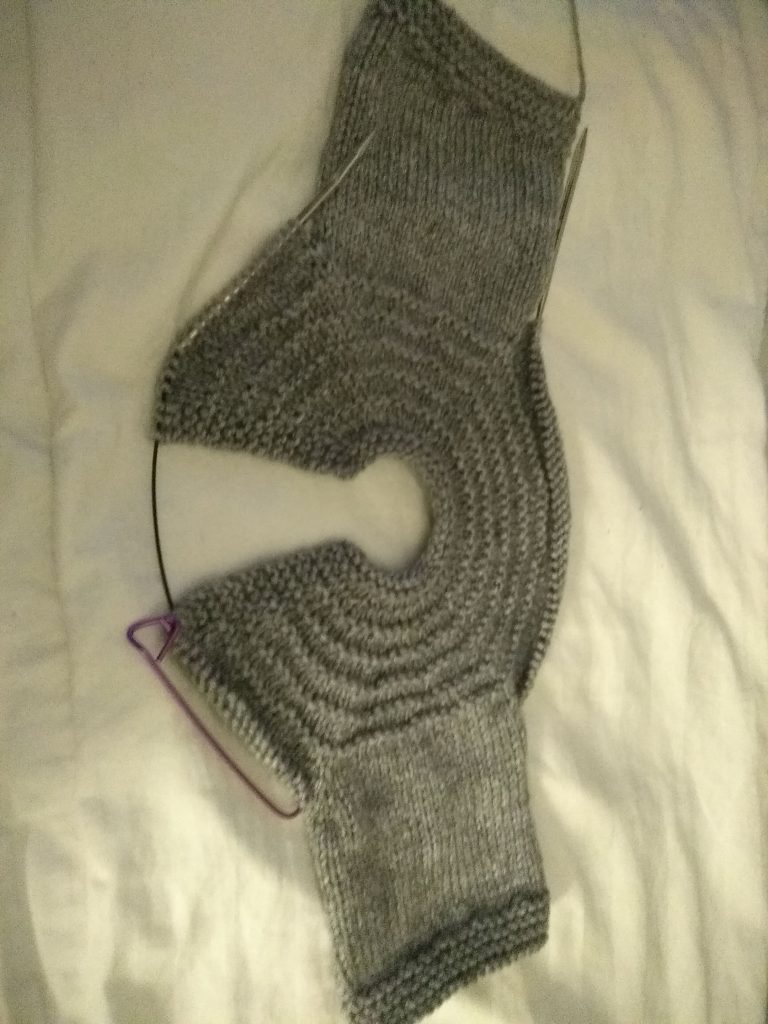
The back
2 front pieces
2 arms
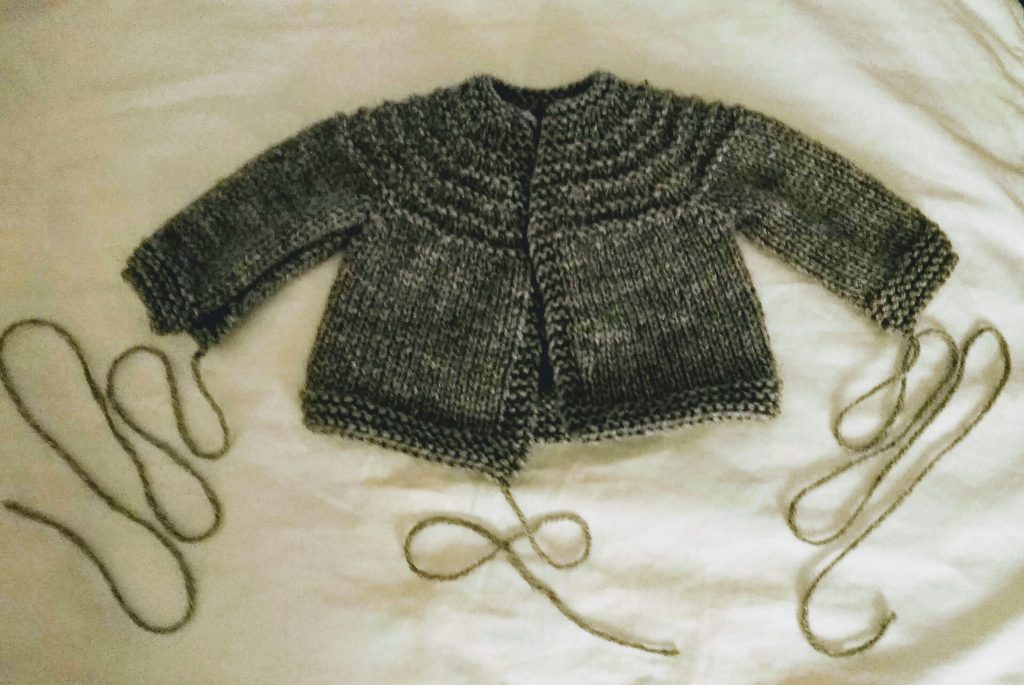
And so, with all the pieces successfully sewn together and a neat little crochet border I can finally say I made something (other than a scarf) on the Addi that I would be happy to give to some I love.
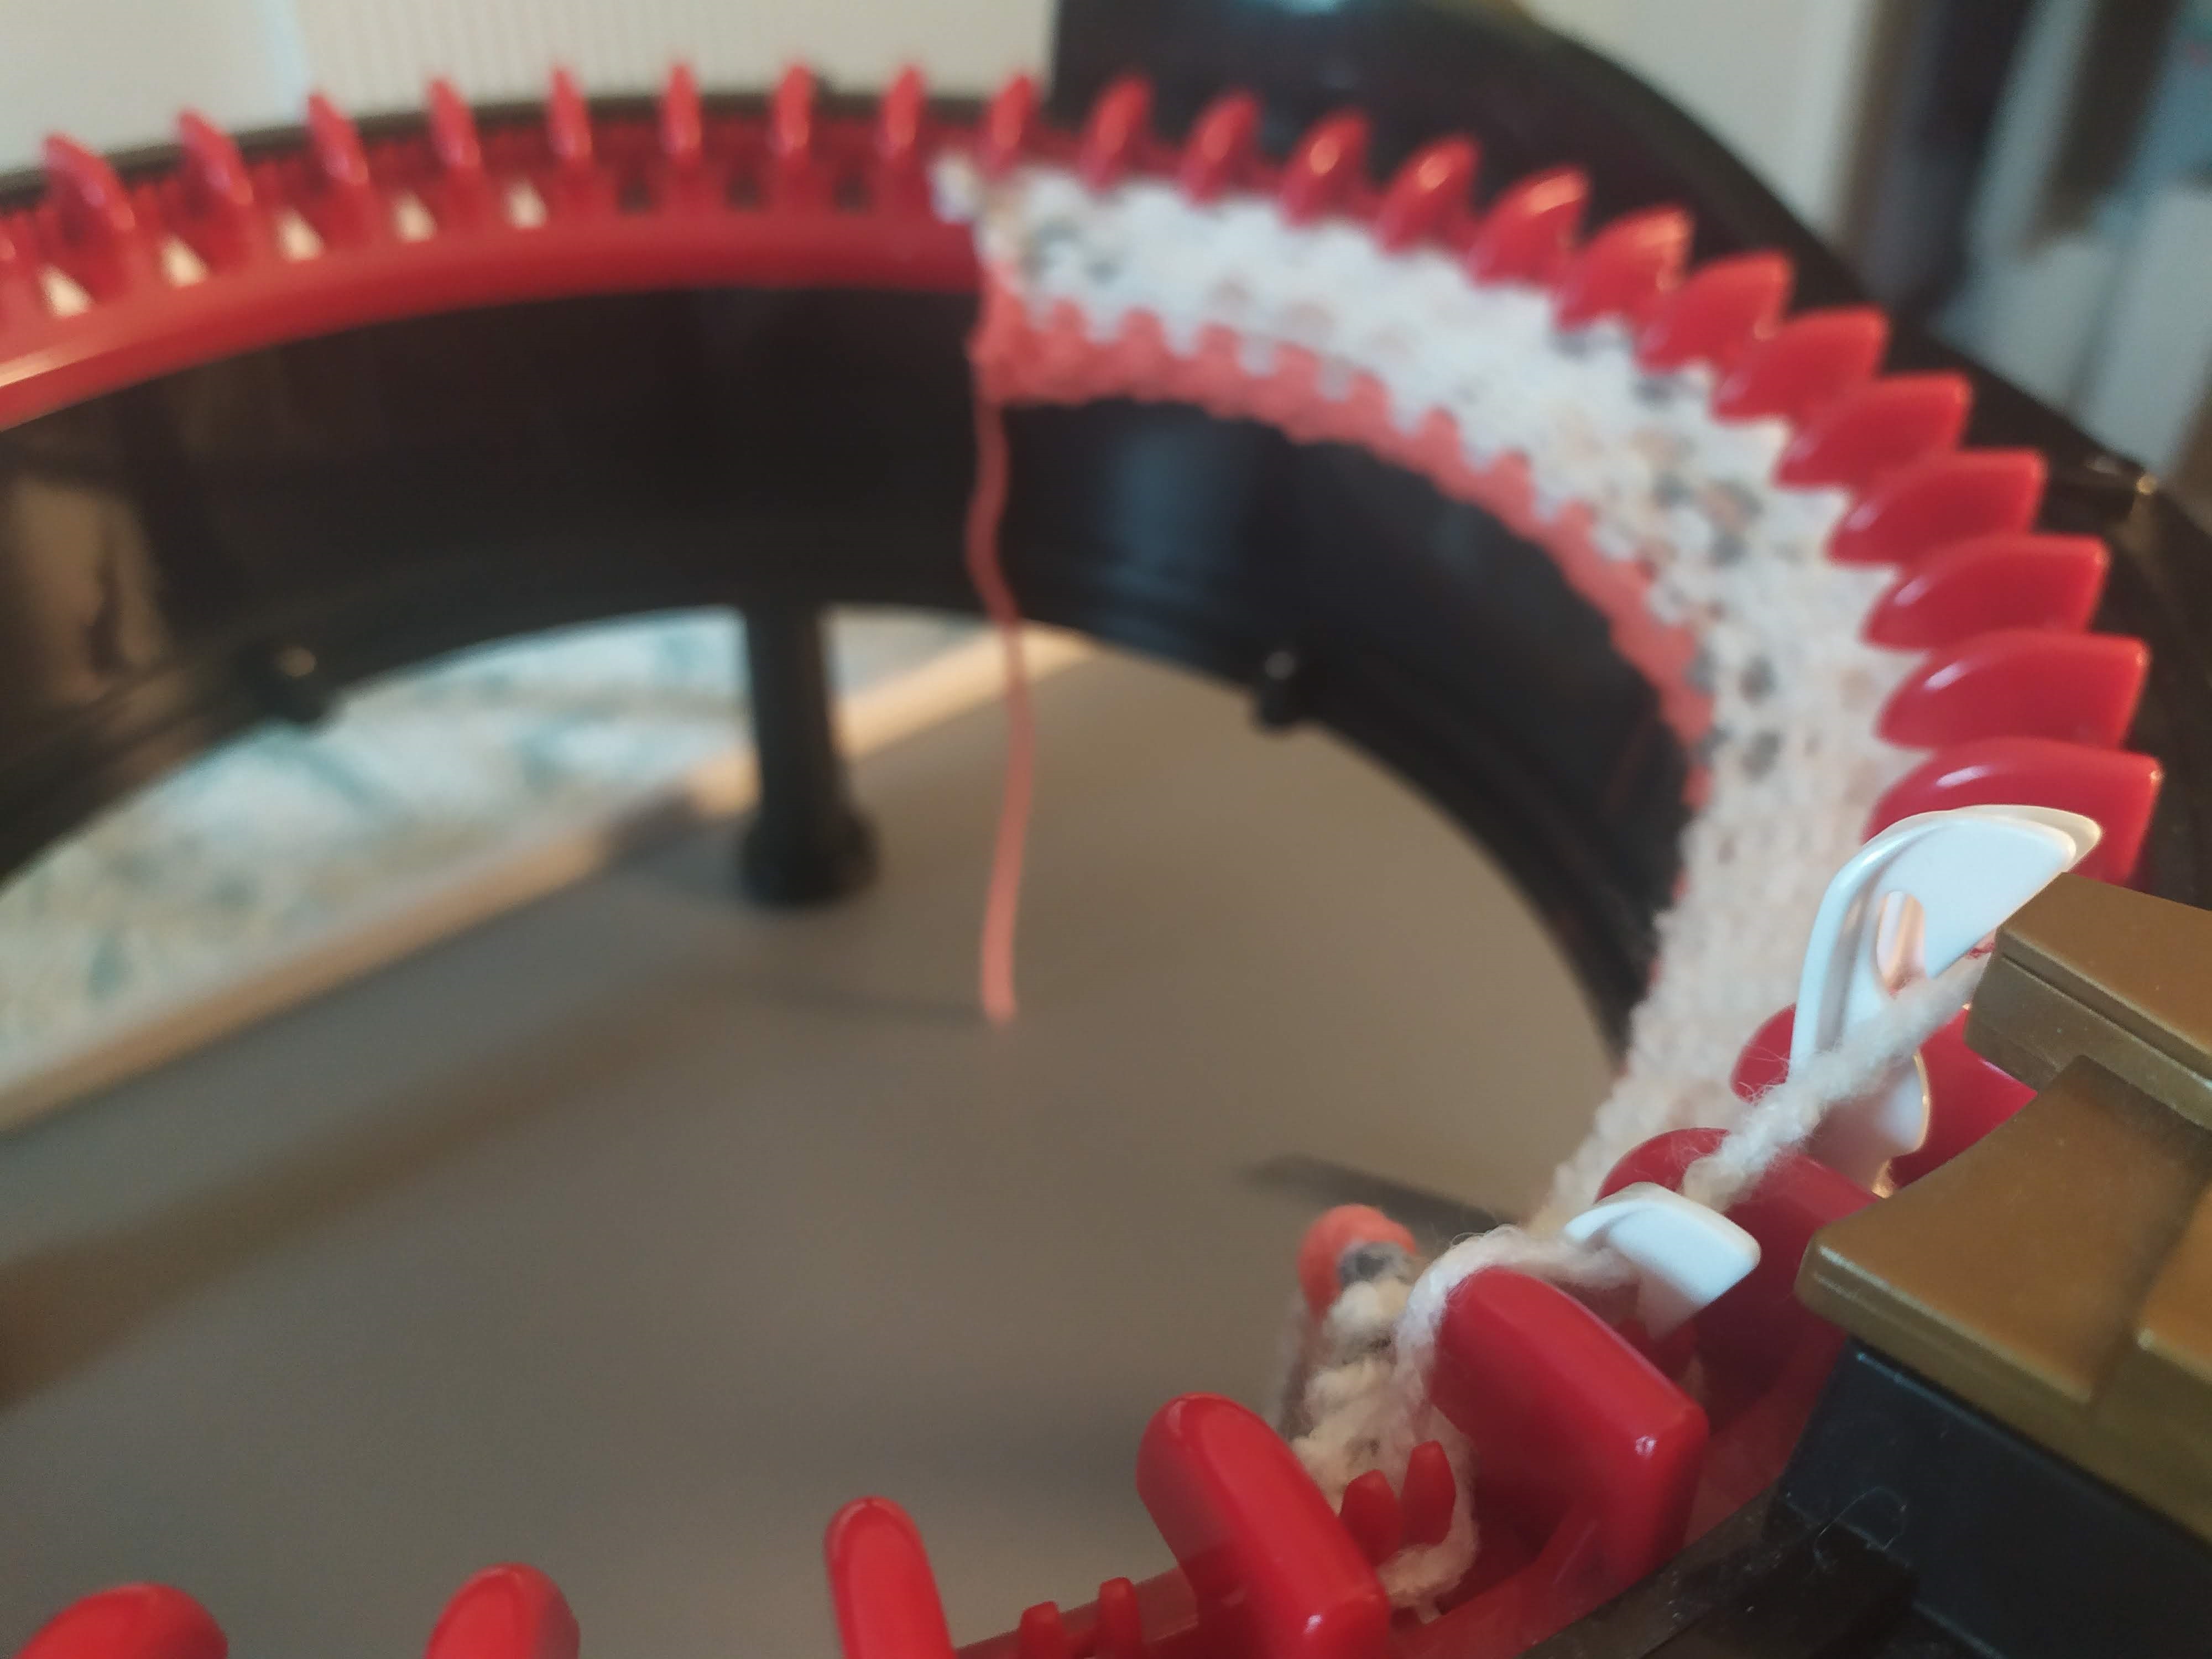
But as a disclaimer I should say, I don’t know the Addi “rules” – if there even are any. Some of these pieces will involve counting rows yourself as the counter won’t tick over once you cast off stitches.
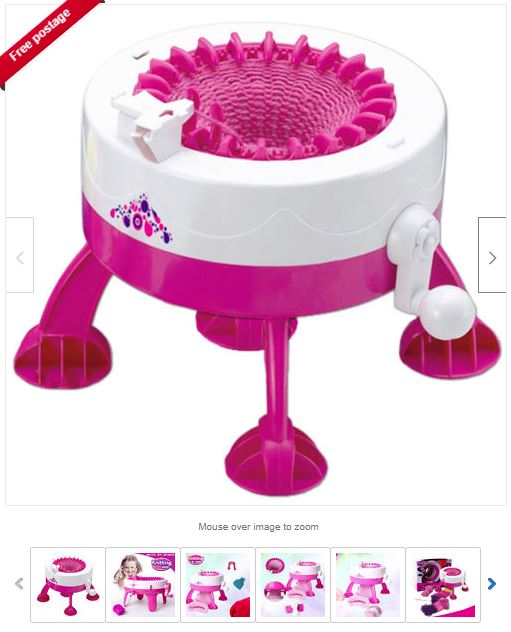
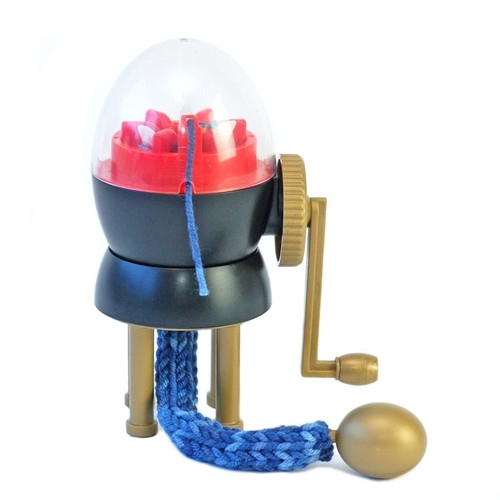
I debated about this forever. I ummed and ahhed and talked myself out of it. So I thought, before I waste too much money I would test out the idea by first buying a generic brand from eBay.
This was not an ideal introduction into loom knitting machines. Quite frankly, it was a disaster! It was clunky and halting. It skipped and stopped and wobbled all over the place – but it did knit. It was chore and I didn’t enjoy a second of it. I then, with pride and joy, I took the knitting off the machine and it was a hot mess! Skipped stitches, split stitches, ladders…. I was back to my 7 year old frustrated self with a falling apart scarf and no idea how it got like that!
I do have plans to take it apart and see if I can make it run better but it has sat on a shelf since day 2 after it arrived.
I naturally just assumed that loom knitting wasn’t for me but the spark of interest persisted…. I think it must be the lure of knitting something so quickly and eliminating some of the tedious work of plain panels and tubes.
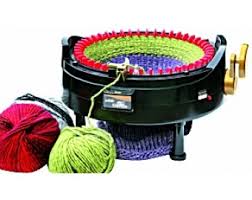
So I bit the bullet and decided to buy an Addi machine –
purported to be the best and most reliable and , therefore, comes with the
price tag to match!
Well…
How do you decide??
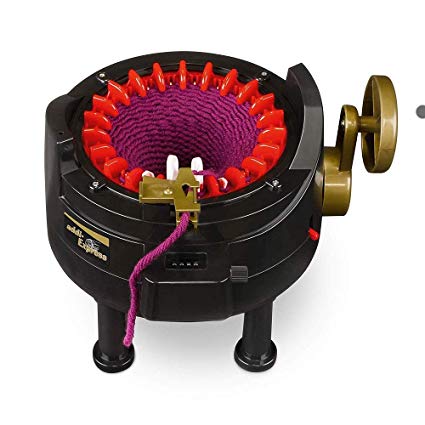
You can get an addi Kingsize (46 needles)
This is ideal for larger projects, particularly adult hats, jumpers, wraps.
Or an Addi express (22 needles)
Ideal for smaller projects – baby hats, mitts and mittens.
I watched endless videos and clicked on many other links to different patterns and ideas. I set up a Pinterest board for ideas and “gathered my evidence”. Turns out I want them all!! Why would I not want the Kingsize to knit myself a gorgeous cowl and an Express to knit the matching gloves?
I decided if I was going to do it, I would go big and work my way down…. So now I am the proud owner of an Addi Kingsize knitting machine.
I love gifting my knitting. There’s nothing better than using up that ball of wool that you bought with nothing in mind. Using it for a project and giving it away. It gives me all the joy of crafting and none of (well, a reduction in) the clutter.
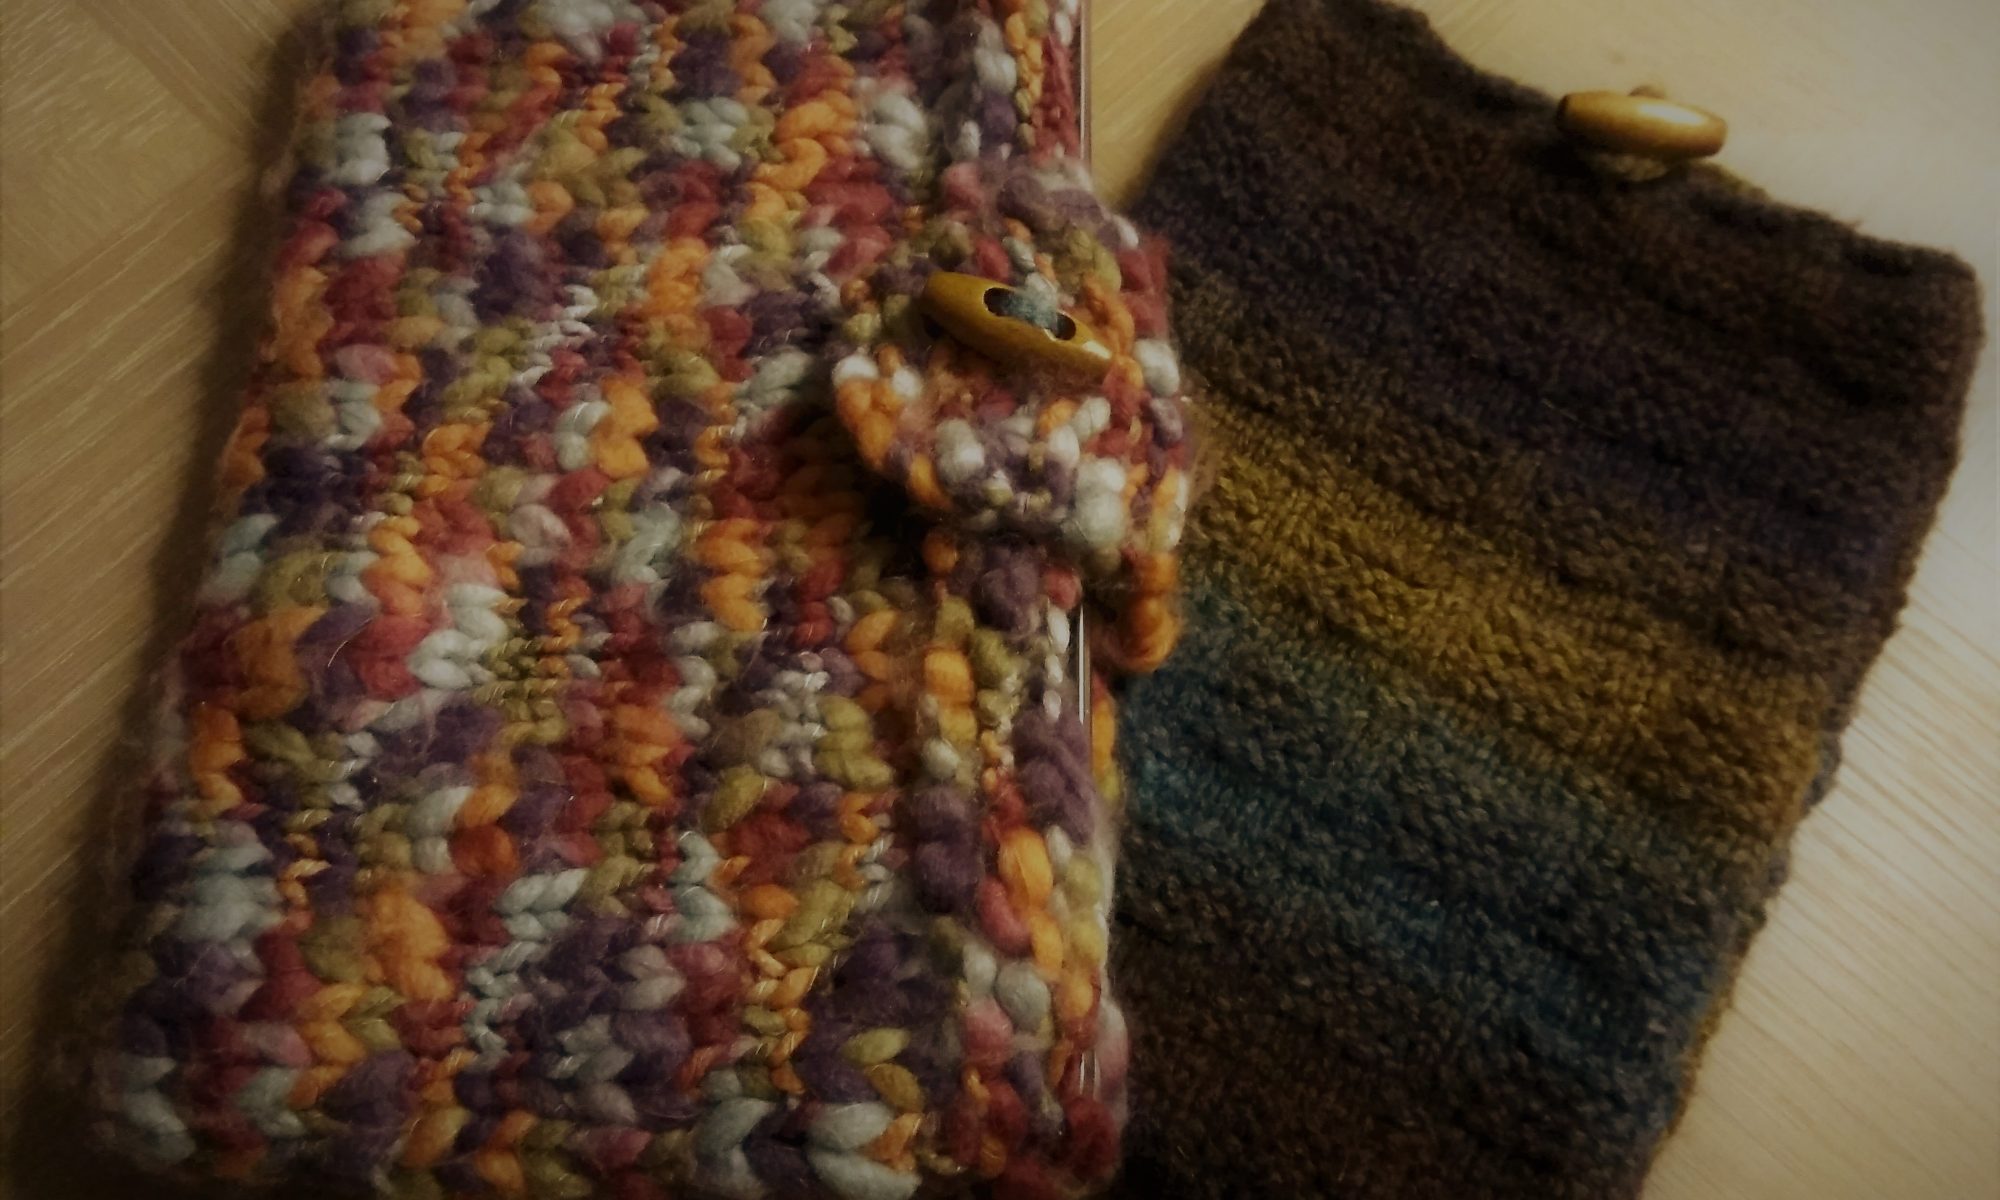
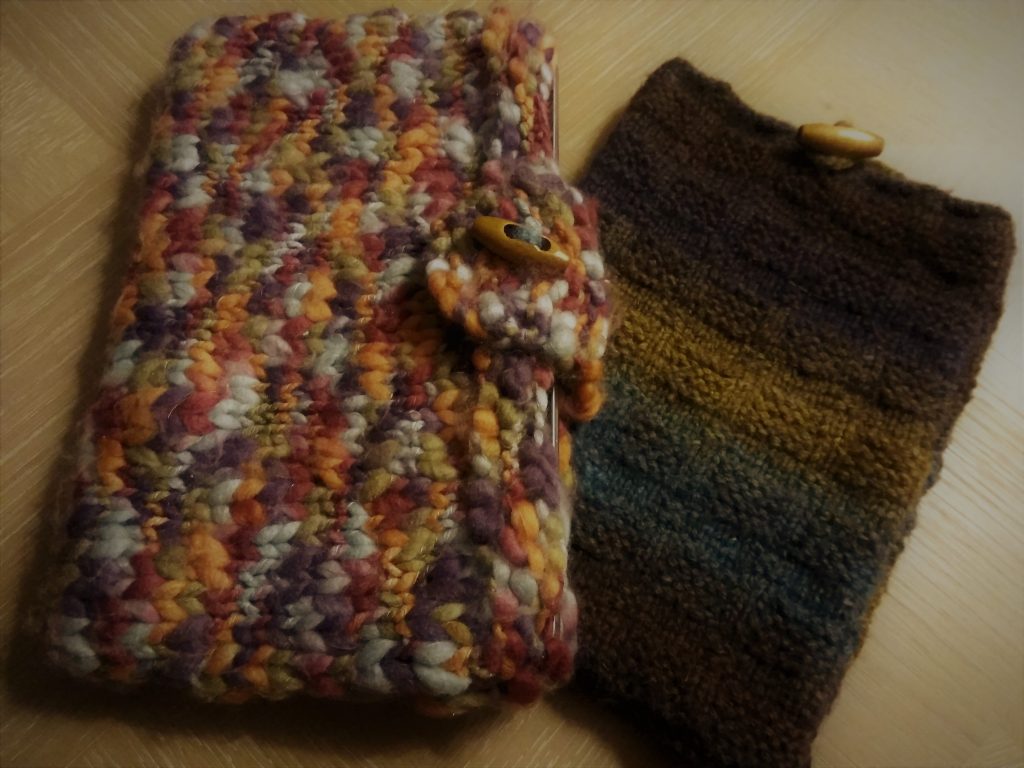
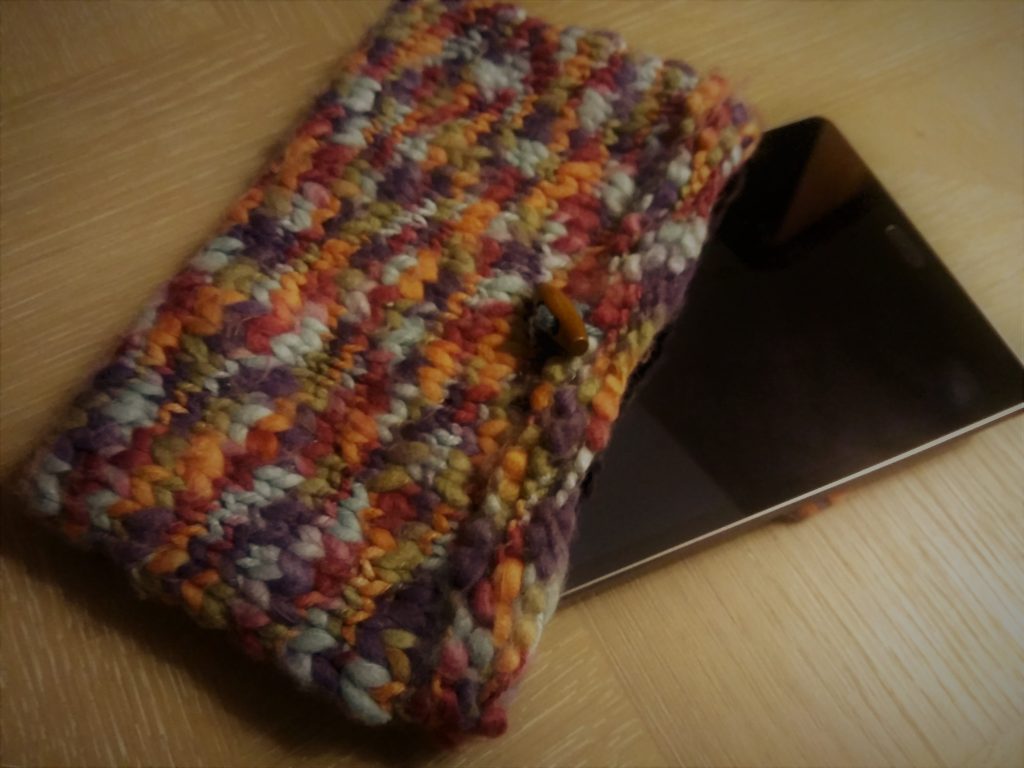
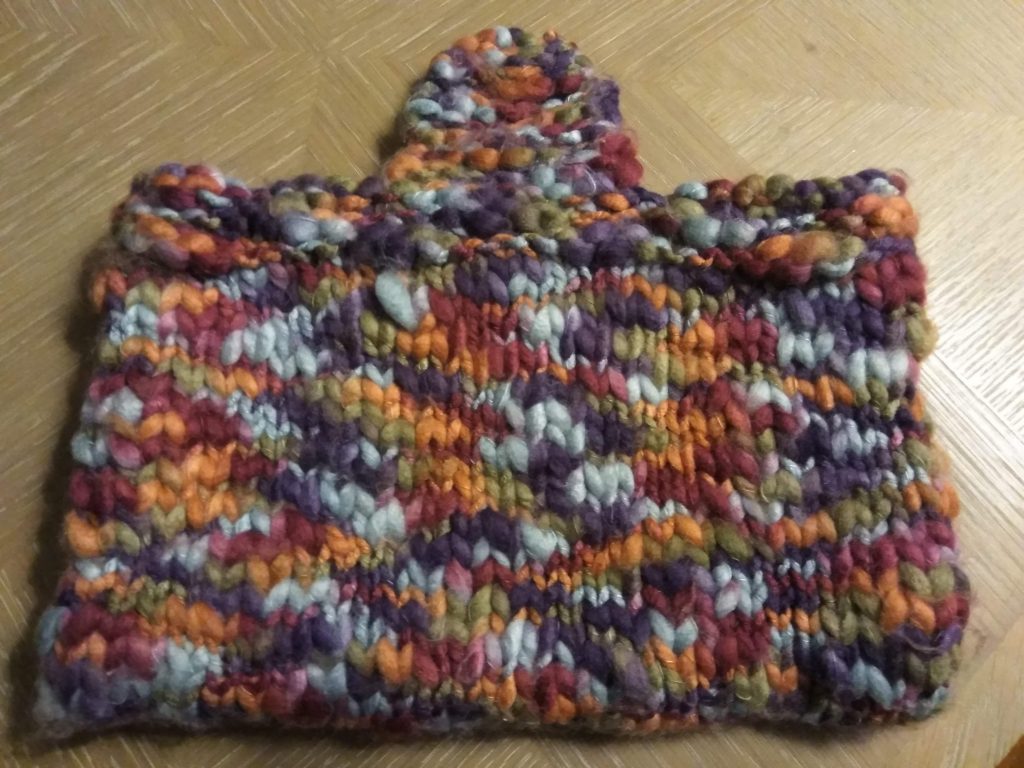
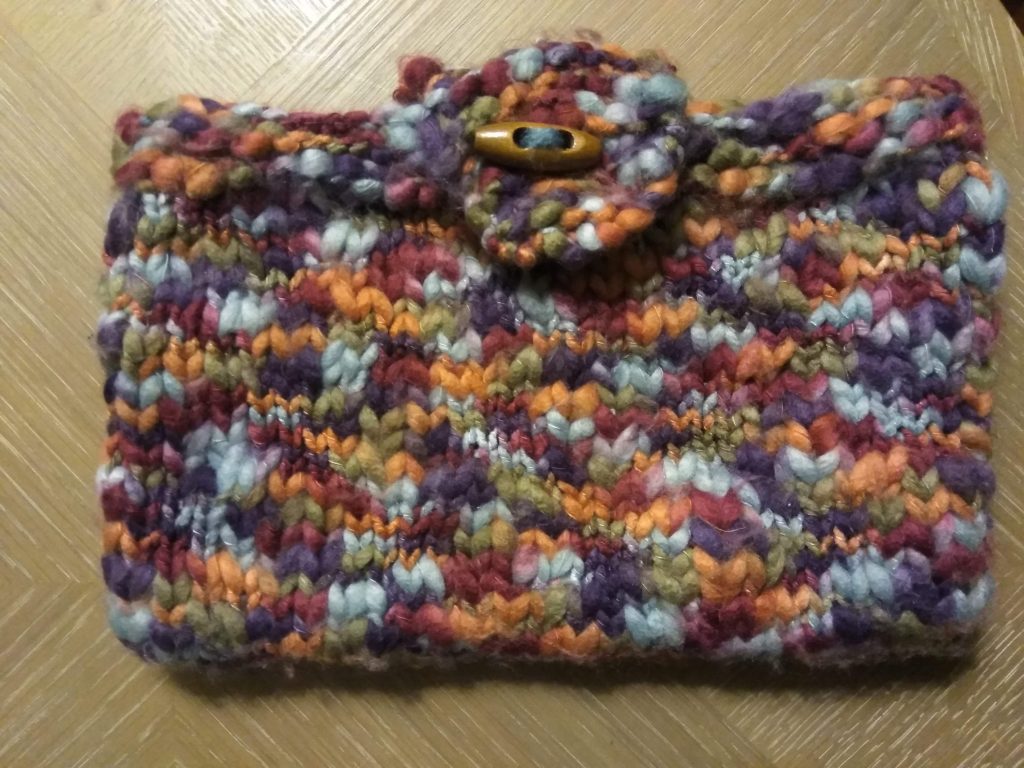
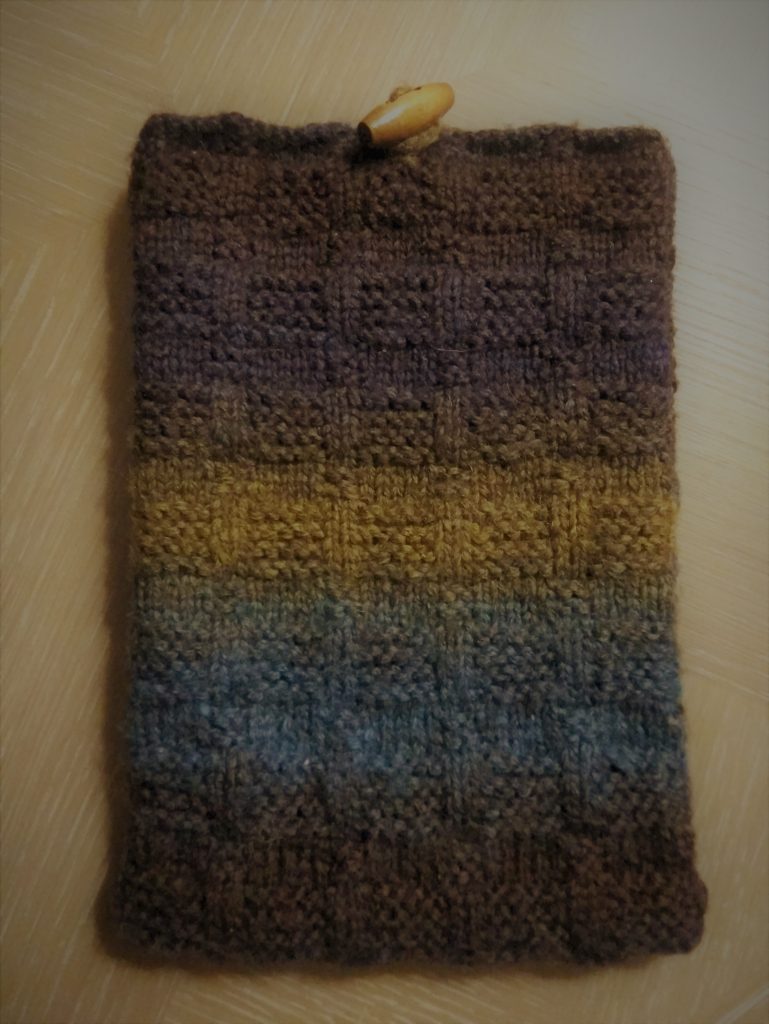
Tablet cases are such a good way of using up an interesting ball of wool on something practical and pretty. They are so easy to customise and make your own.
Take these 2 – I’ll let you guess which is mine and which is my husband’s…
Both of these were made with a wool that I had bought with no purpose until I got bored one day and decided to make these.
Making your own is so easy.
Measure your tablets height and width.
Knit a swatch of your wool to work out number of stitches and rows needed.
A few calculations and then off you go…
For this side opening case:
Use your test swatch measurements to cast on the number of stitches needed to match the height of your tablet.
Calculate the number of rows that would equal double the width of your tablet.
Work out the desired number of stitches for the width of your button band.
(Subtract this from the total number of stitches and divide by 2 – keep this number for later)
Cast on required stitches and complete 4 rows of garter stitch.
Stocking stitch until you have desired number of rows minus 4 and then finish with 4 rows of garter stitch.
Now cast off the number of stitches from your calculation and work to end.
Cast off the same number of stitches again and you will be left with the stitches for a button band.
I worked in garter stitch with a (K2tog YO) for the buttonhole.
Fold over and sew up the edges.
You can customise this in a number of ways:
Work width x2 and then extra to have a fold over flap.
Have 2 button bands
Garter stitch throughout (but bare in mind that this will give your case extra stretch.)
For this top opening case
Cast on the number of stitches that would match the width of your case.
Calculate the number of rows that would equal double the height of your tablet.
I used a basket weave stitch for this as I thought it suited the wool and so I made sure that I rounded up (or down) to the closest number that was divisible by 6 +4 over.
Basket weave stitch:
Rows 1+3: P4 (K2 P4) repeat to end
Rows 2+4 K4 (P2 K4) repeat to end
Rows 5+7 K4 (P2 K4) repeat to end
Rows 6+8 P4 (K2 P4) repeat to end
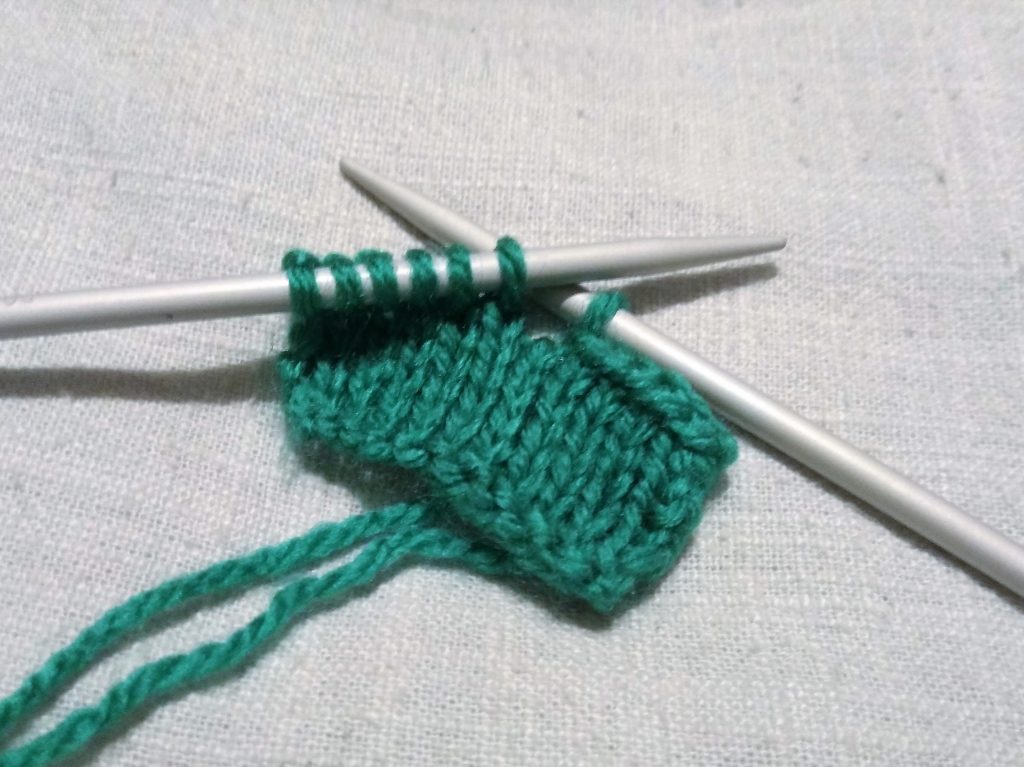
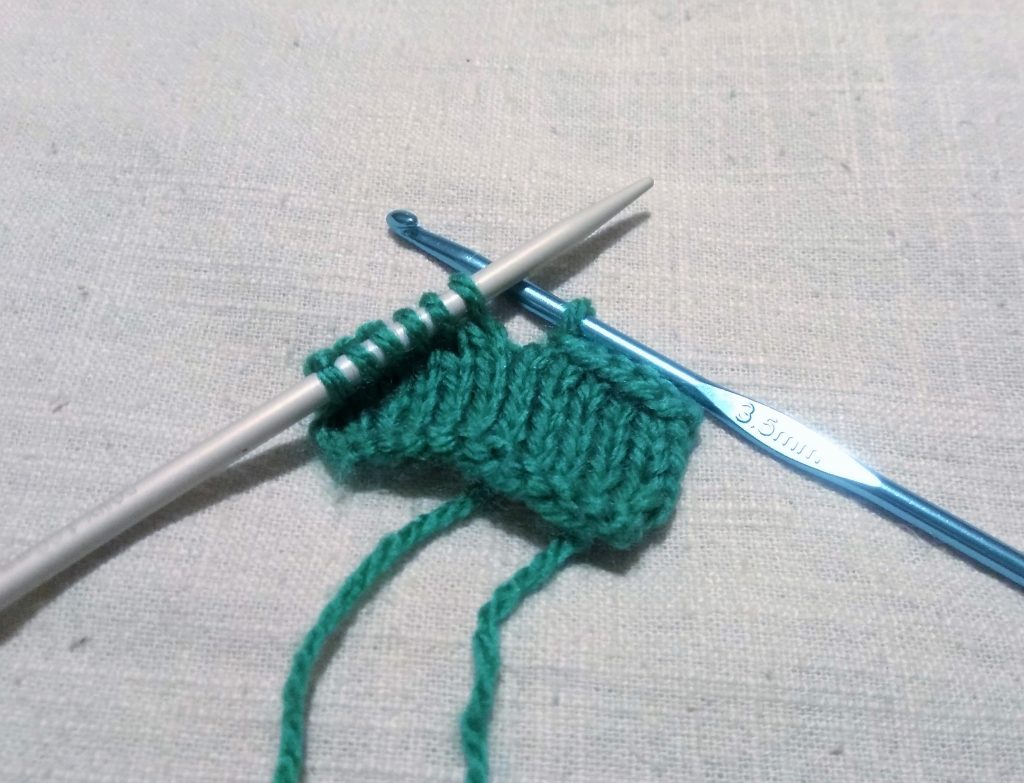
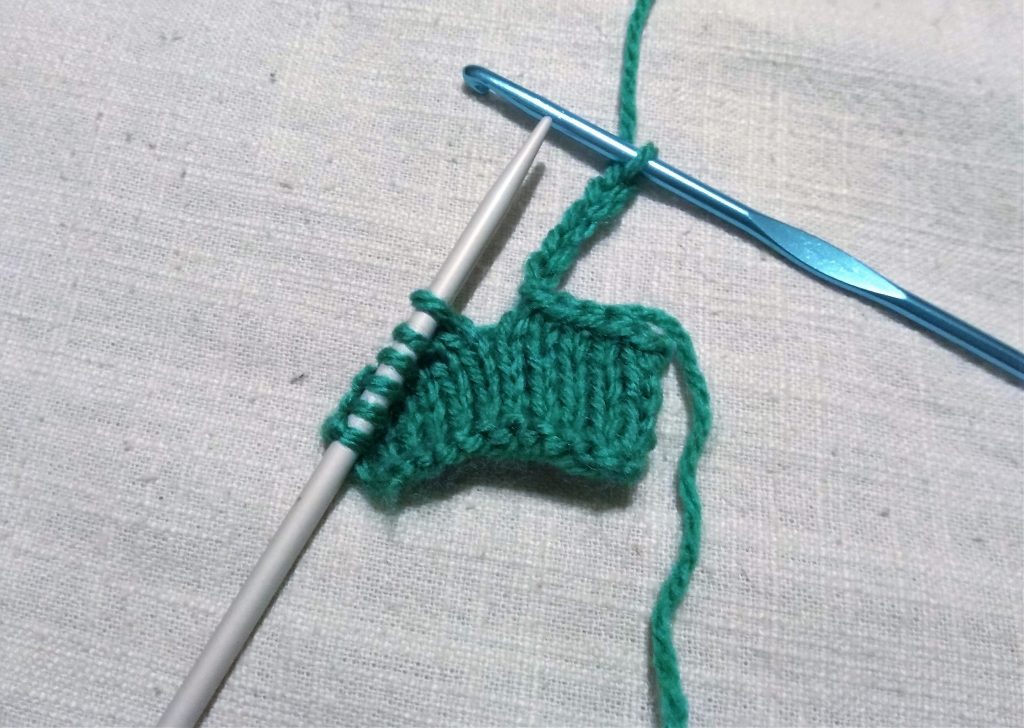
The button band for this was done by adding a crochet chain into my cast off. I’ve used some scrap wool and just a few stitches to demonstrate this below. It is a really simple method that I have used for lots of projects.
Cast off half the number of stitches
Switch to a crochet hook
Chain until your buttonhole is long enough
Switch back to a knitting needle
Knit the next stitch as usual – Continue cast off
The finished button hole
Finish it all off with a complementary button – I like these toggles.
With a bit of imagination, an interesting stitch you want to try and a friend with a “naked” tablet, you have the perfect weekend project.
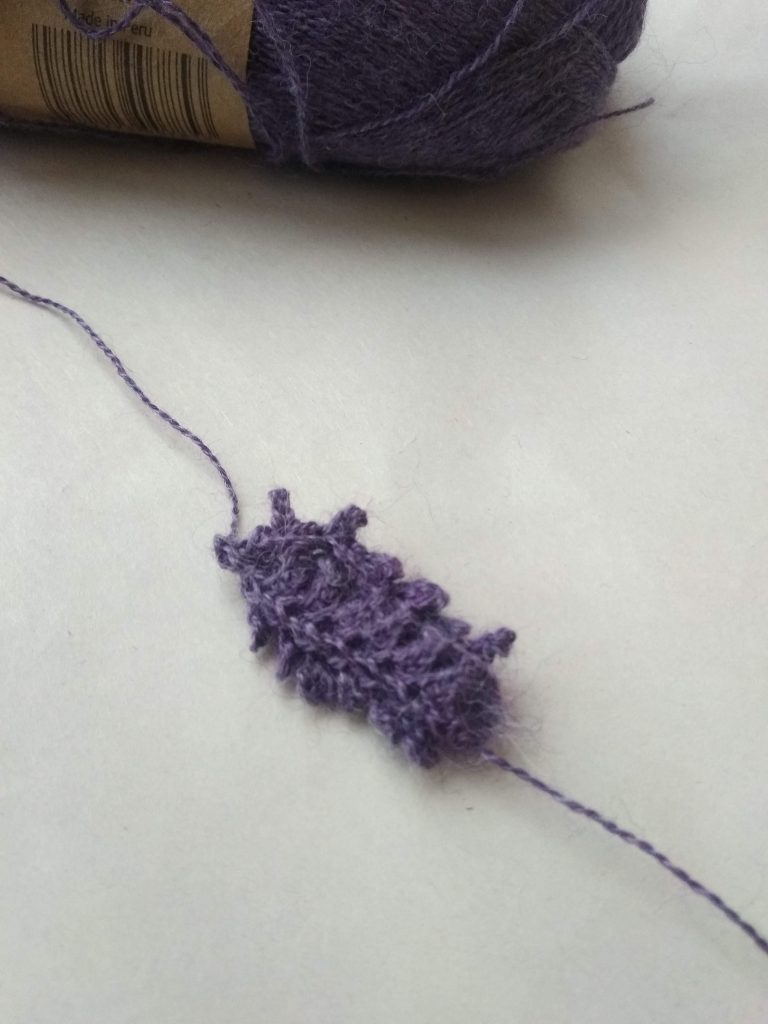
In keeping with my knitted wedding dress I wanted to keep the “crafty” theme but I didn’t want to go overboard with an entirely knitted bouquet. When it came to the flowers, I went to a wedding fair and got several quotes that made my toes curl. I knew immediately that I was going to make the floral arrangements.
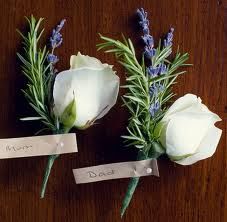
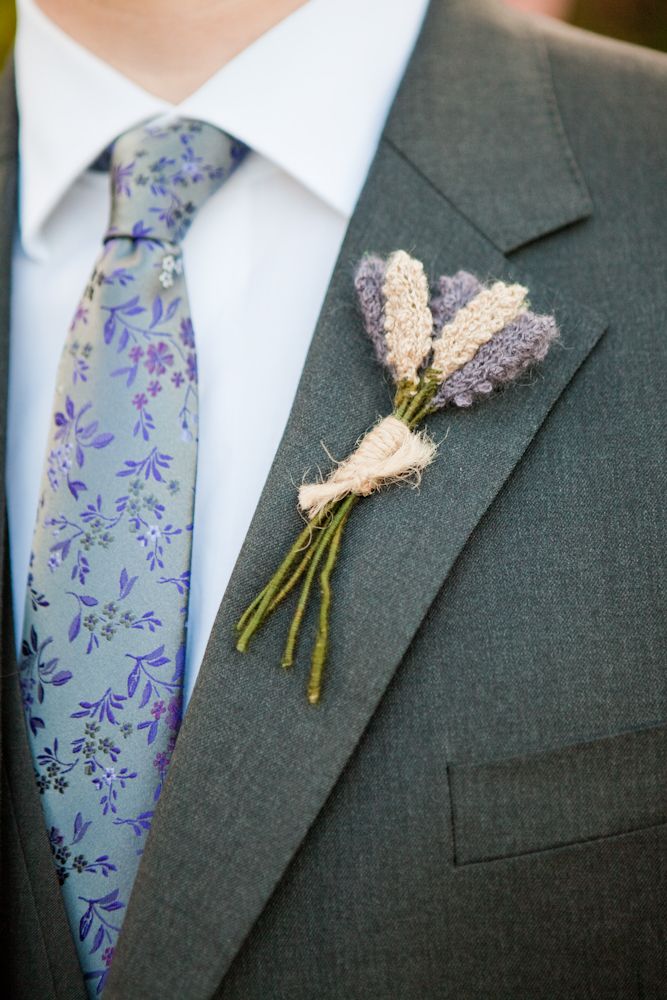
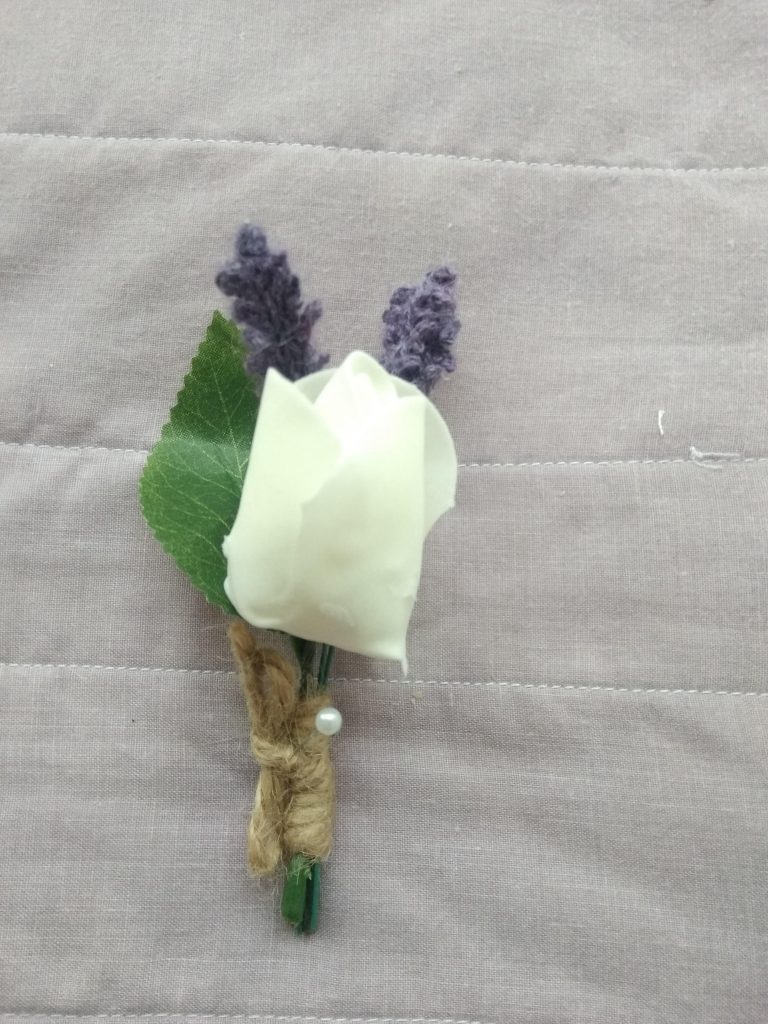
I started with the buttonholes mainly because I could do this in front of my husband and ask his opinion on flowers without him realising that I was taking notes for my bouquet.
I had pinned these images to my secret Pinterest board as my dream buttonhole so I knew what I was aiming for and set about creating it.
I read the owner of the knitted buttonhole, Crafty Tails, blog and knew that I wanted these too and followed her instructions.
Knitting these with 2mm needles was hard work on the fingers and I got so frustrated with the ease with which the stitches would fall off the needle. I found bamboo needles easier because they were not as “slippery”. This is a labour of love. You have to want them but once you have made 2 or 3 you can knock them out really quickly.
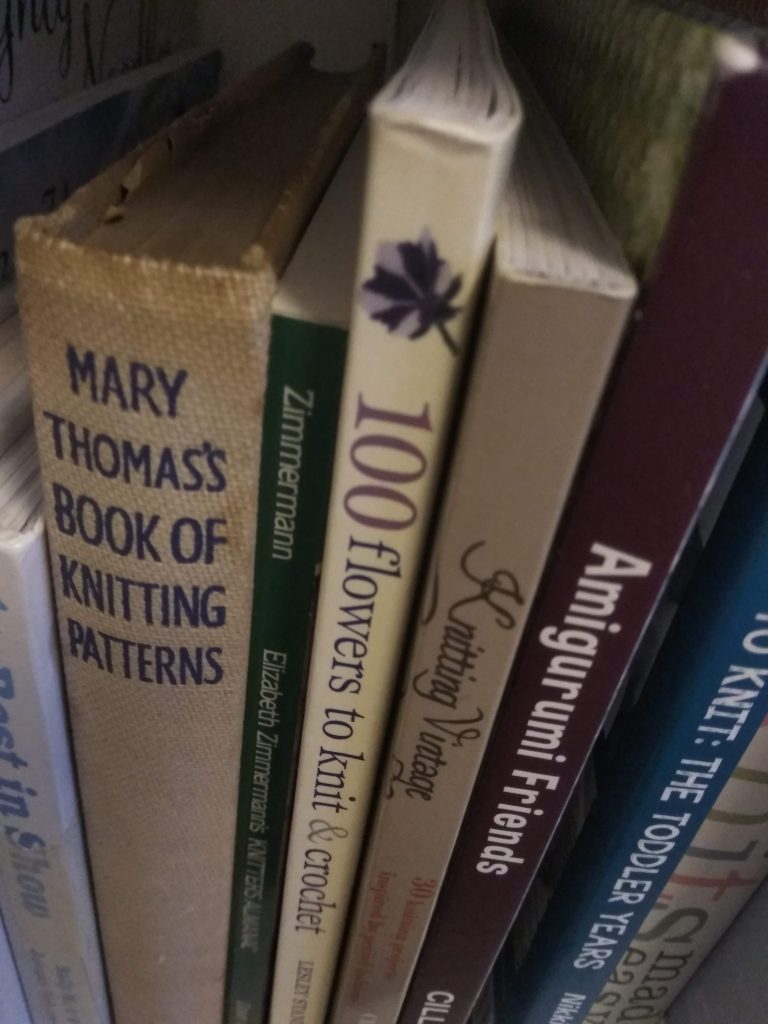
Really love this book. Every kind of flower!
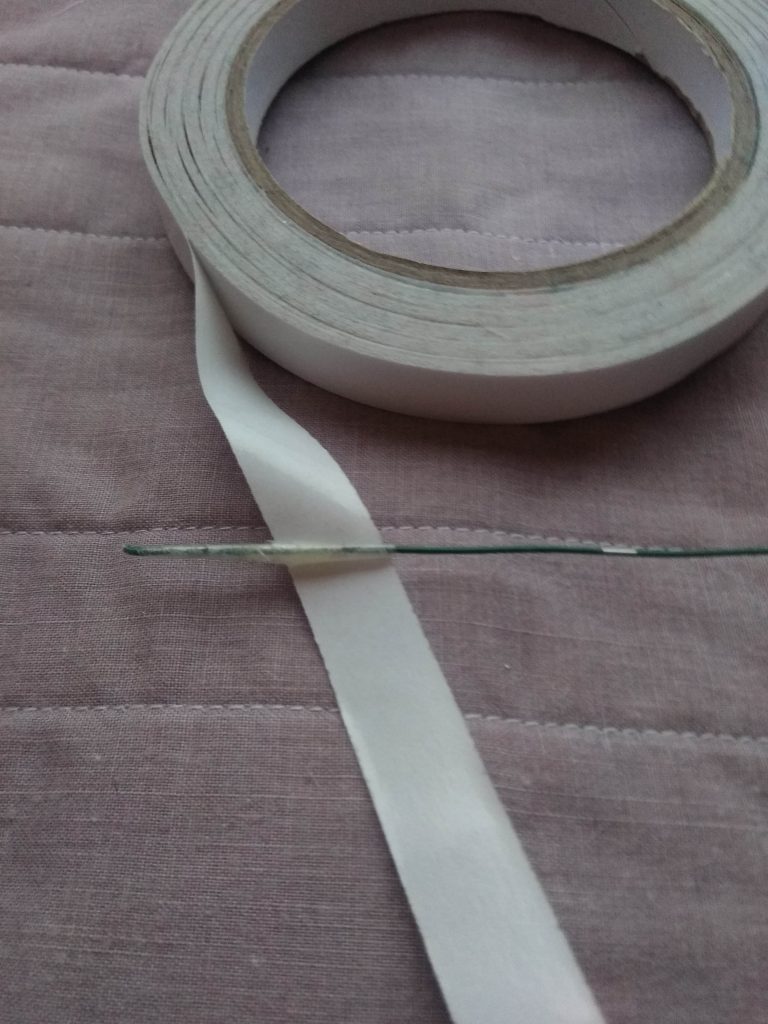
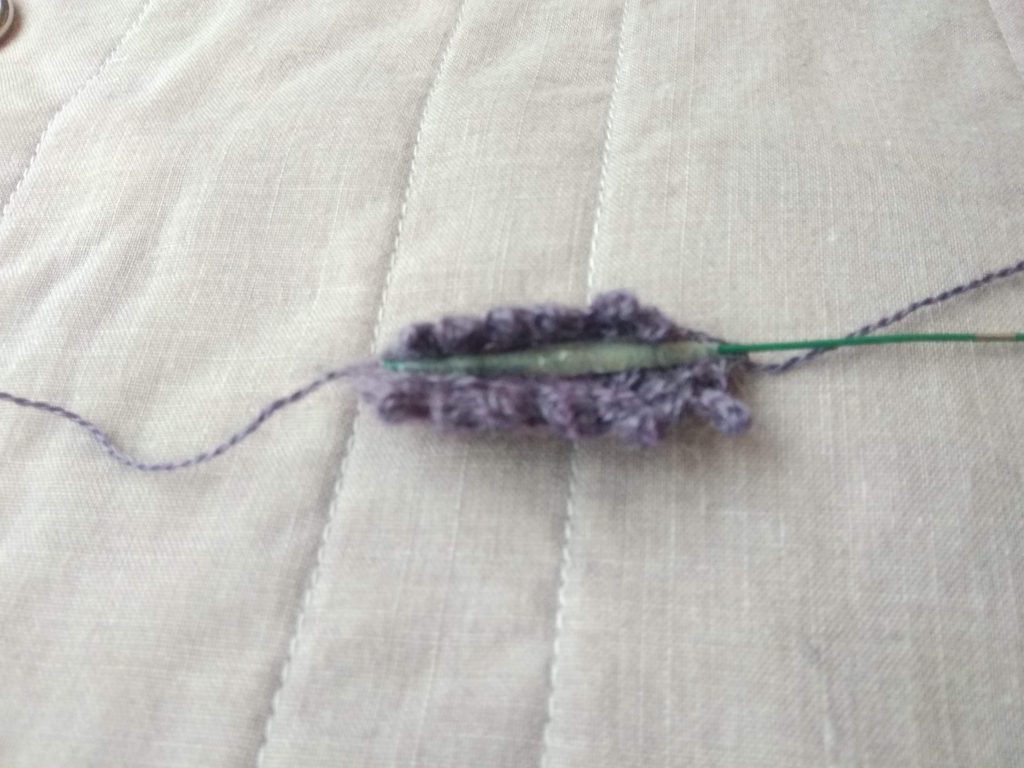
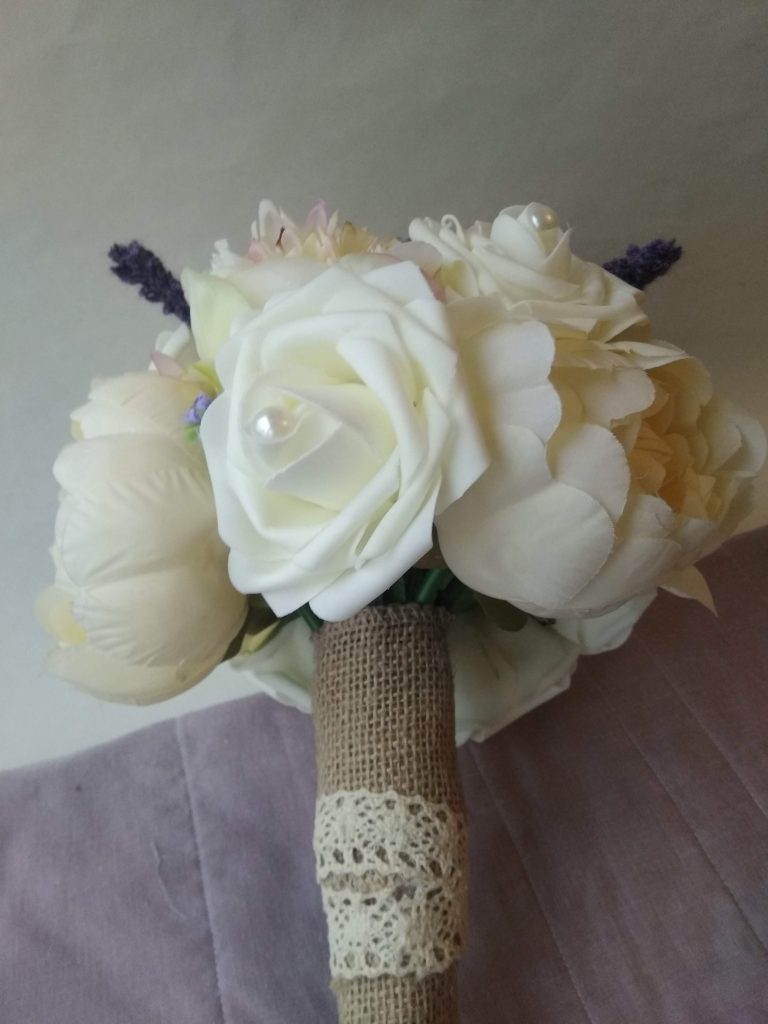
I also knew that if I was going to create these far in advance I needed all the flowers to be fake. I did some research and found foam roses on eBay. I was sceptical until they arrived – I could not have been happier. They look absolutely brilliant and 50 roses cost me £10.
The roses don’t come with leaves so I also bought so fake rose leaves.
For the buttonholes, I took 3 layers off to give a bud. This left little glue dots on the outside which I had to cut off gently but it wasn’t perfect so I tried to position them carefully so it wouldn’t show.
I tied the whole thing together with regular garden string and I was so thrilled with the outcome. Add a cheap pearl style pin to attach to suits and my joy was complete!
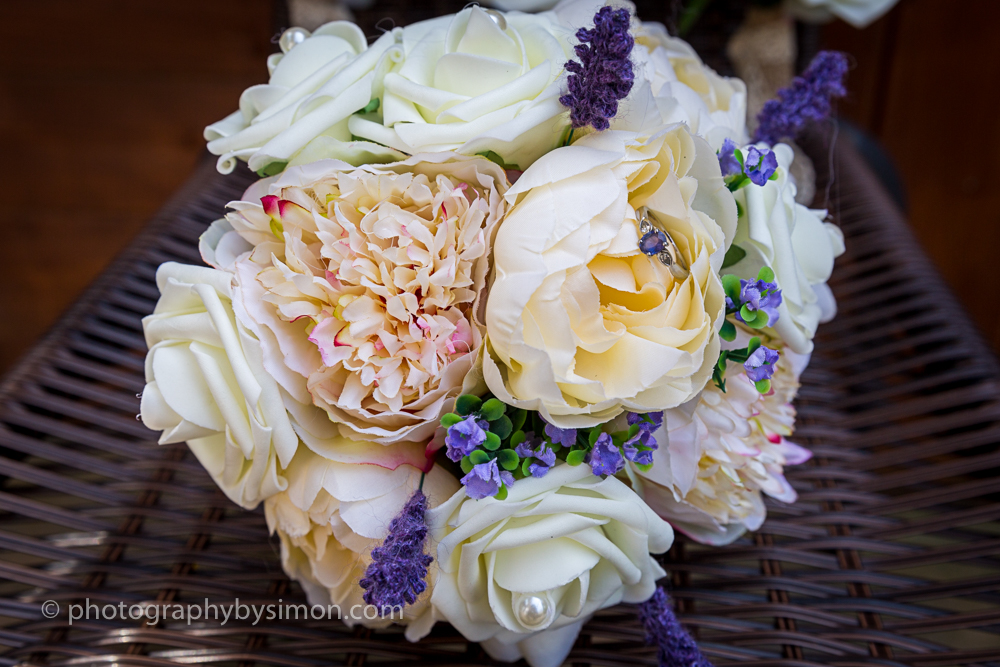
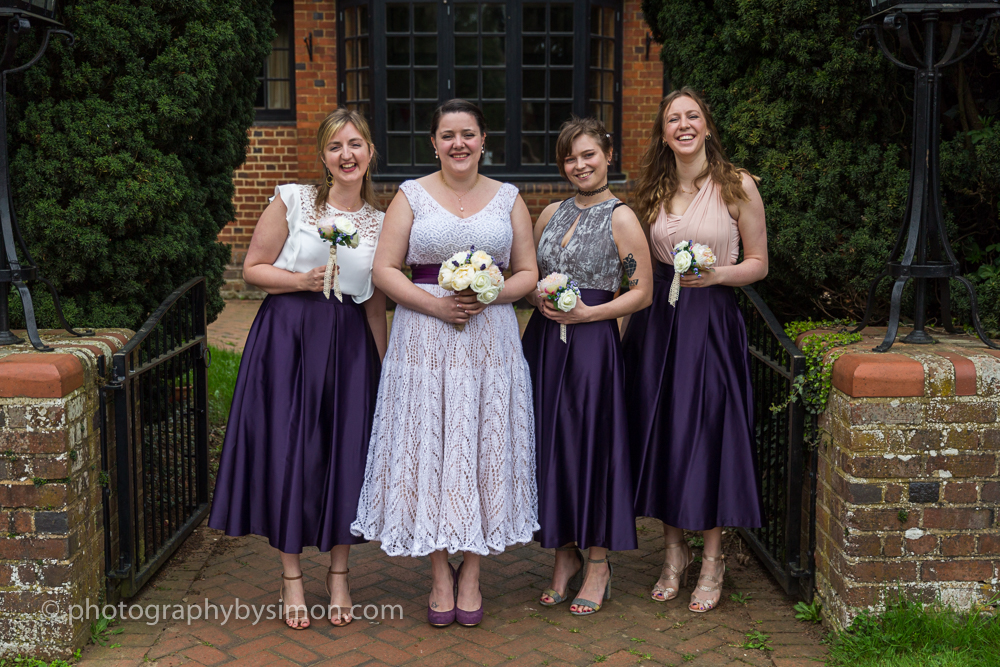
Bridal bouquet
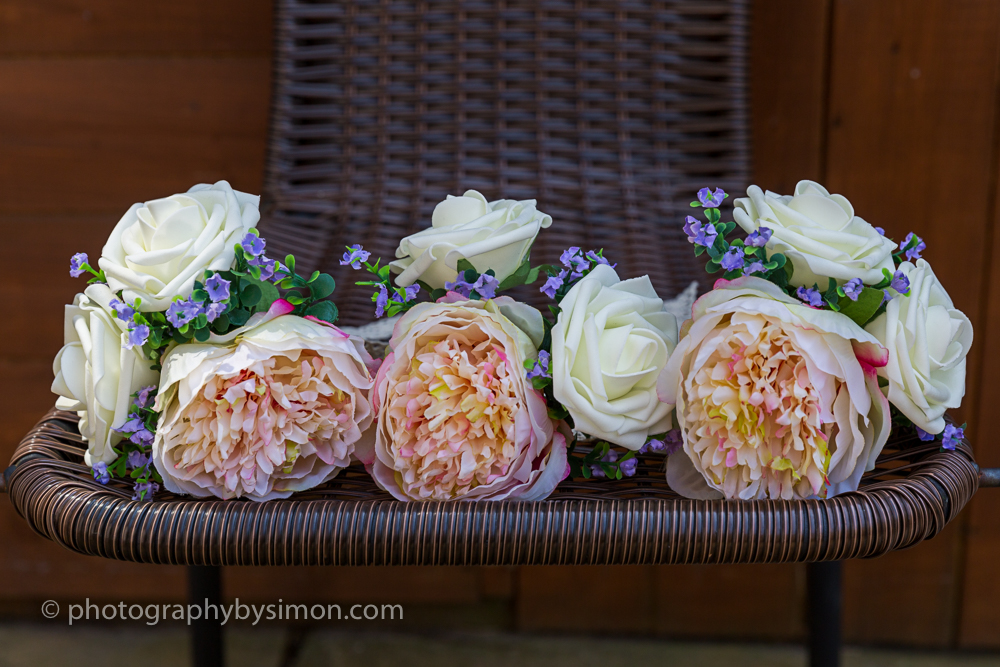
I moved onto my bouquet. In order to have lots of options I bought lots of cheap fake flowers from eBay and practised several bunches to see what looked good and what looked really fake.
I settled on peonies, foam roses and “purple wild flower”. Combined with the knitted lavender I was able to put together a bouquet I was happy with.
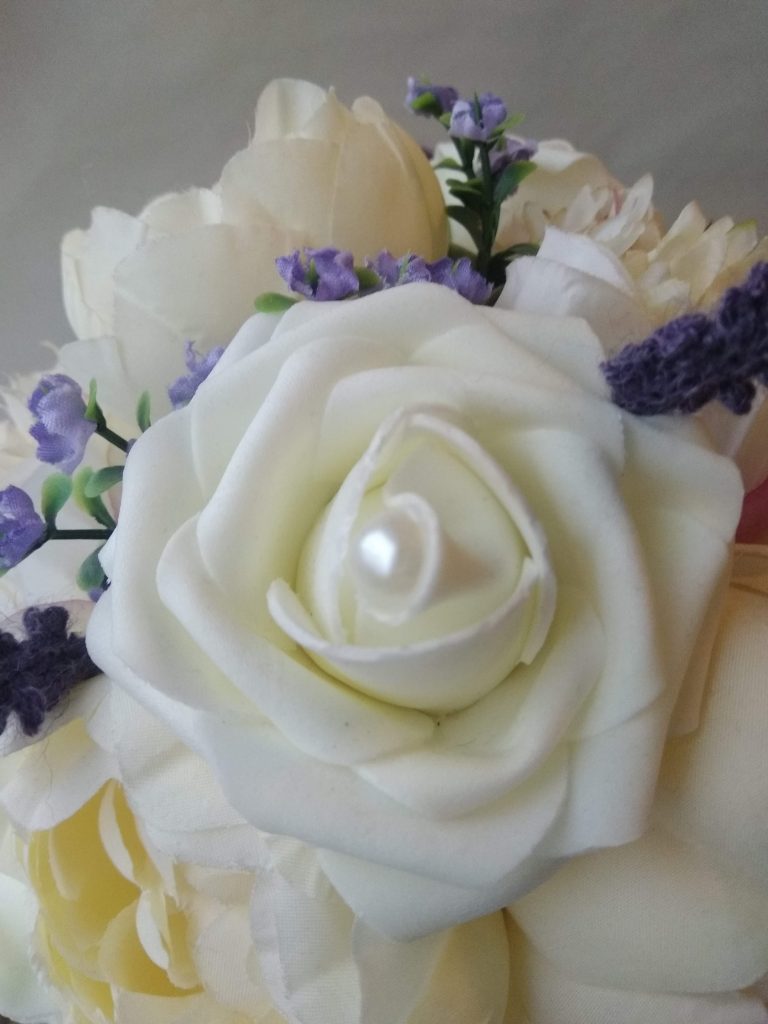
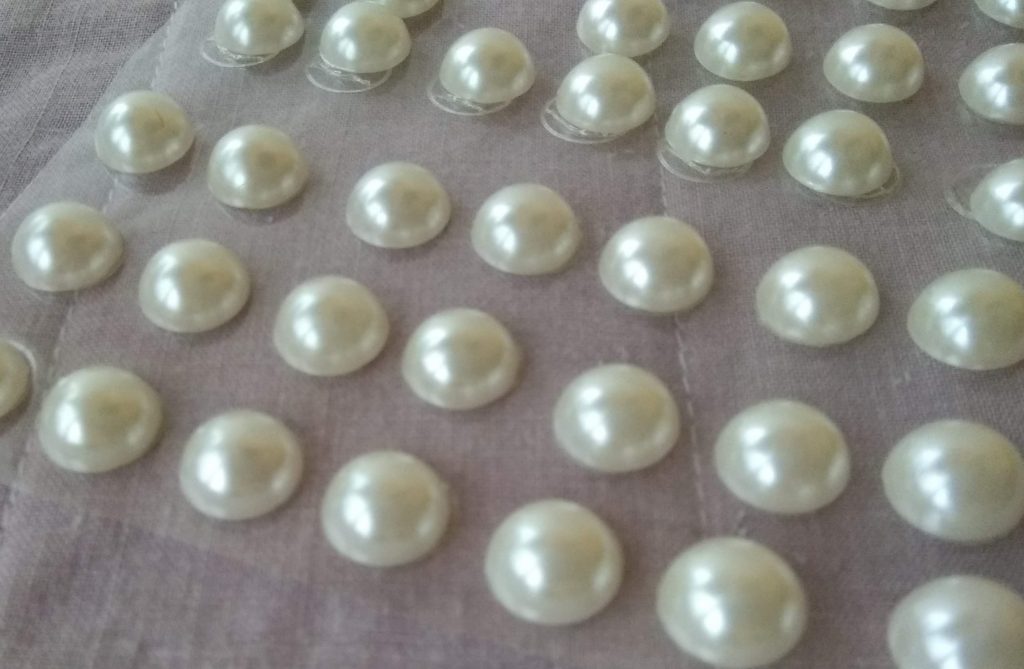
For a bit of extra sparkle in my bouquet I used a glue gun to put some pearly stickers into the centre of each rose. I got the pearl details from… wait for it…. a pound shop!
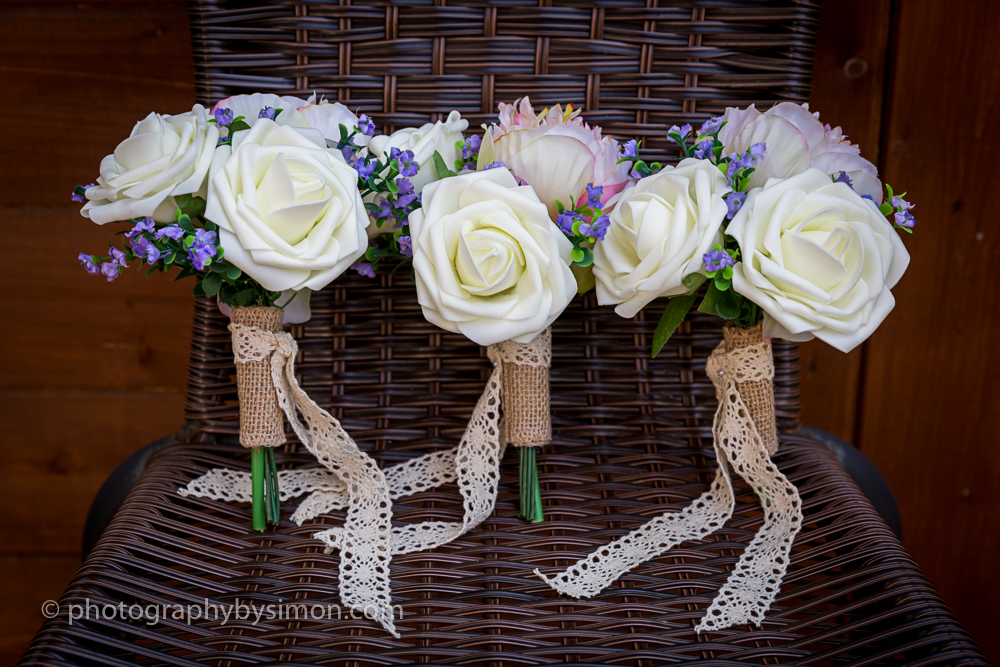
I then moved on to bridesmaids bouquets. I used 1 peony, 2 roses and the “wildflower” so they would match the bridal bouquet.
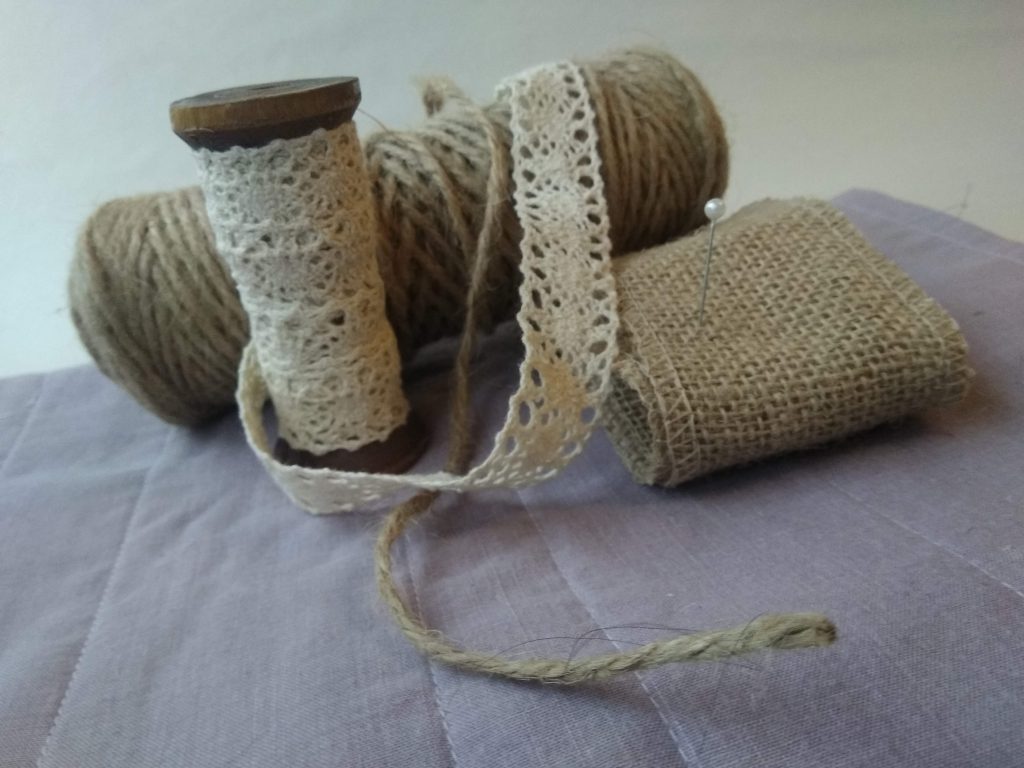
I then had to finish off all the bouquets and so between several cheap suppliers (Pound shops, The Works, eBay…) I found raffia style supplies for wrapping the stems of the bouquet.
What takes the time with these is deciding what you want. If you are reading this page you likely have a Pinterest board. Pin everything you like over a few weeks and then review it. You will start to see a theme emerge and can work on which flowers you want to buy. Then play with your purchases.
Tip: Do this well in advance of the wedding as the majority of cheap flowers can be bought from international sellers who have long shipping times.
These are so easy to put together in an evening once you have decided the look you are going for. You can match the bouquet to your colour scheme and play around with loads of flowers without spending any where near what you would have done one professional flowers.
The best part is we can keep the bouquets as keepsakes from the day. I have mine sat in a glass vase with one of the buttonholes inside the vase.
There has been a massive influx of newborns into my circle of friends and family. I do love making something to welcome the new little person but can find myself overwhelmed by knitting projects that the babies will probably have grown out of before I even finish them.
And so this 5 hour baby jumper pattern by Beverly Leestma came as a saviour. The pattern is easy to follow and very easy to customise. Short sleeves, long sleeves, cropped cardigan, long, buttons, no buttons. Each one can look completely different and can show your love without burning out your fingers!
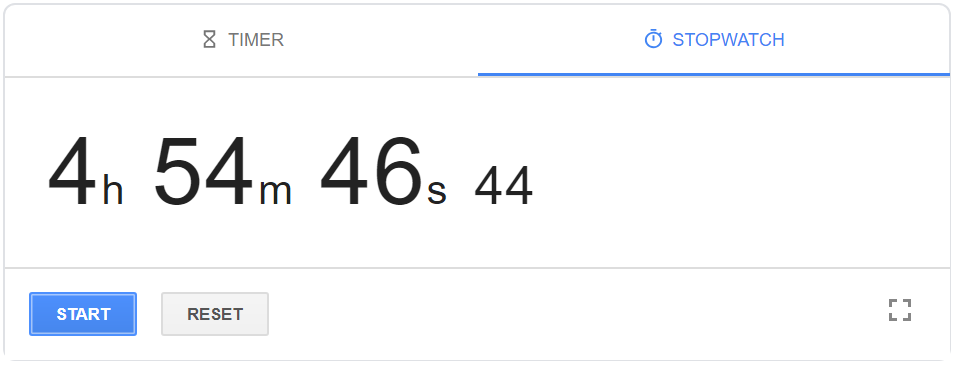
I have made a number of these now but I don’t know how long it has actually taken me. I wanted to test the 5 hour claim and see if it is true. So I gathered my equipment, the pattern, a pot of coffee, a supply of films and a timer.
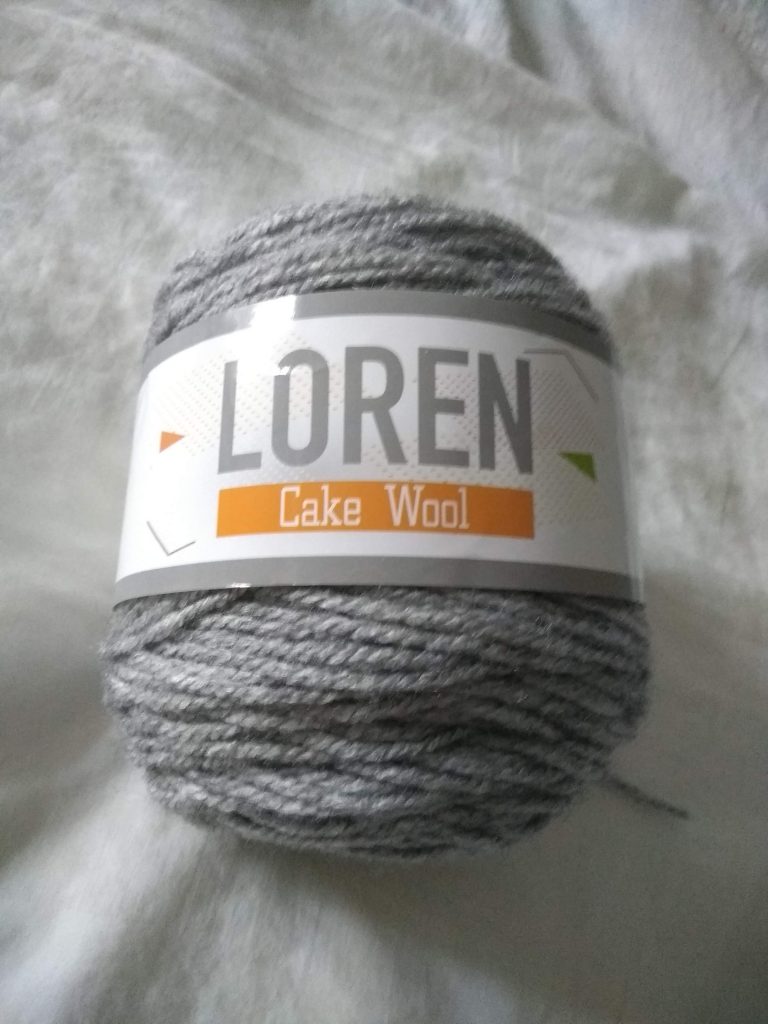
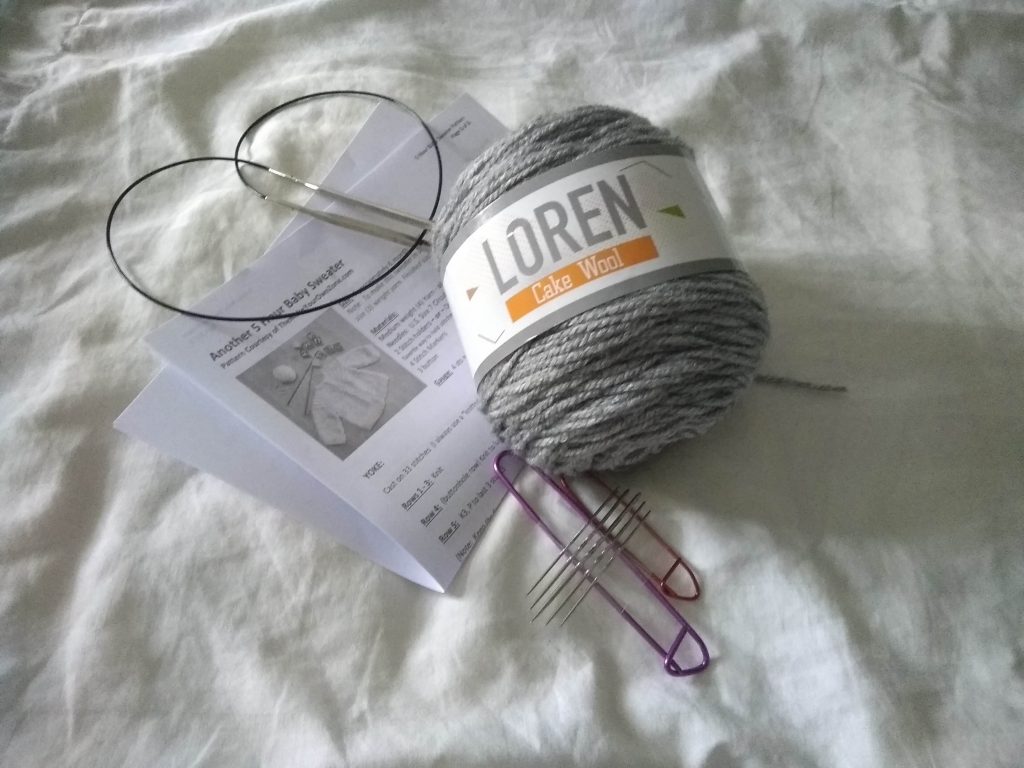
The wool:
I have this Loren cake wool that I picked up in Wilko, of all places. It is 80% acrylic/20%wool. I think acrylic wool for babies is much kinder to new parents. This particular wool is machine washable at 30°C which isn’t totally ideal but it’s better than hand-wash only. The pattern calls for 4oz (which is approximately 100g) and since that is all I have of this wool it makes it the perfect project.
The needles:
I really love my KnitPro Lace needles. They are light and smooth. I find knitting with them really comfortable and so I use them for almost every project that requires circular needles.
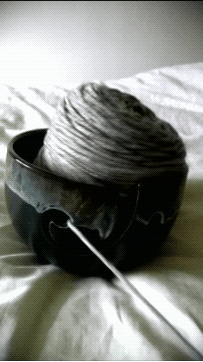
I am also going to test a new wool bowl. I bought this from Tiger because it looks pretty but haven’t used it yet. This cake wool looks like it will lend itself well to using it so I’ll let you know.
Here goes:
1 hour later….
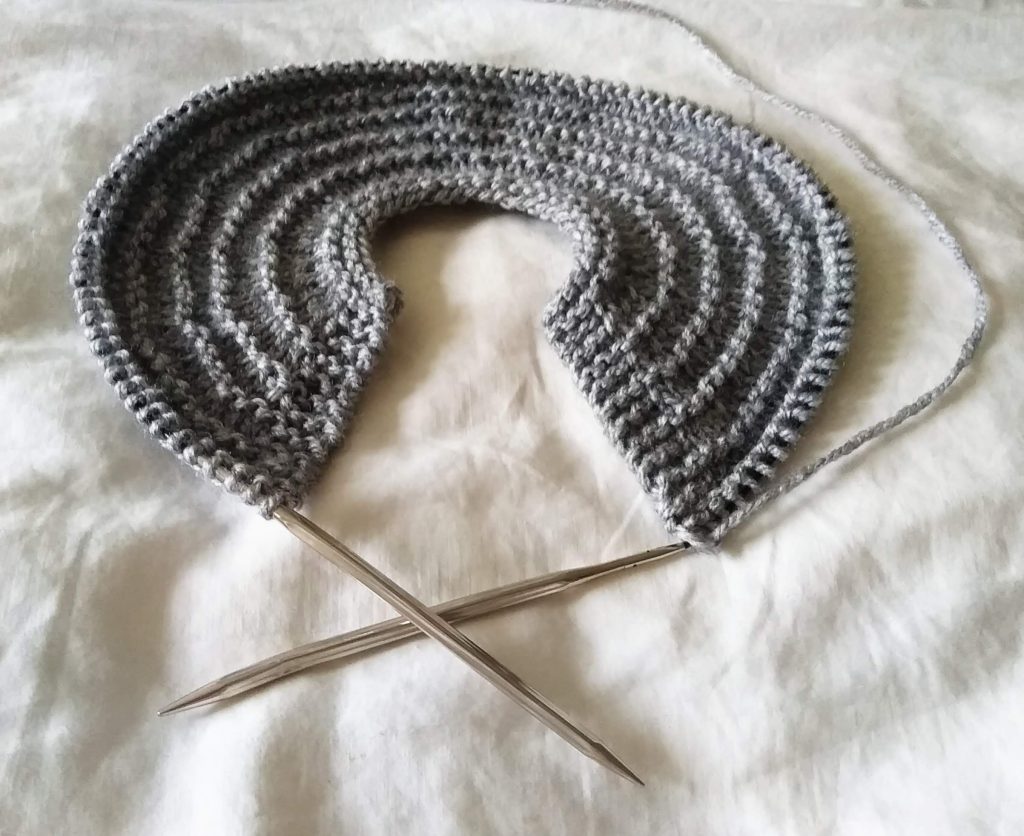
The first section, the yoke, took me 1 hour and 10 minutes. It’s only 25 rows but there is a lot of increases and the fingers are warming up.
I opted for KFB as my increase so it made a solid yoke. Previously I have used YO to add a little decoration and I am also planning (one day) to design a zigzag pattern rather than the straight lines in this pattern.
1 hour and 40 minutes…
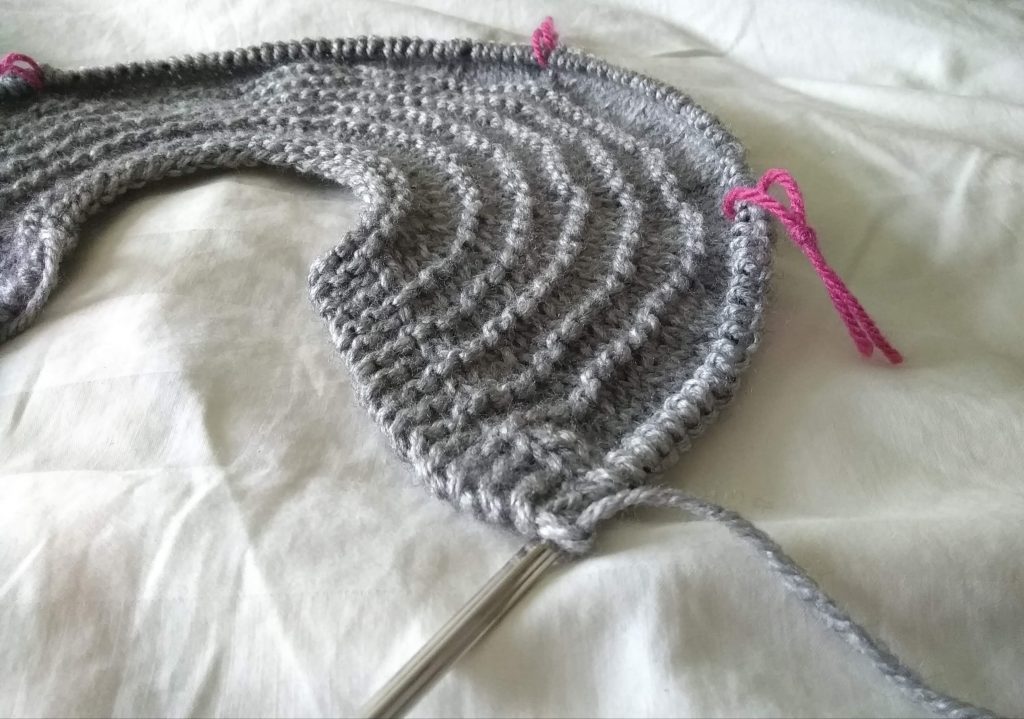
I have completed the increases. I have made and put in markers to separate out the fronts, back and sleeves.
I use a different colour wool as a marker for a few reasons.
1: I am cheap. I don’t want to pay for stitch markers when I have more wool than I need.
2: I lose little things. I can barely keep track of my keys and purse, never mind tiny little stitch markers. I have bought and lost many a tiny stitch marker.
3: I am lazy. I have wool to hand but I store my knitting stuff upstairs. Unless I was organised to bring them downstairs at the start, I won’t be getting up to get them.
2 hours and 30 minutes…
Halfway through my time and I have finished the first sleeve.
I stopped for lunch because I thought my fingers might drop off. It is quite intense knitting to a deadline as tight as this one feels. It’s amazing how timing yourself can make you feel like you’re knitting slowly even when you’re trying to knit fast.
End of hour 3…
By just over 3 hours, the sun was going down and I had completed the second sleeve.
And so, I have 1 hour 50 minutes to knit the body of the jumper. That feels like a long time but the last 3 hours have told me that they will fly by…
End of hour 4…
It’s easy knitting but a long slog. I find I keep counting rows because I think I must be farther along that I am.
Hour 5…
It is done.
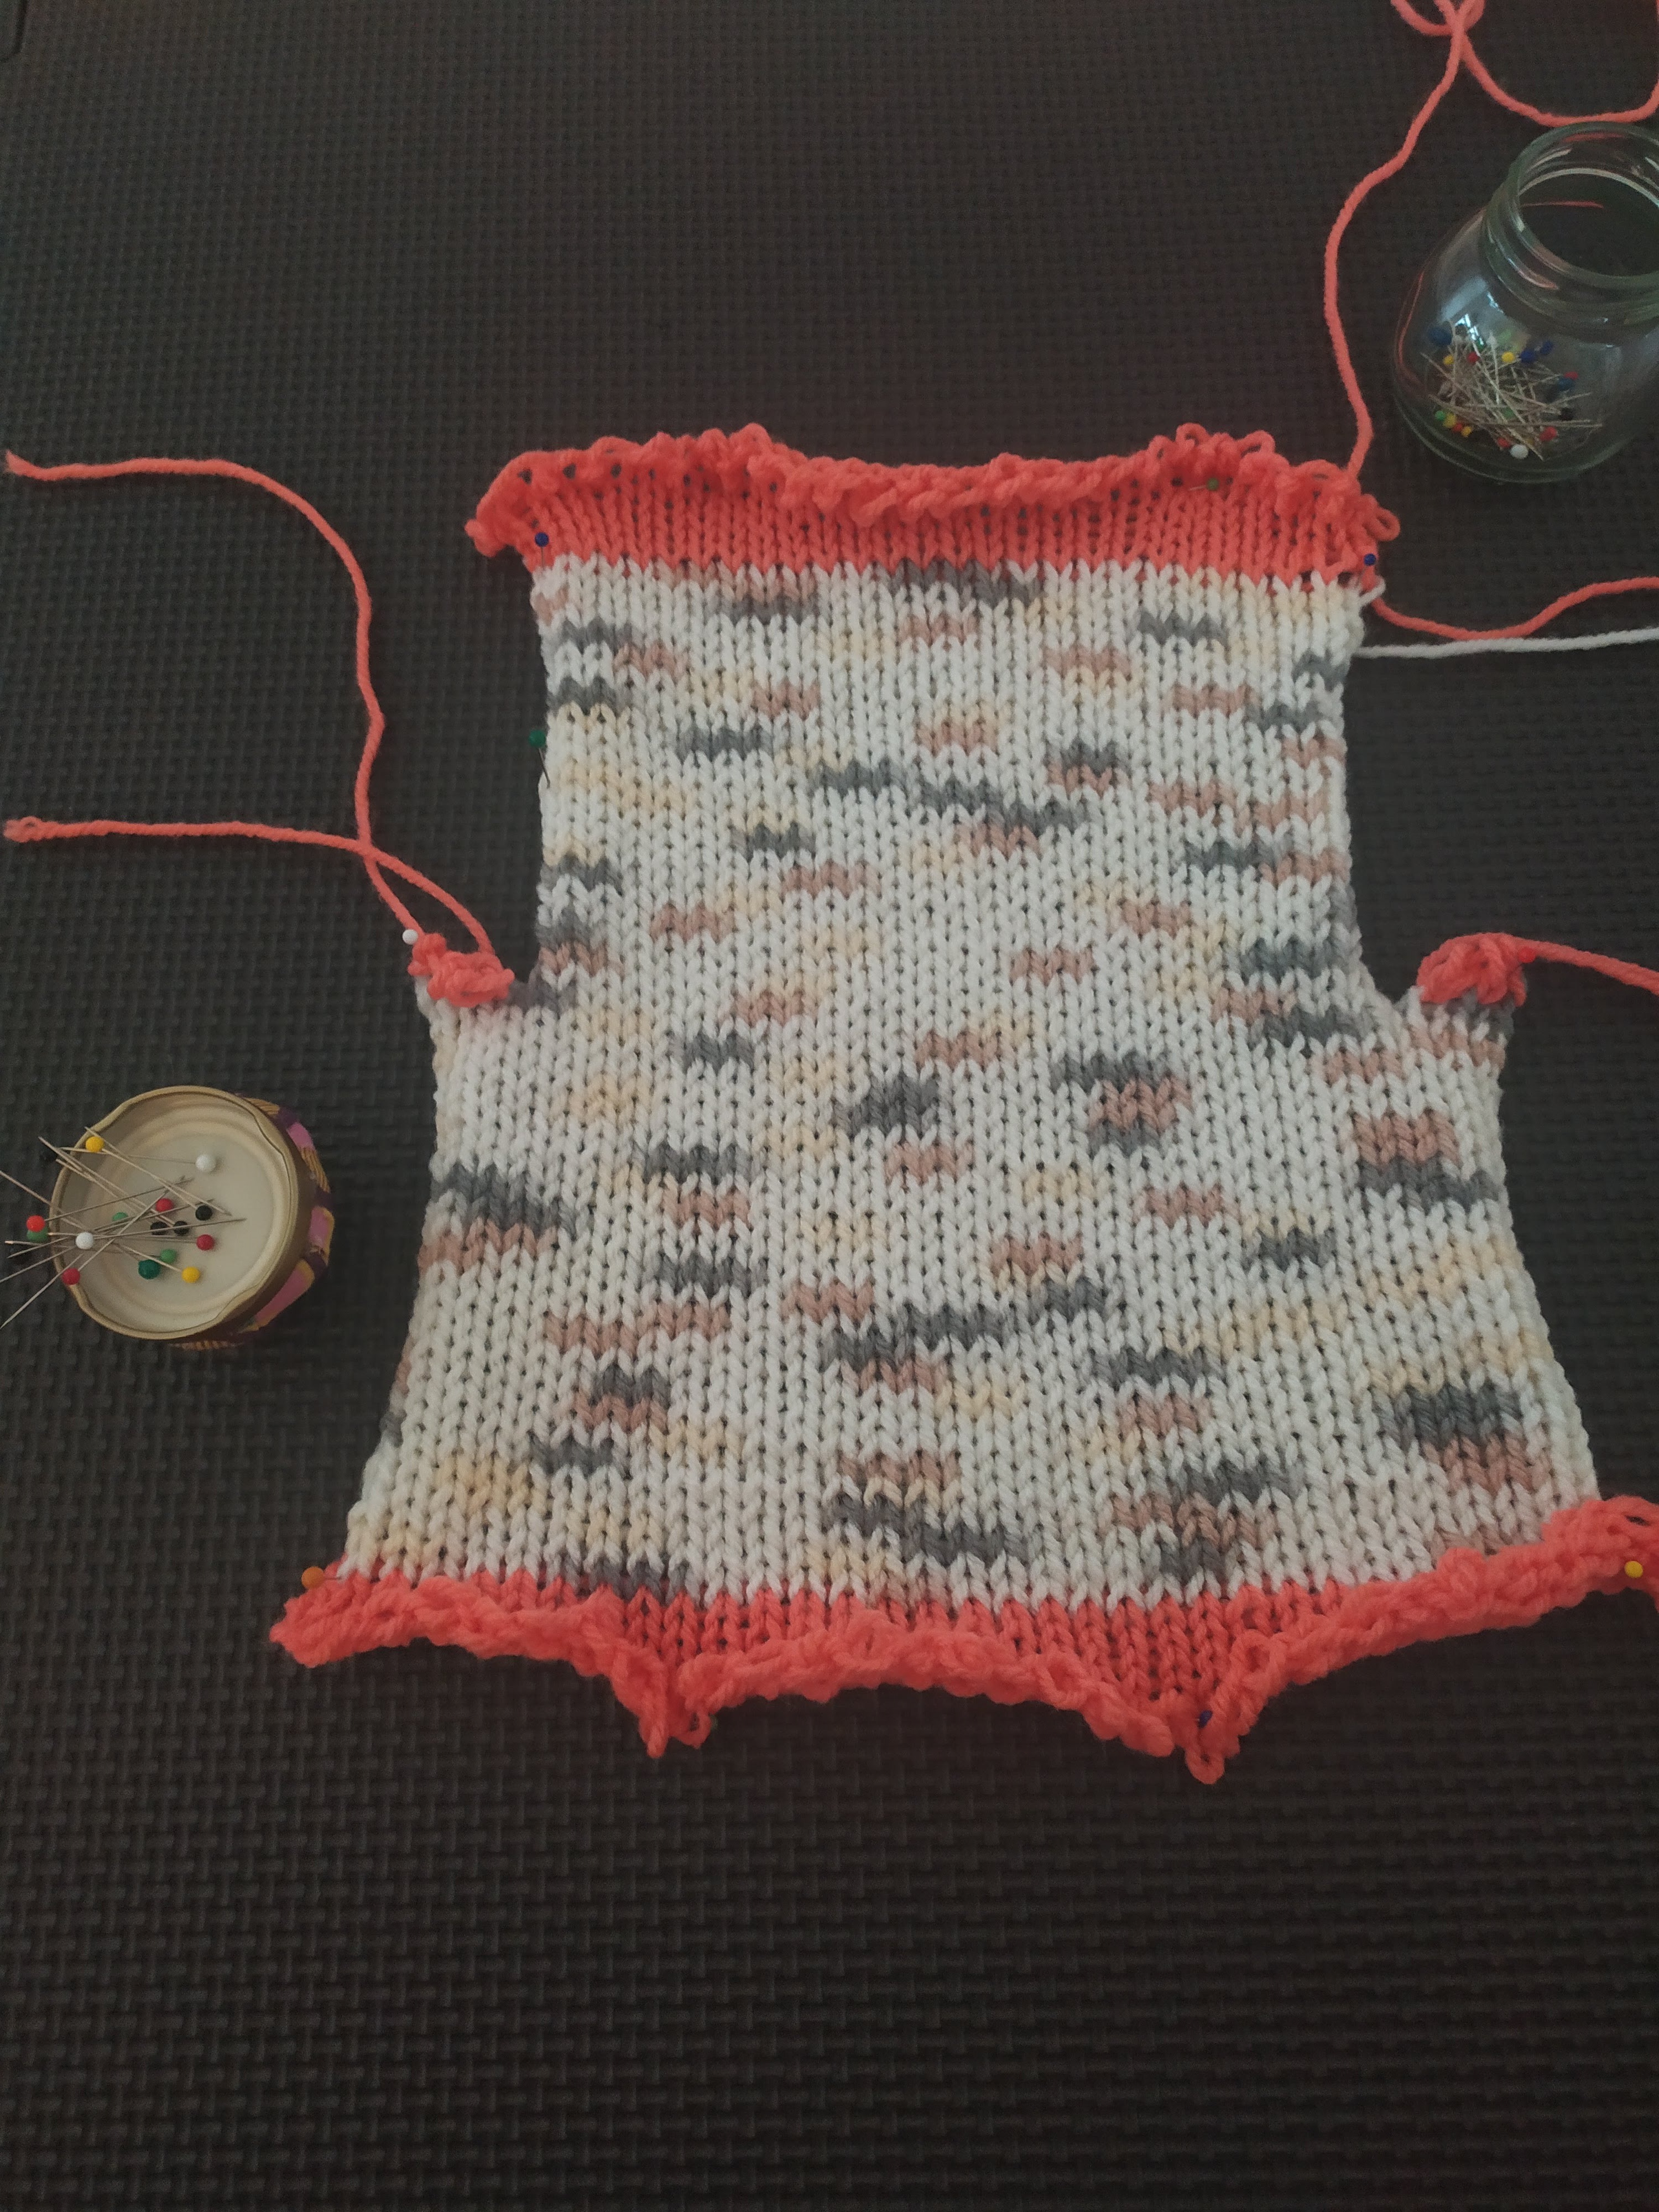
Sure enough – a baby jumper in just under 5 hour. All that needs to be done is sewing up the arms, weaving in the ends and attaching buttons. Then wrap it and give it to the new baby.
But…
While you can knit it in 5 hours that is a measure of actually knitting time. A finger numbing 5 hours…
I set out today to do only this but I had to eat, drink, live life and rest my fingers and so it took me 11 hours to actually finish knitting. Not only that but I haven’t done the finishing. I was going to but I can barely type, never mind sew a seam!
Also, this is a pattern I am familiar with, having knitted it a few times before, so that helped me keep my time. If it is the first time you are knitting it I would say it would take a lot longer.
Despite being familiar I still made mistakes:
I don’t know how I did it but I managed to pick up a stitch from somewhere and knitted it for 5 rows. Normally I would have unpicked and started again but I was on a timer and I didn’t think I would make it if I did that.
This is the kind of mistake that no-one but you will notice so I don’t feel too guilty about giving this one away but just bare it mind if you’re planning to knit one in an evening for a baby shower you forgot about tomorrow.
All in all, this is a great pattern to keep to hand for those “don’t know what else to knit” days and especially when you’re on a time limit or have lots of babies to knit for. It’s easily editable to make each one slightly different and helps you show your thoughtful side to many friends at once.
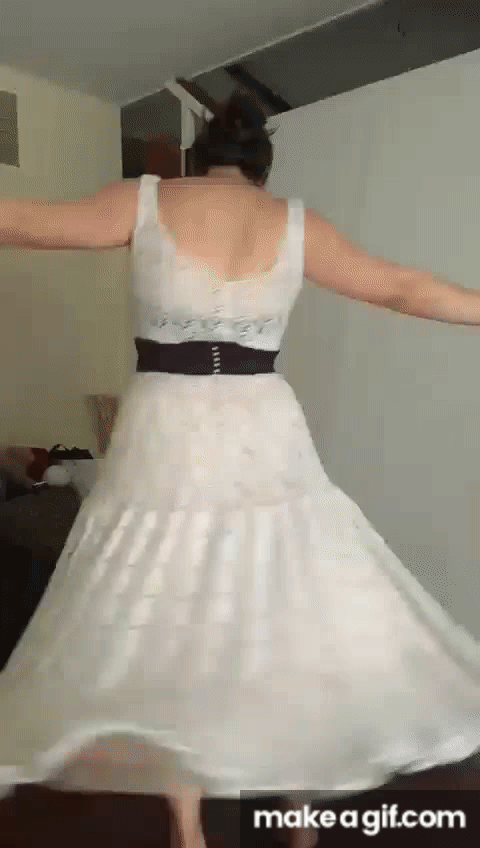
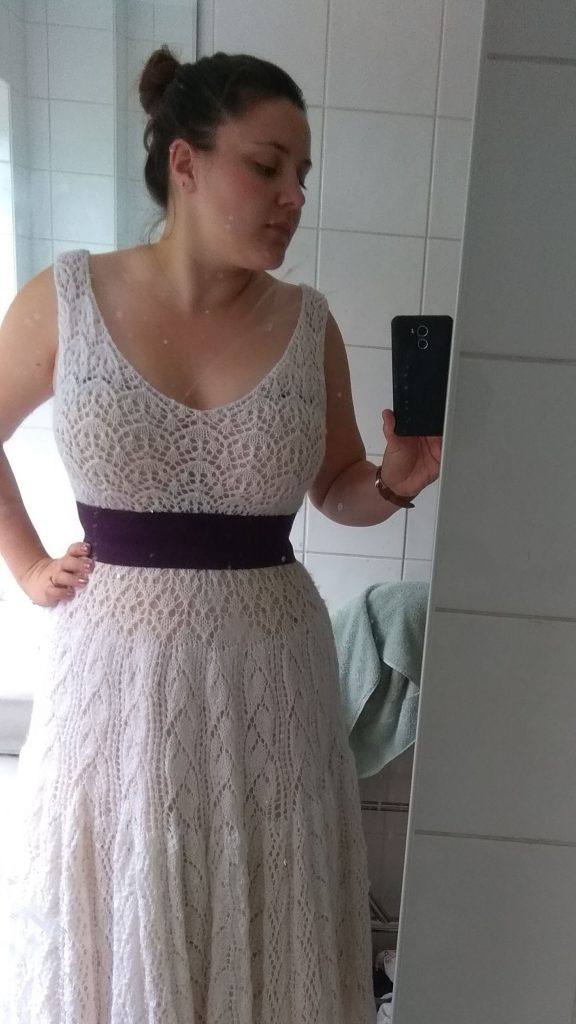
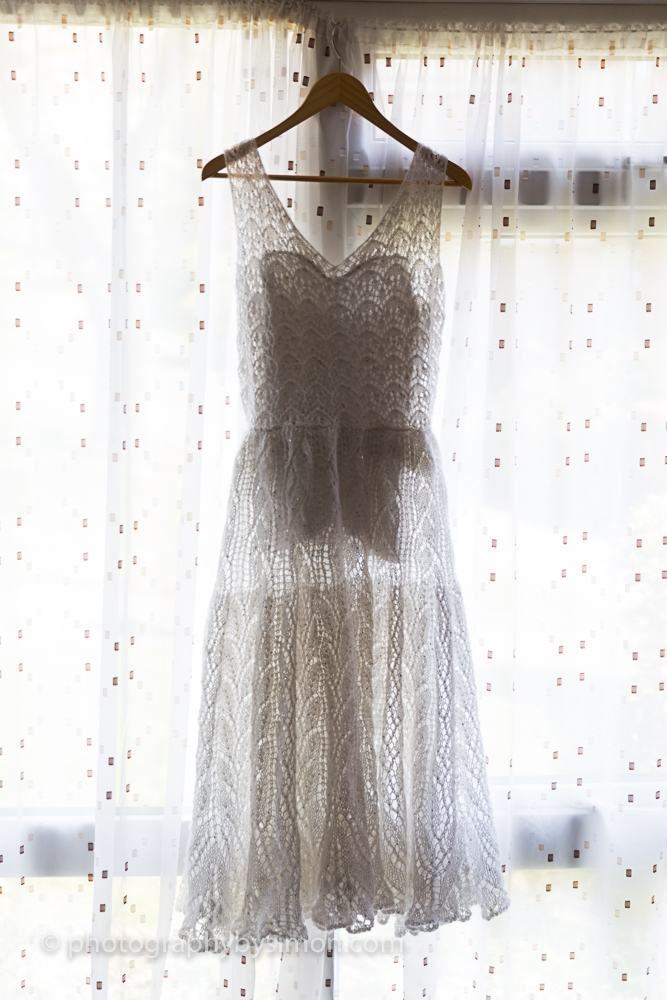
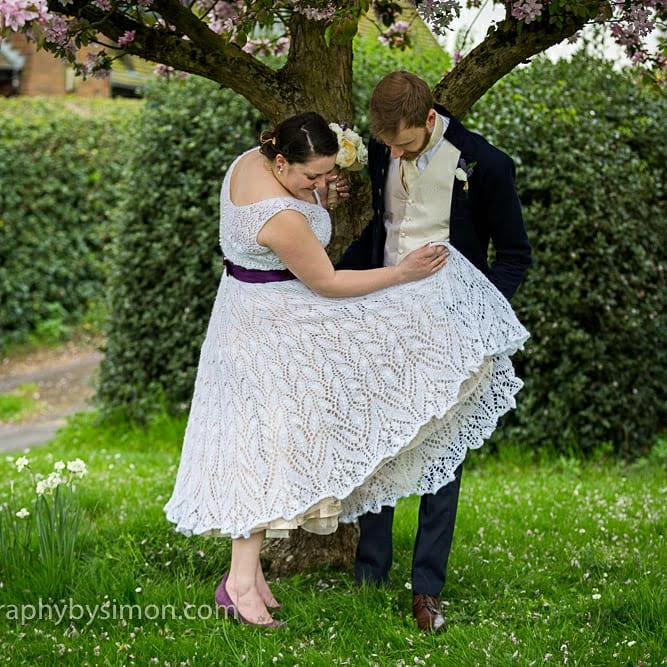
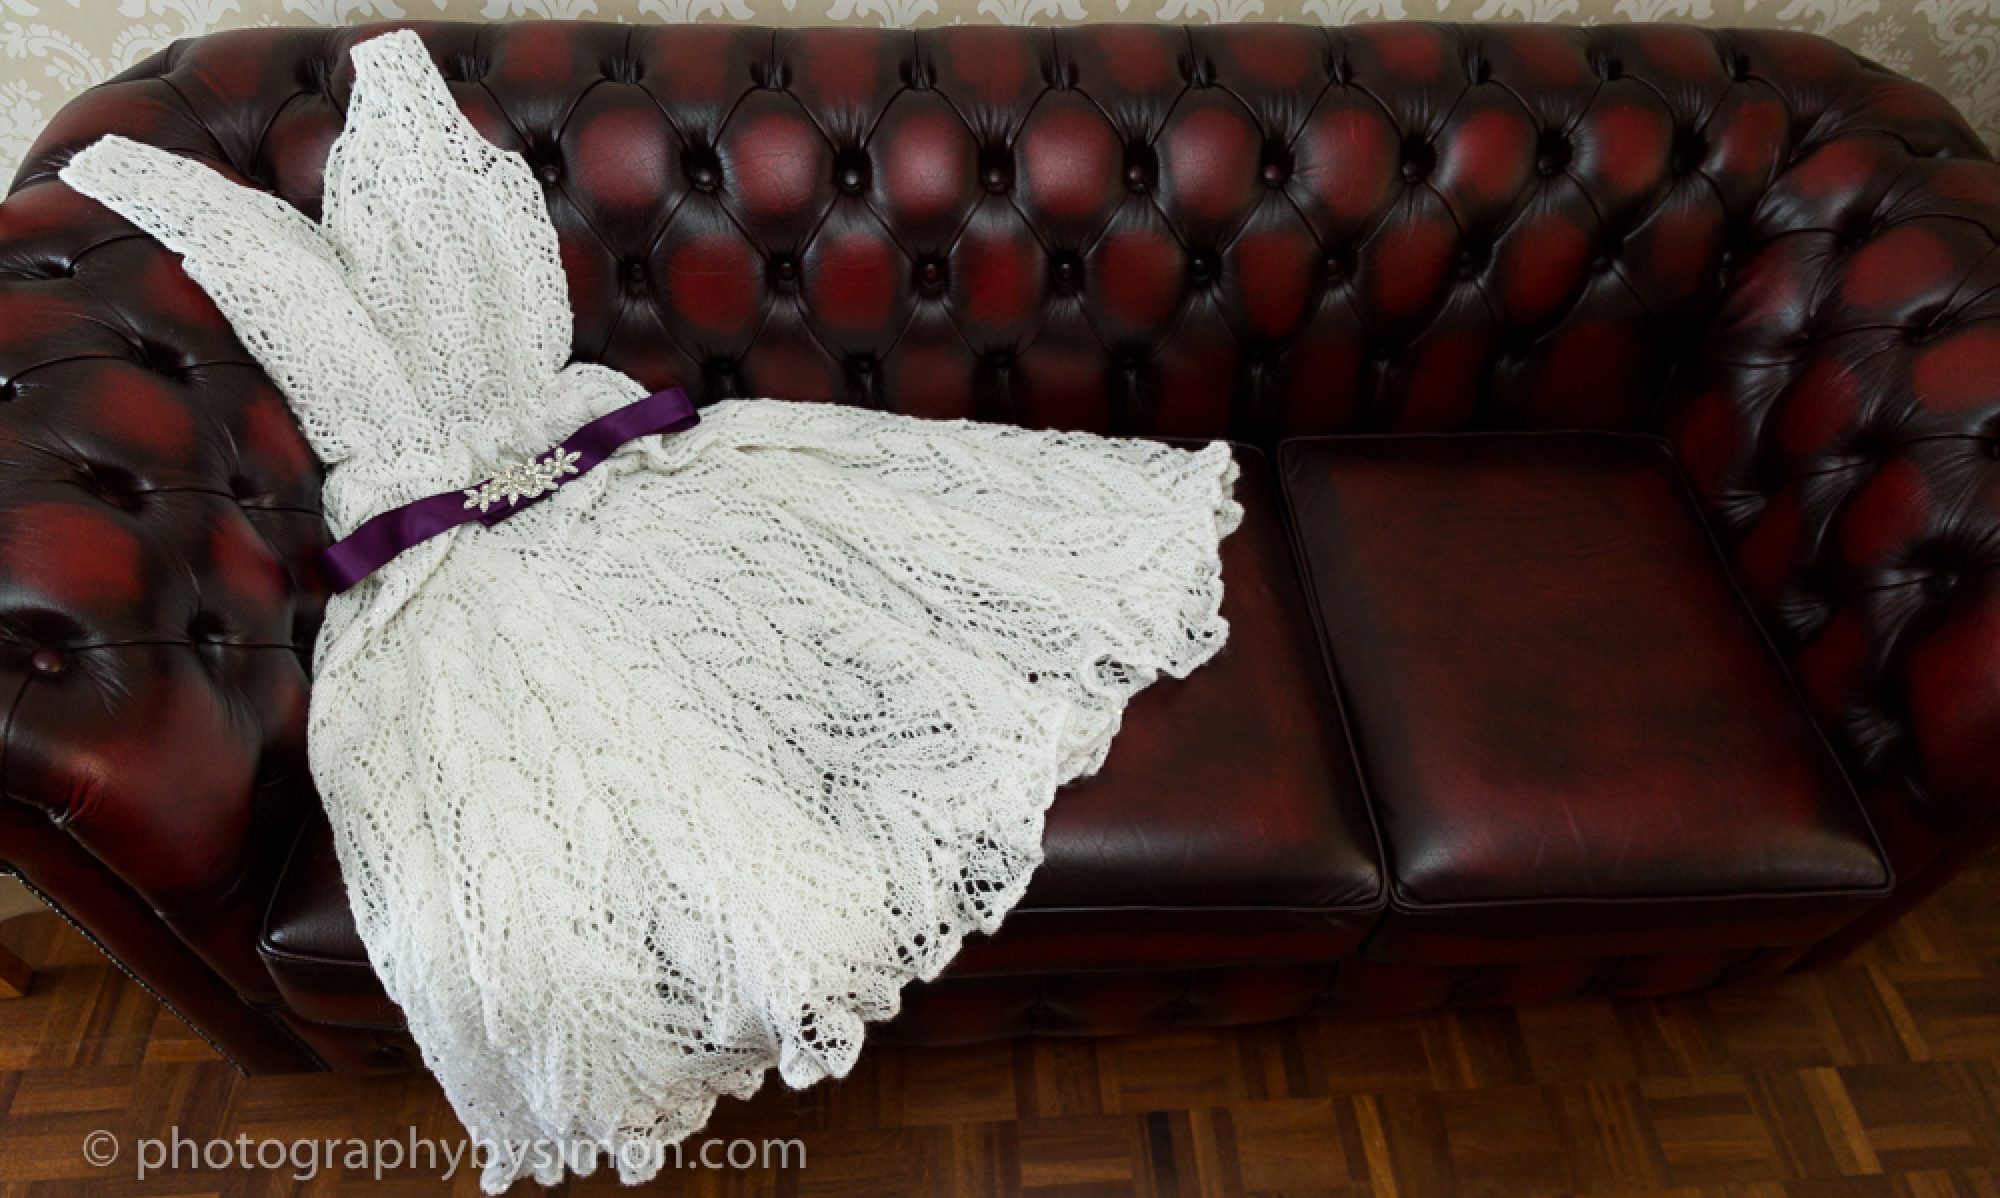
It came as no surprise to the people who know and love me that I knitted my own wedding dress. I still don’t know where the idea came from but once I had it, it took hold and I couldn’t stop until I had done it! It was a simple project in the end. Very lengthy but so worth while. I highly recommend it!
I am also proud that I managed to keep the whole thing a secret from my husband.
You will need:
Good quality circular needles: I used Addi Click Lace
Lace weight wool: I used Patons Lace Sequin in Crystal
Stitch markers
Imagination
Many a good film or TV series to keep you company
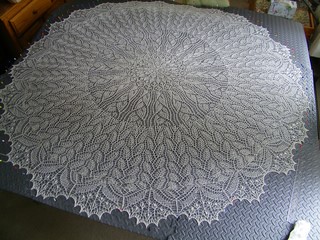
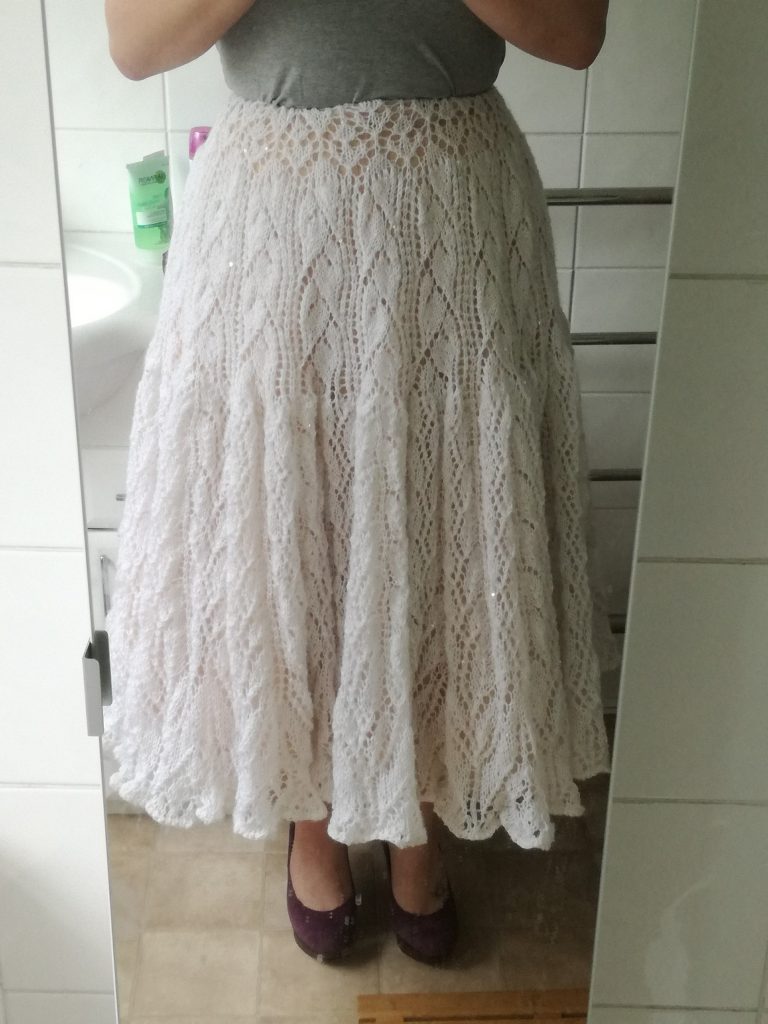
The skirt
As soon as I saw Renata Brenner’s Heliotaxis Pi Shawl I fell
in love. I knew I wanted a leafy design in my dress and this could not have
been more perfect
copyright: Renata Brenner
The shawl pattern is available on Ravelry and is really easy to follow. It knits up really quickly and it really looks like I worked much harder at it than it felt like I did.
See YouTube on in the background so I don’t go completely mad!
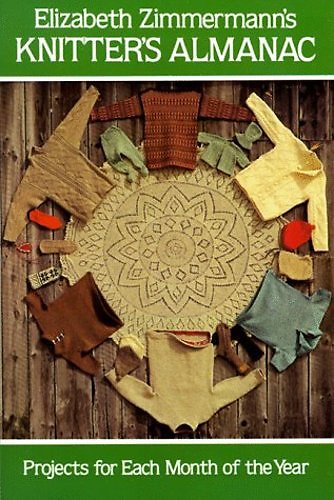
The Pi shawl was created by Elizabeth Zimmerman and is explained in great detail in her book:
If you follow her basic principle you can have any design you like for your skirt. You can make it as simple or as complicated as you like.
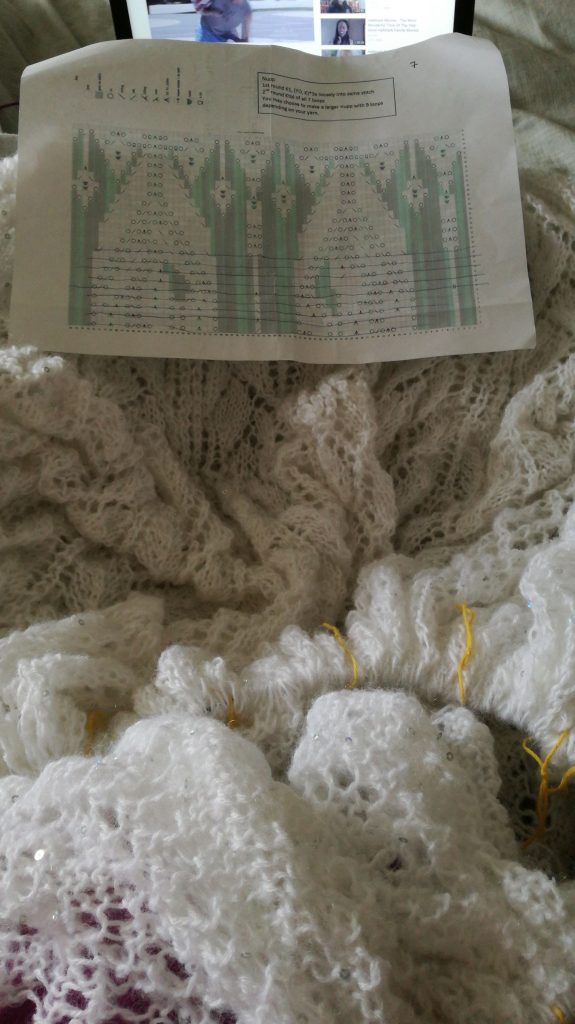
To make it a skirt rather than a shawl I skipped the first rounds and started at row 26 by casting on 144 stitches onto 5mm needles.
I follow the pattern exactly using stitch markers to keep
track of where I was.
At the very end, to add a little more flare, I gradually increased the needle size. From row 103 I did 2 repeats in 5mm and then I went up 1mm at each repeat until I was at 8mm. I them finished of with the 8mm needles.
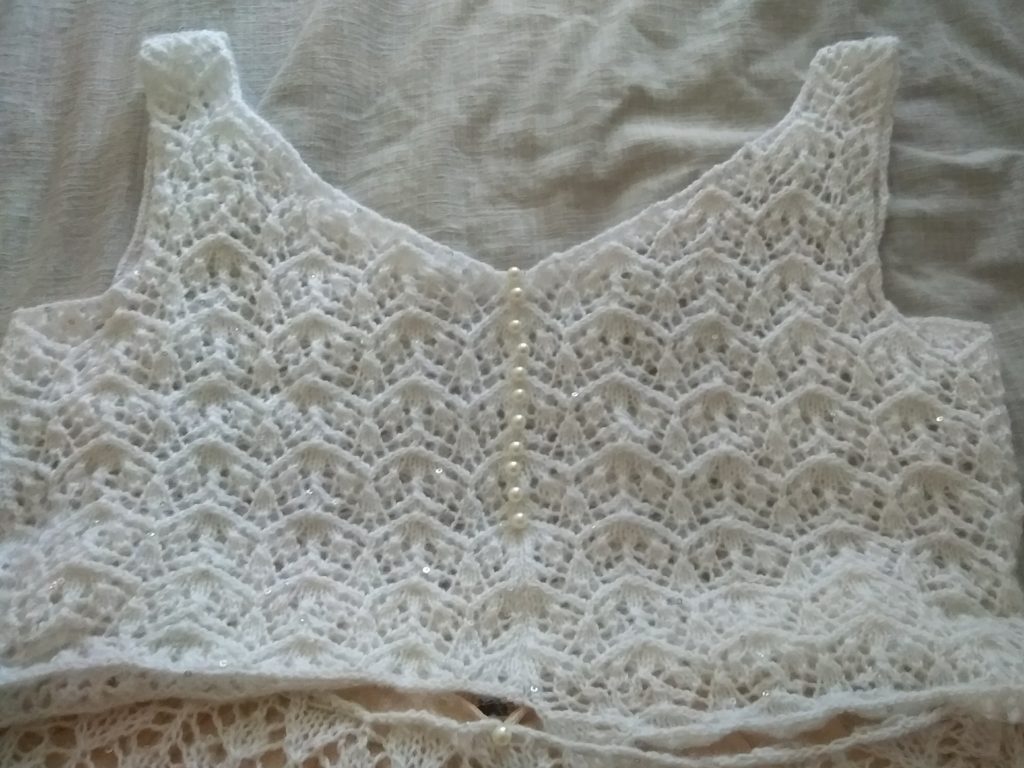
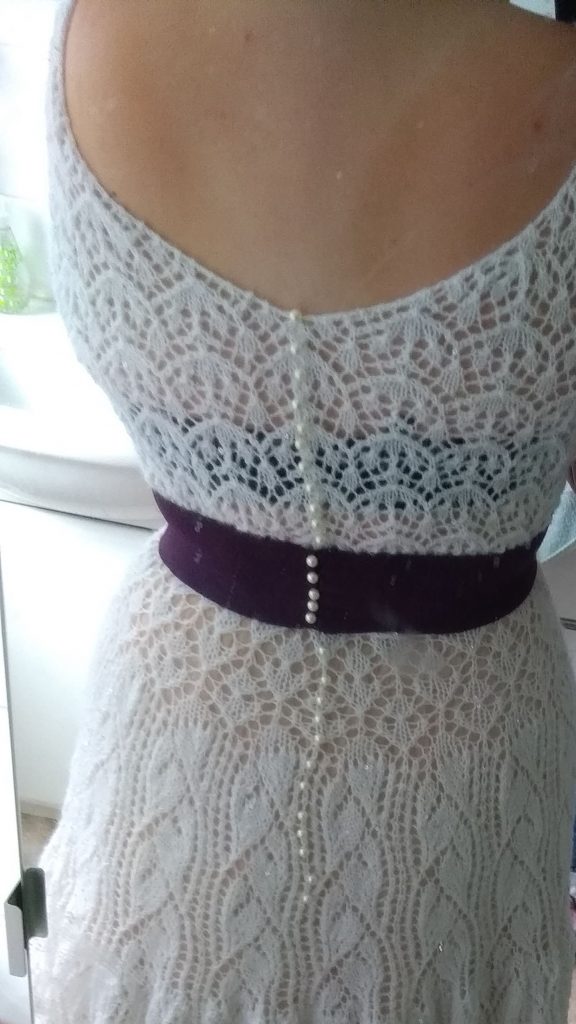
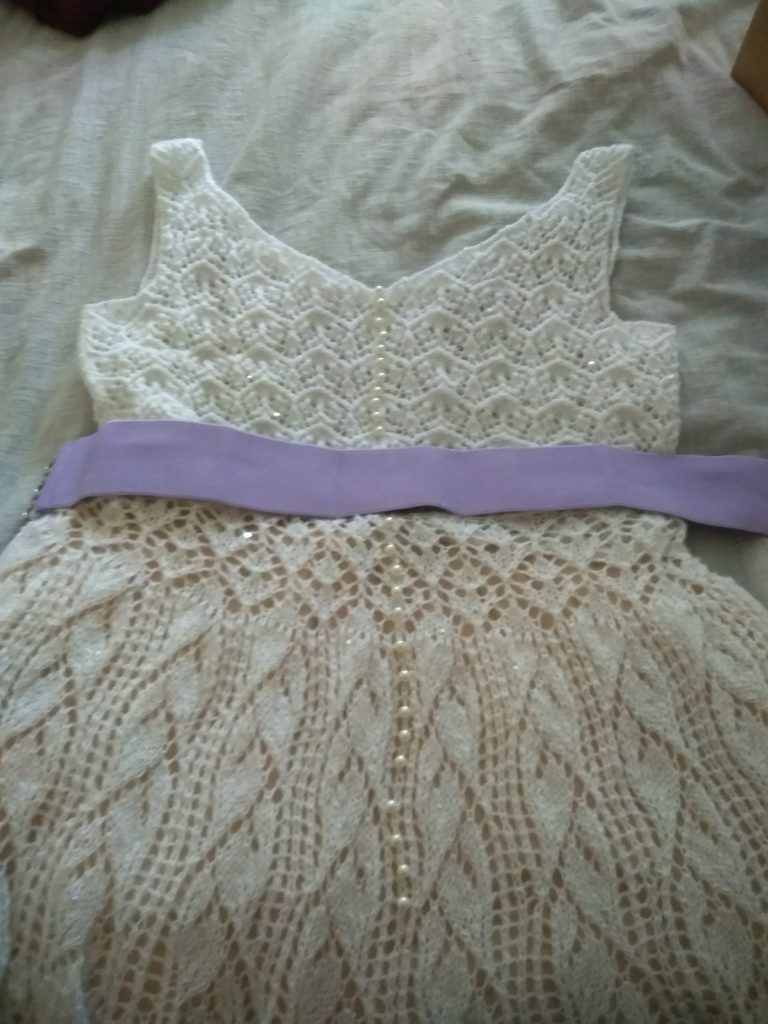
I knitted 2 the same (front and back). The lace is so loose that there is no need to knit 2 panels for the back – I just wanted it to look like there were so I sewed buttons down the middle.
Making up:
I put both pieces on (many times) and sent endless photos to my long-suffering sister:
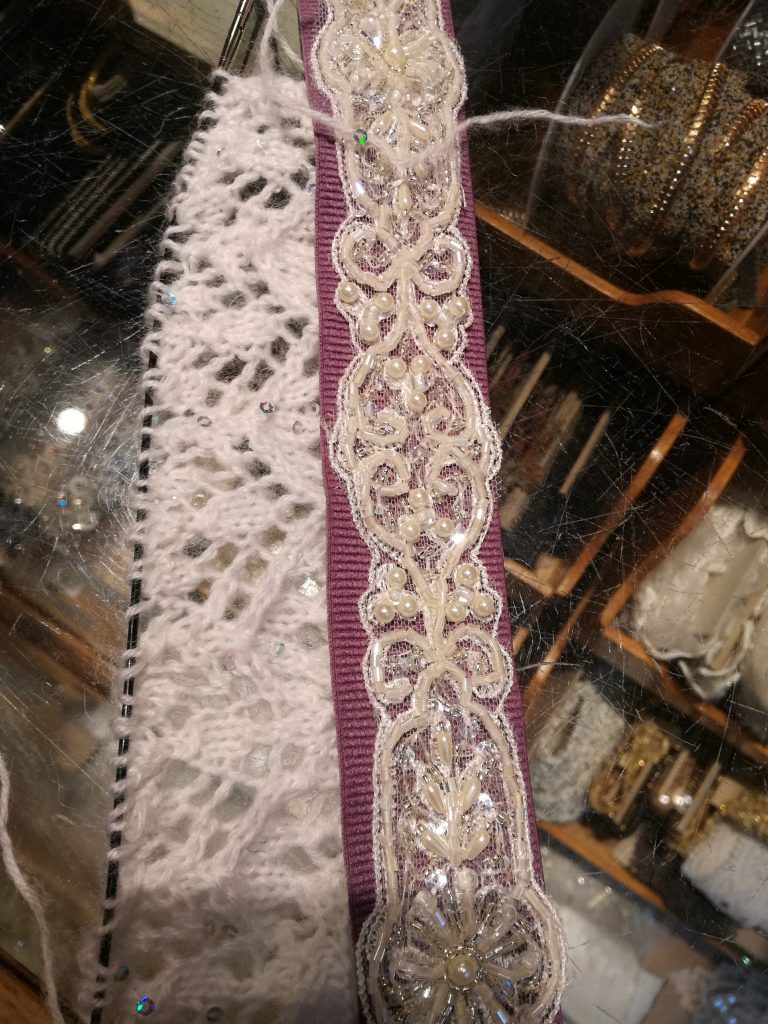
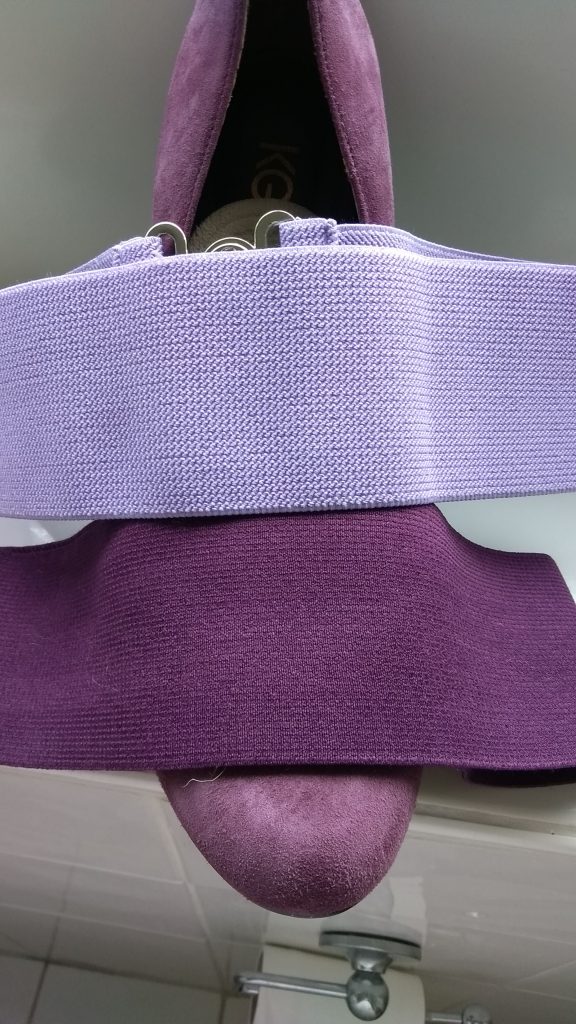
We started looking for embellishments to match my purple shoes:
…before settling on the dark purple you see in the final images.
I finally put the outfit on all together to decide how it should sit. My sisters decided that the skirt was too long so I ended up weaving elastic in about 2 inches from the original cast on and pulling it tight. This actually looked quite nice because it created a bit of extra “puff” around the hips. I decided to sew the top and bottom together after this so it would all stay in place on the day.
I bought a tutu skirt in the ASOS sale to go under the skirt and then I had to worry about the top.
I took a cheap white spaghetti strap vest top, turned it inside out and draw a sweetheart neckline on it. I recycled the spaghetti straps to edge it and the sewed this into the dress. It was not neat or pretty but no-one could see it!
And so:
What I learnt:
Knit a test square: I don’t always because I roughly know my tension with most wools but lace knitting is so different and comes out different each time so practising your tension will make it a more uniform piece.
Know what you want: The design is really important. You have
to know where you’re going before you start or you end up with mismatched
pieces and something that doesn’t quite fit right.
Don’t sweat the detail: I made SO many mistakes in this
dress. At first I would unpick and correct every mistake but as the dress
progressed most minor errors were hidden in the overall design and I only knew
they were there because I stared at it for so long while making it.
Just start: The hardest part was starting. I thought it was
ridiculous to think I could knit my own wedding dress but I started and then
just kept going.

 Cast off leaving a long enough tail to attach to the body
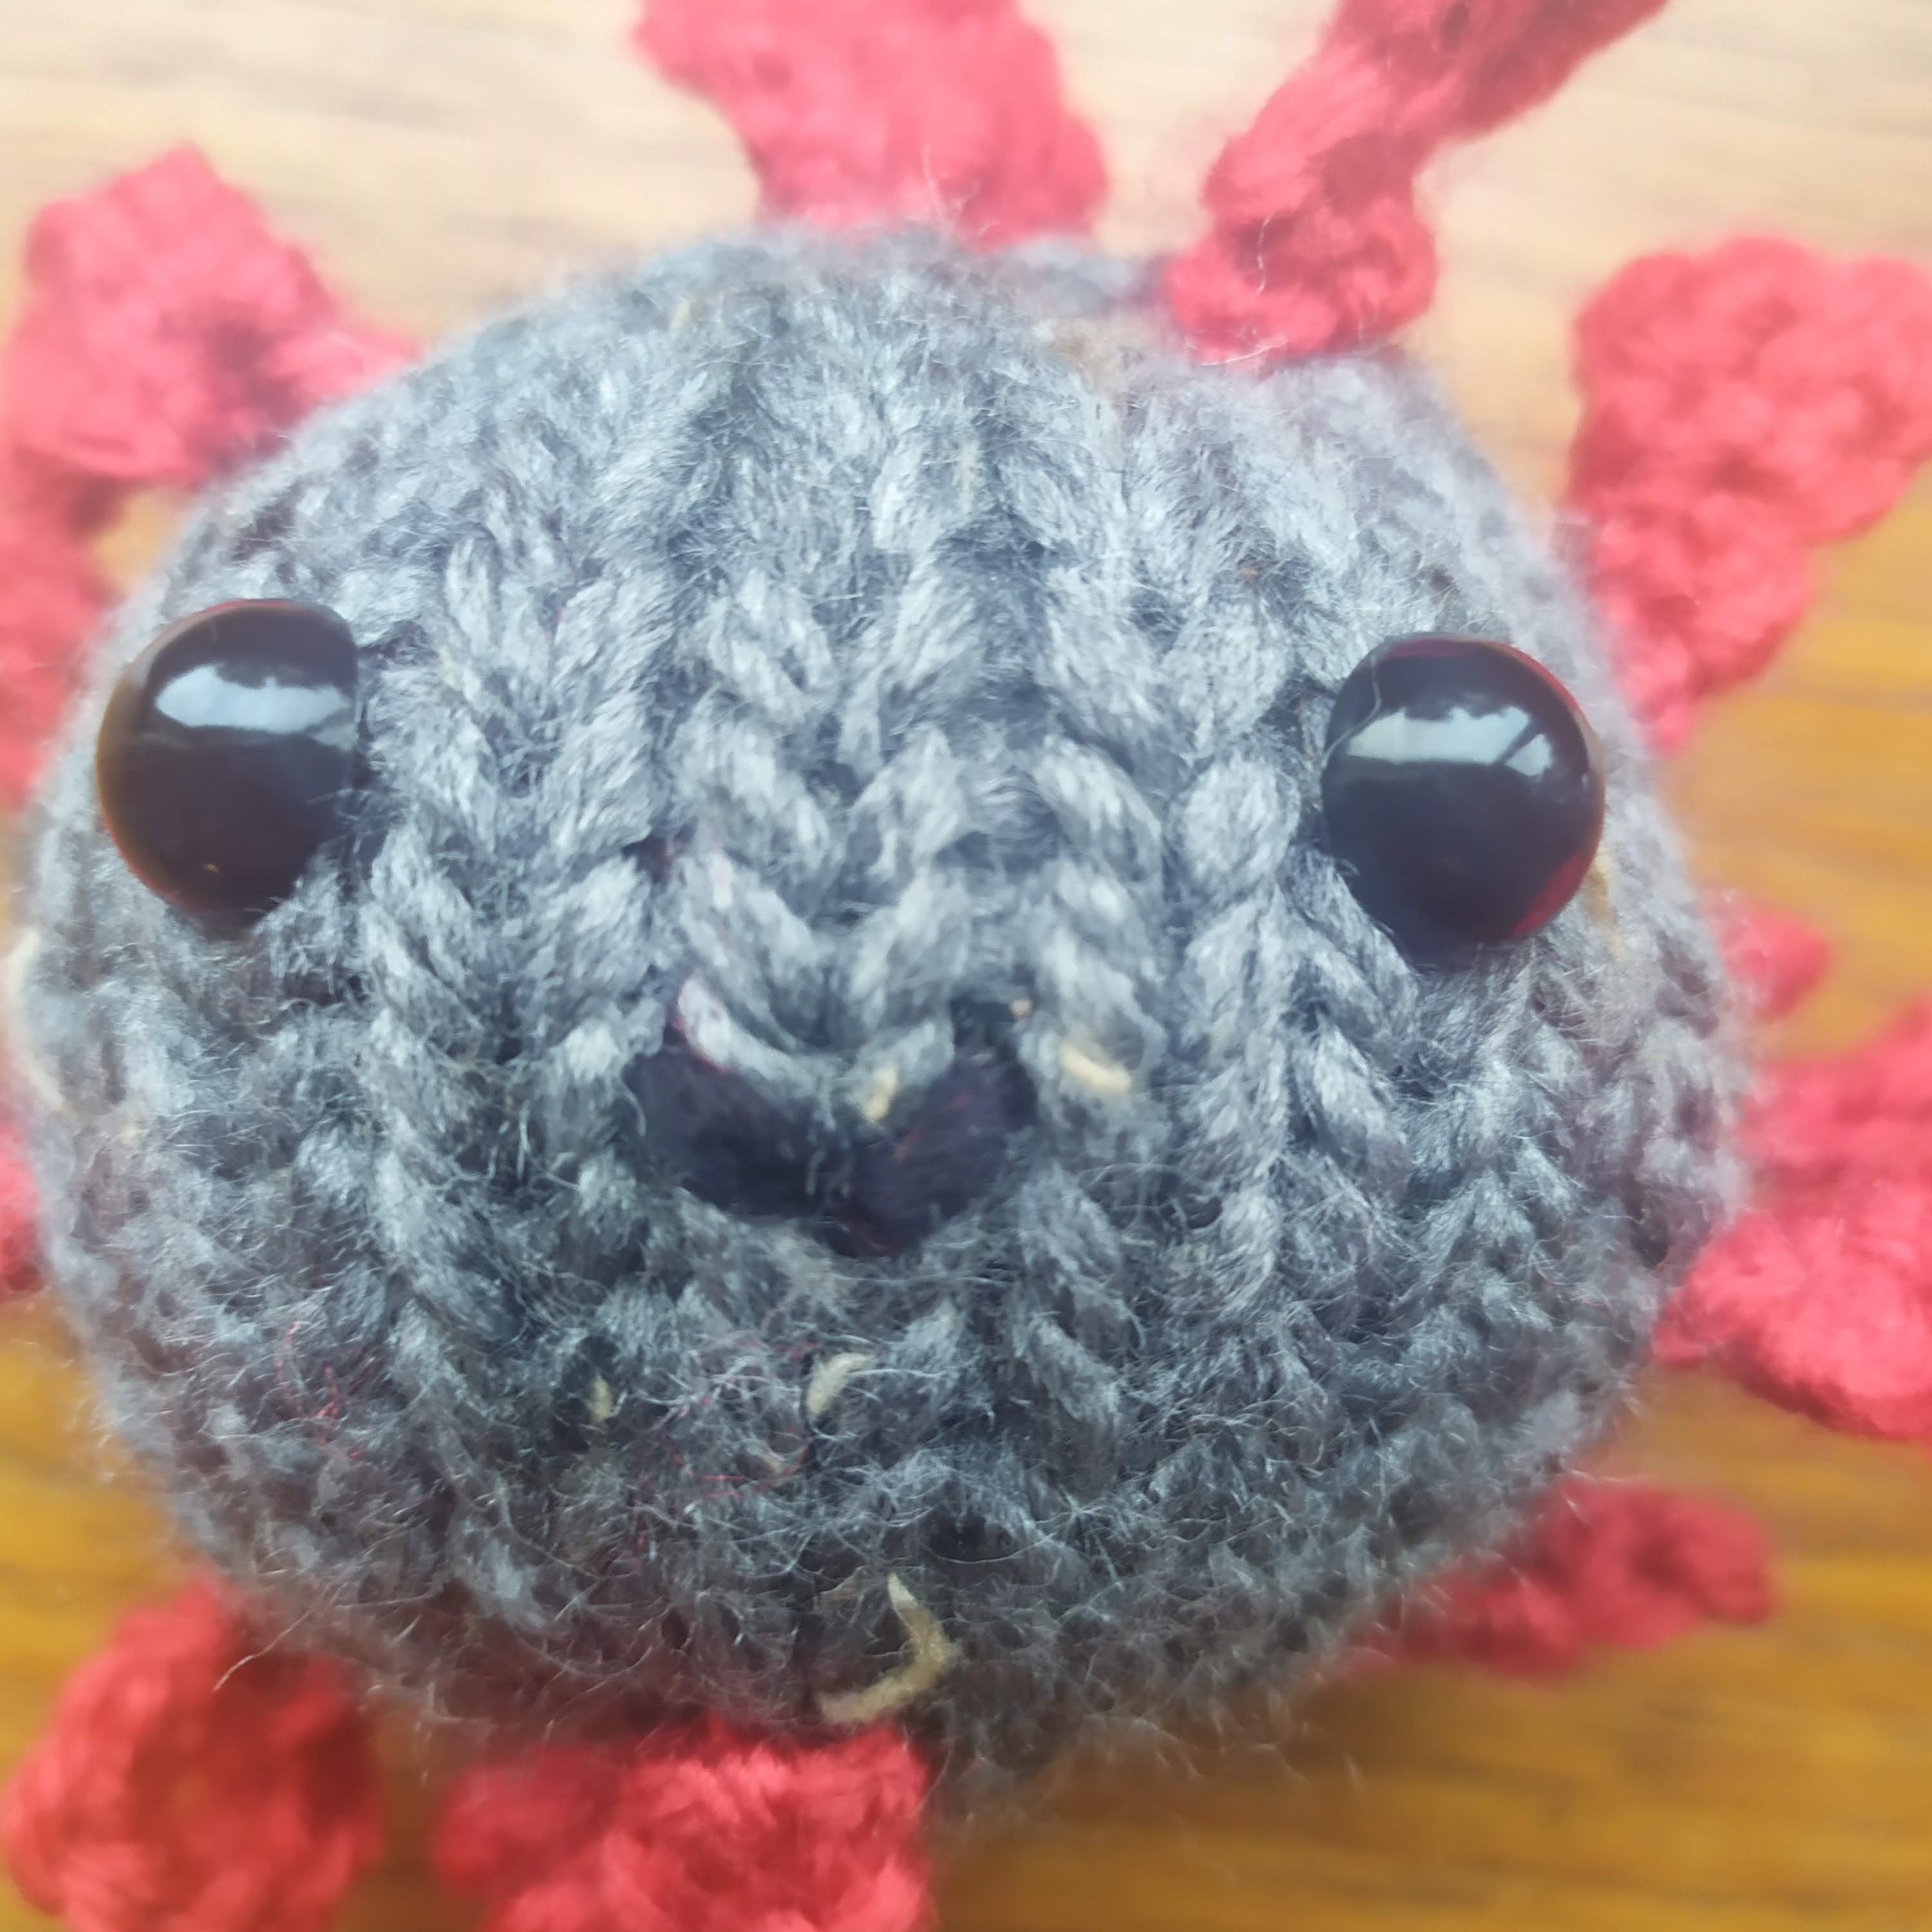

 Chain 16 (more for a longer adapter , fewer for a shorter one)
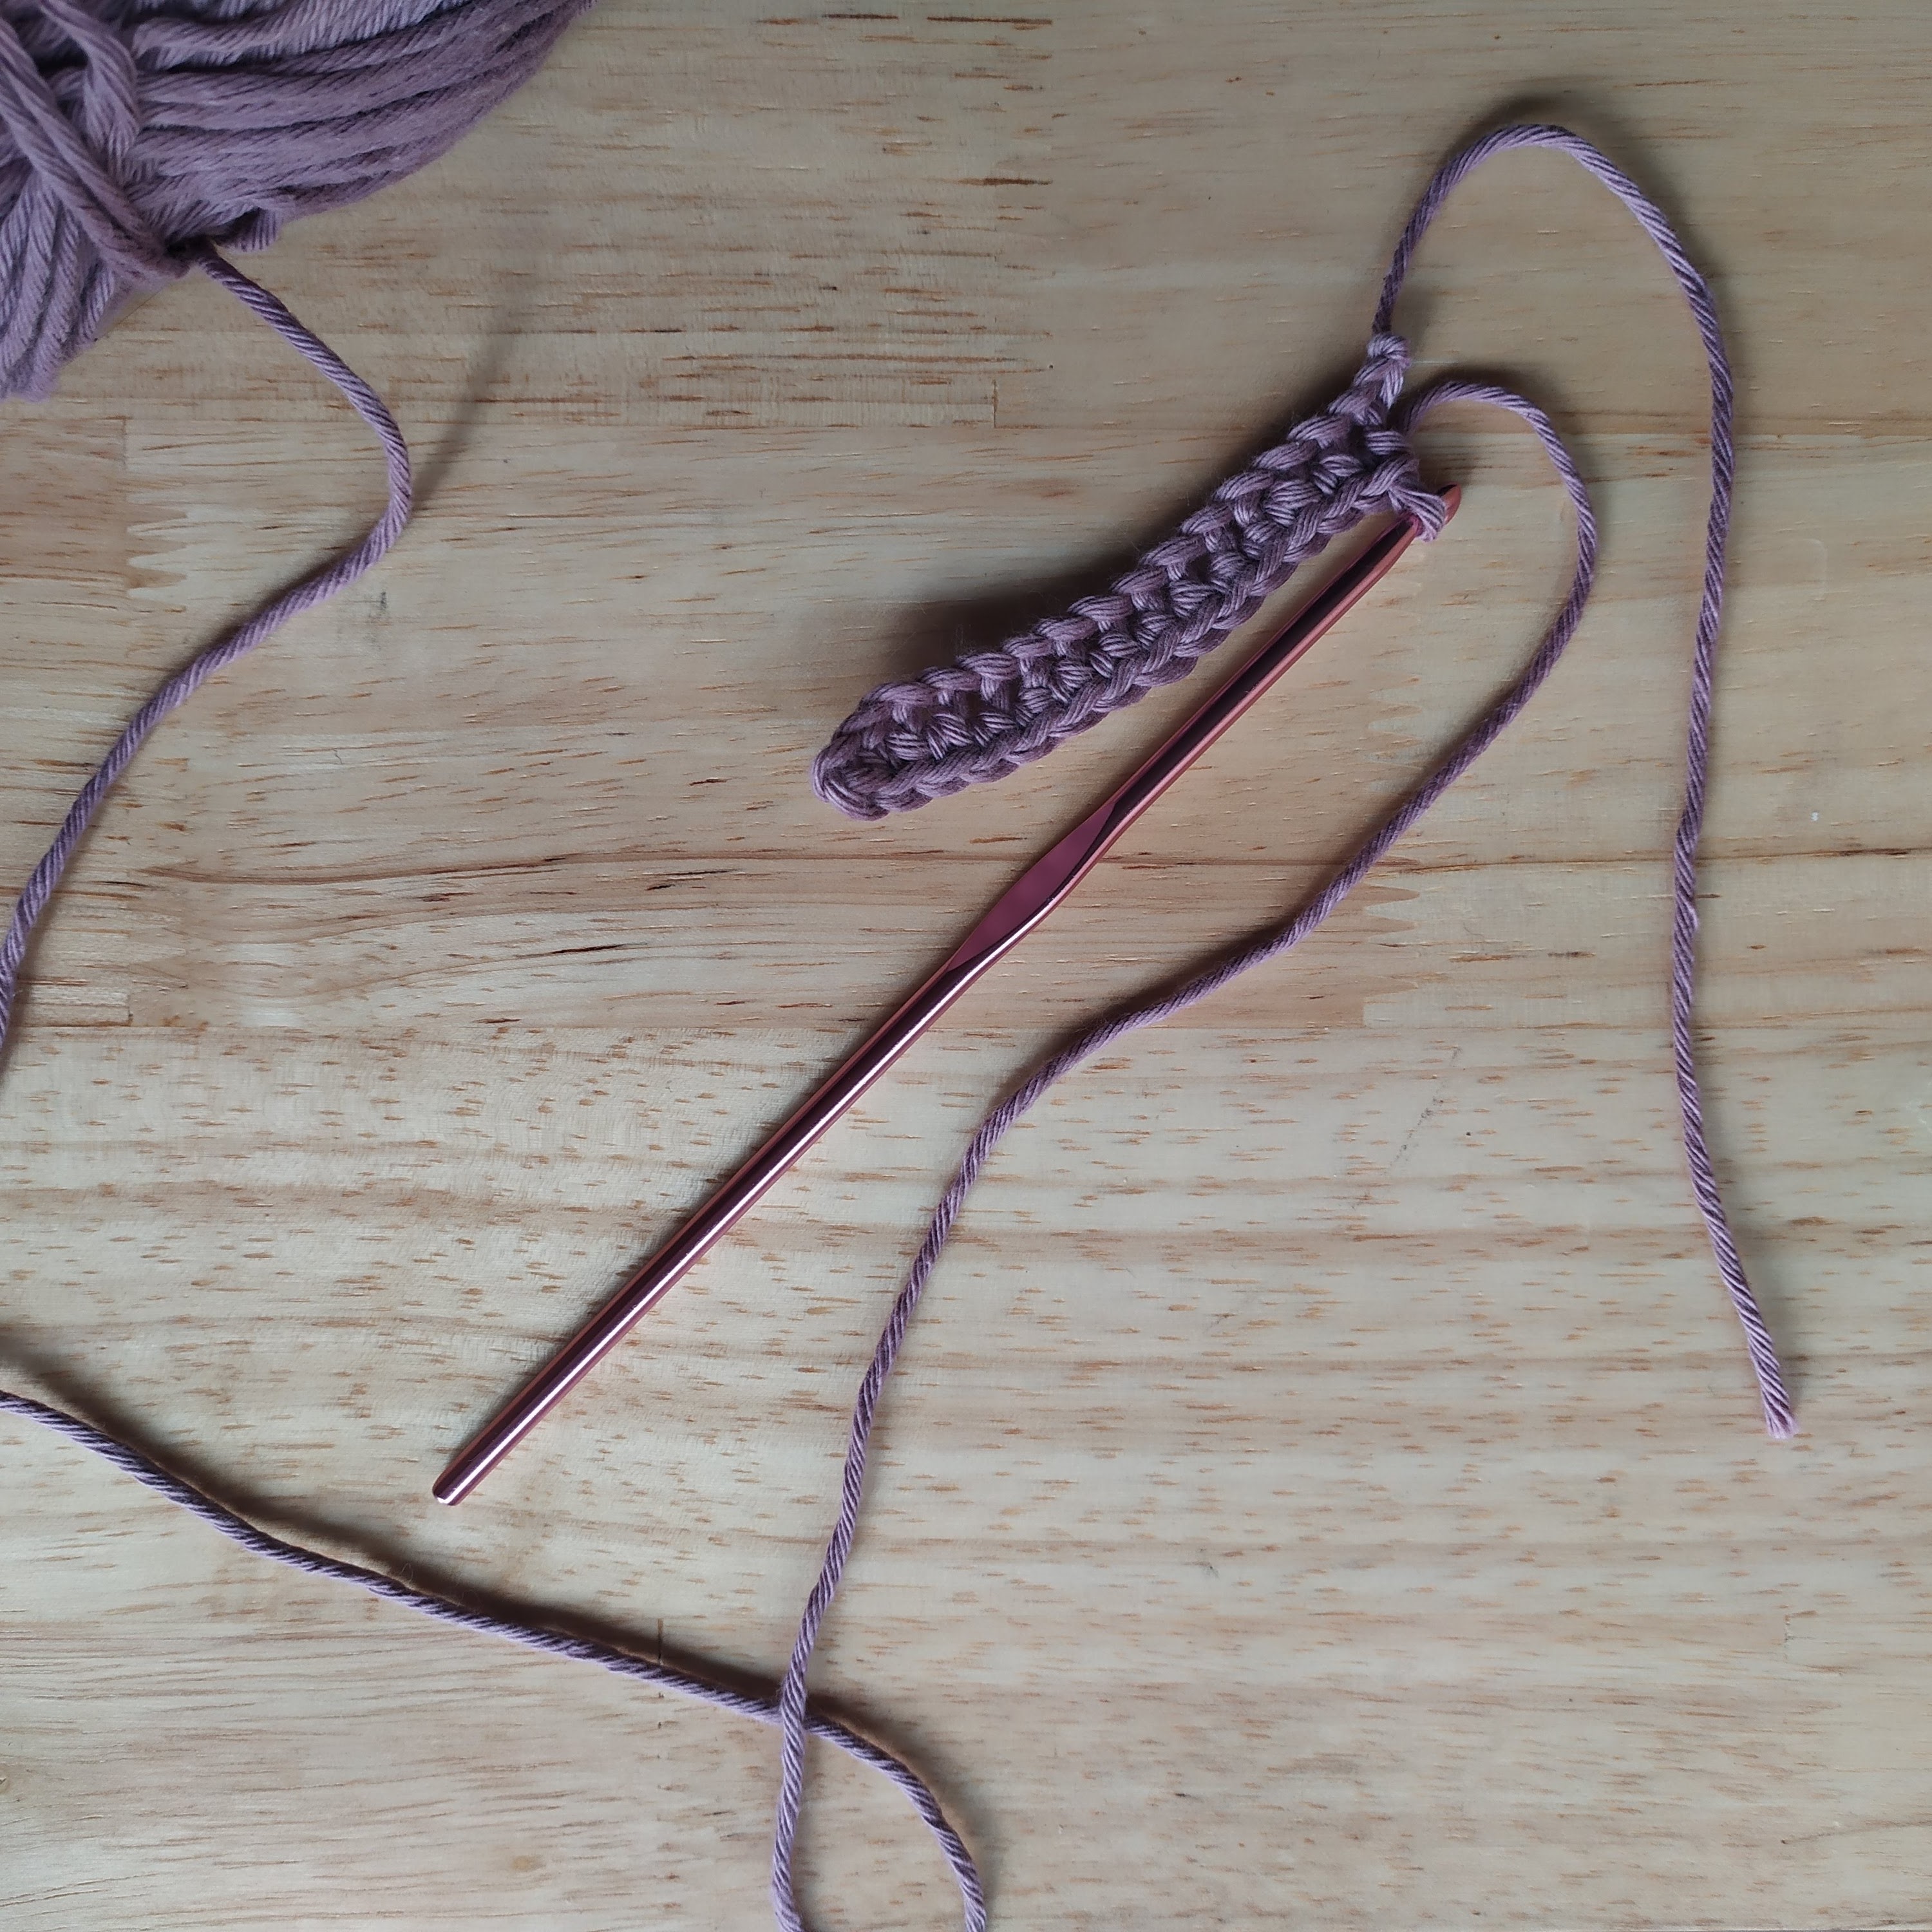 Dc in 2nd chain from hook, DC to 1 before last chain
  3DC in last chain
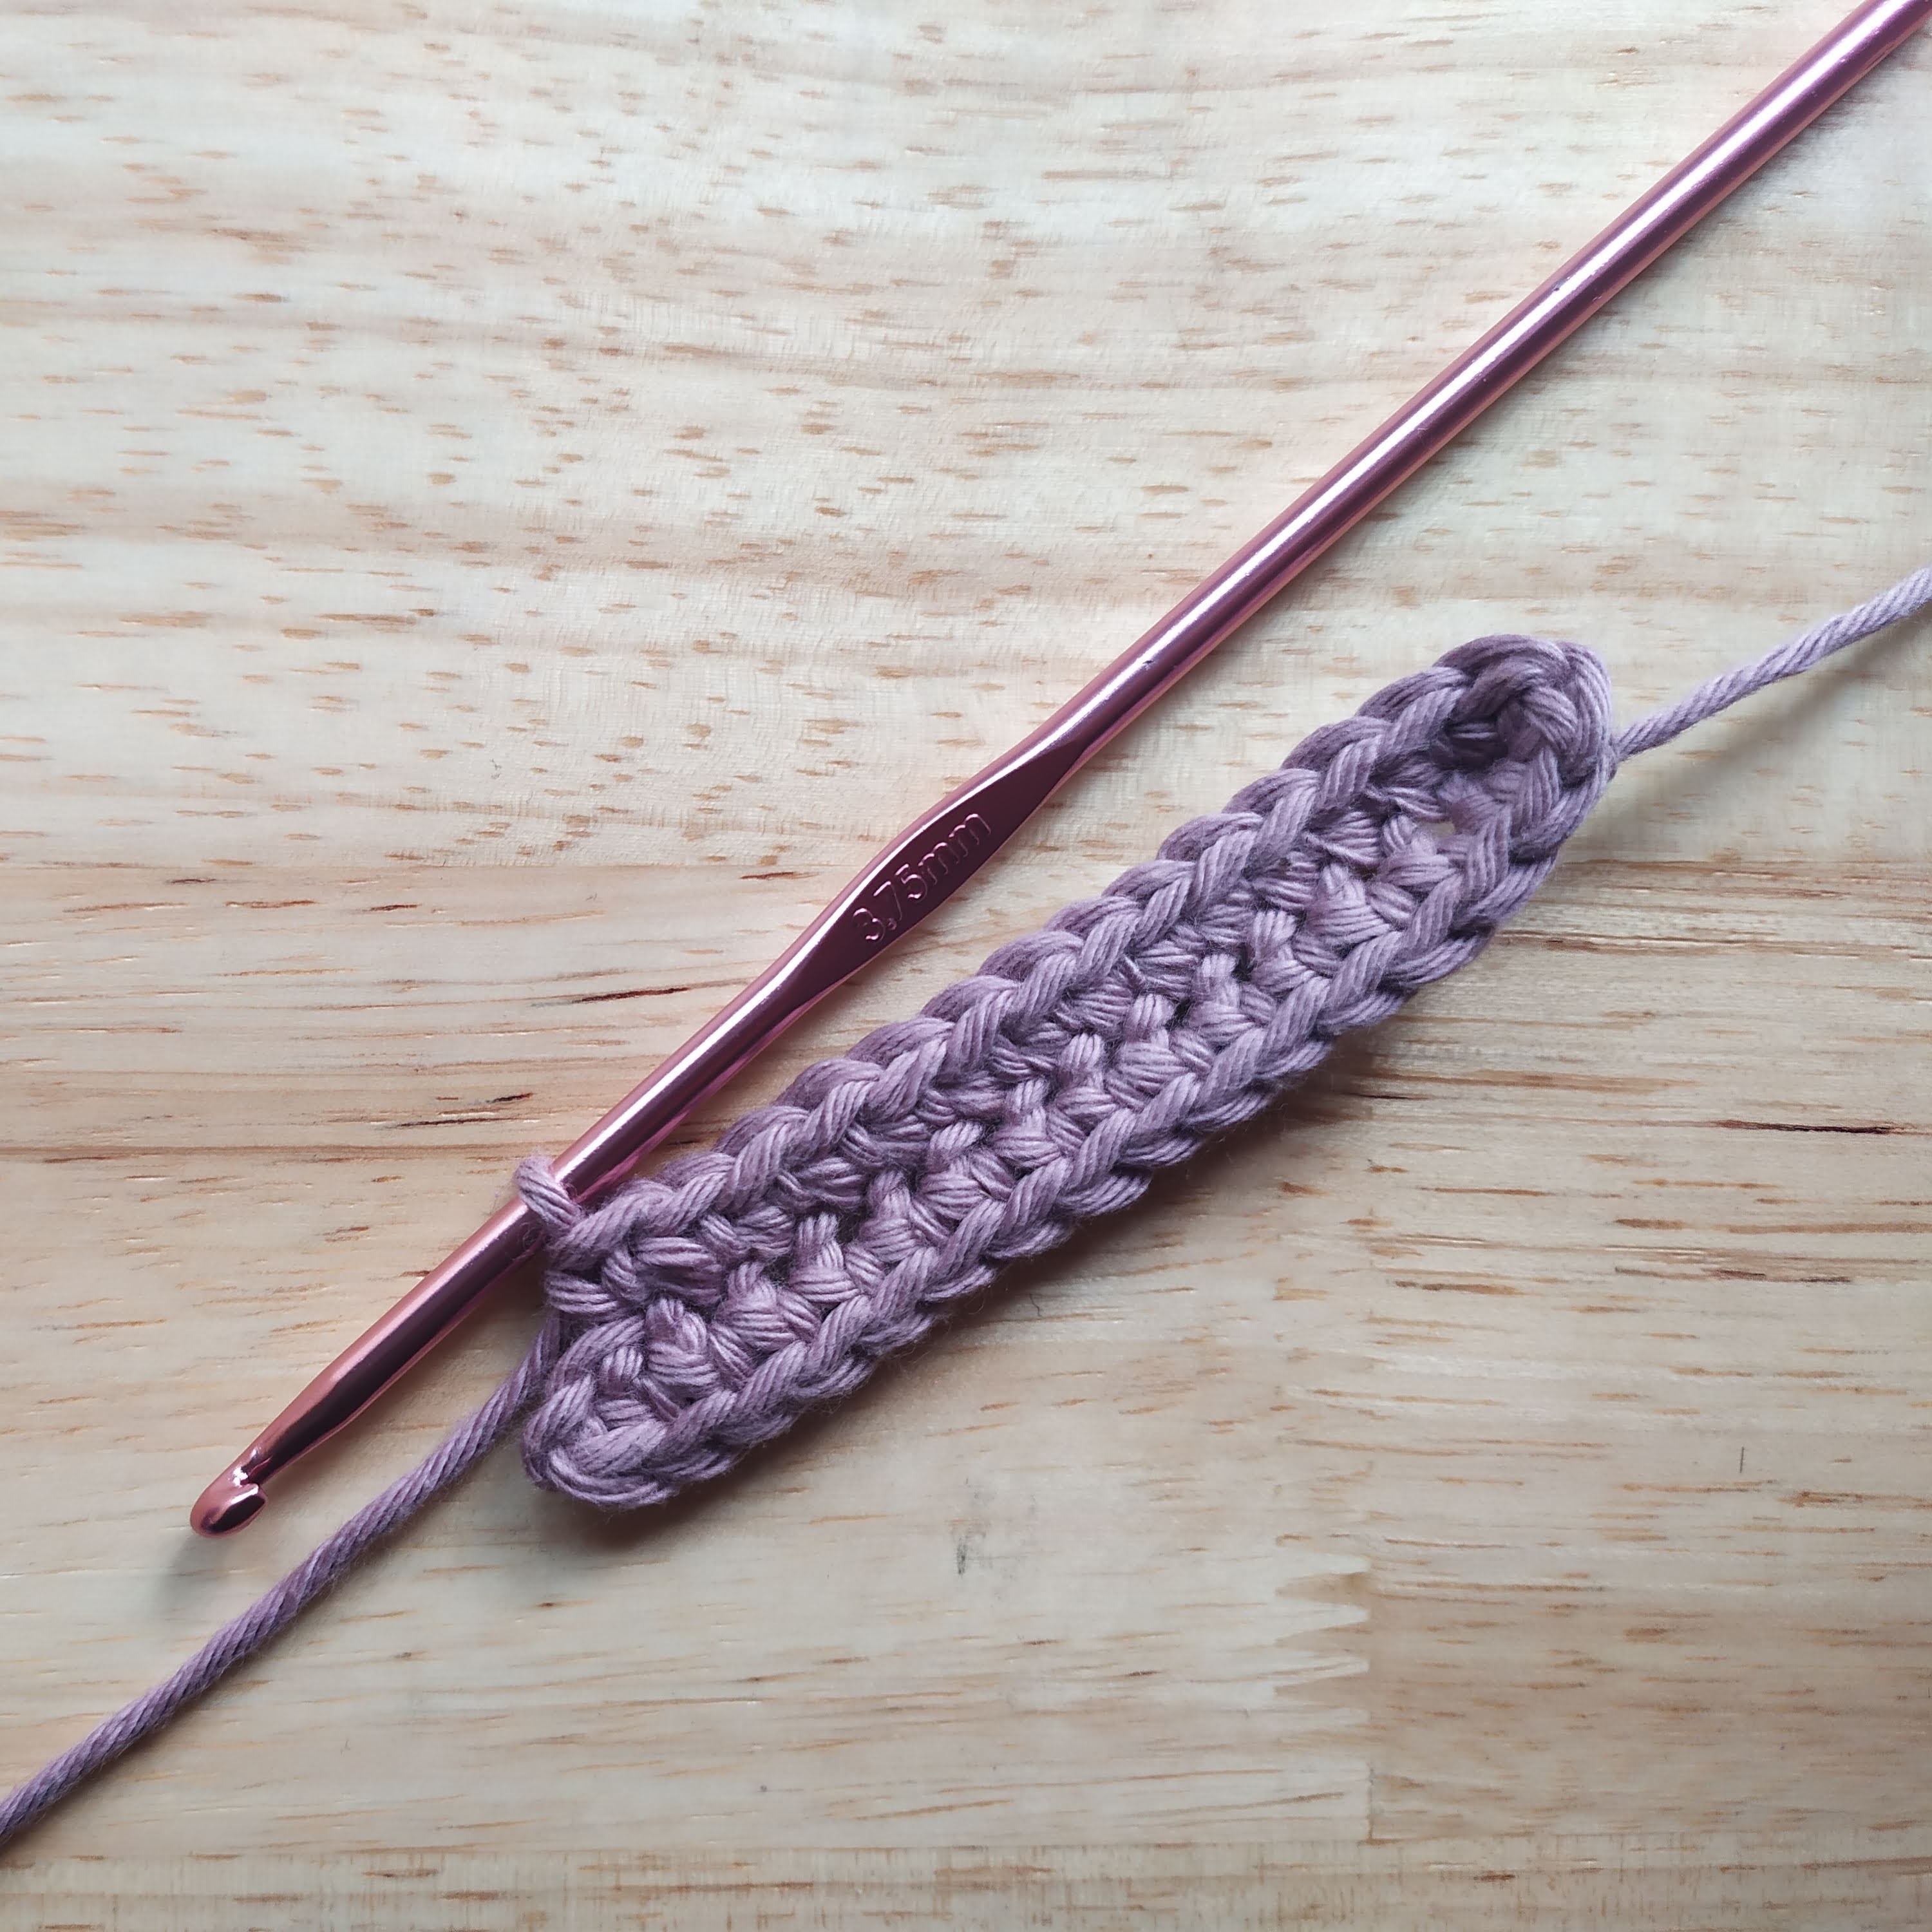 Turn work and DC back to first loop
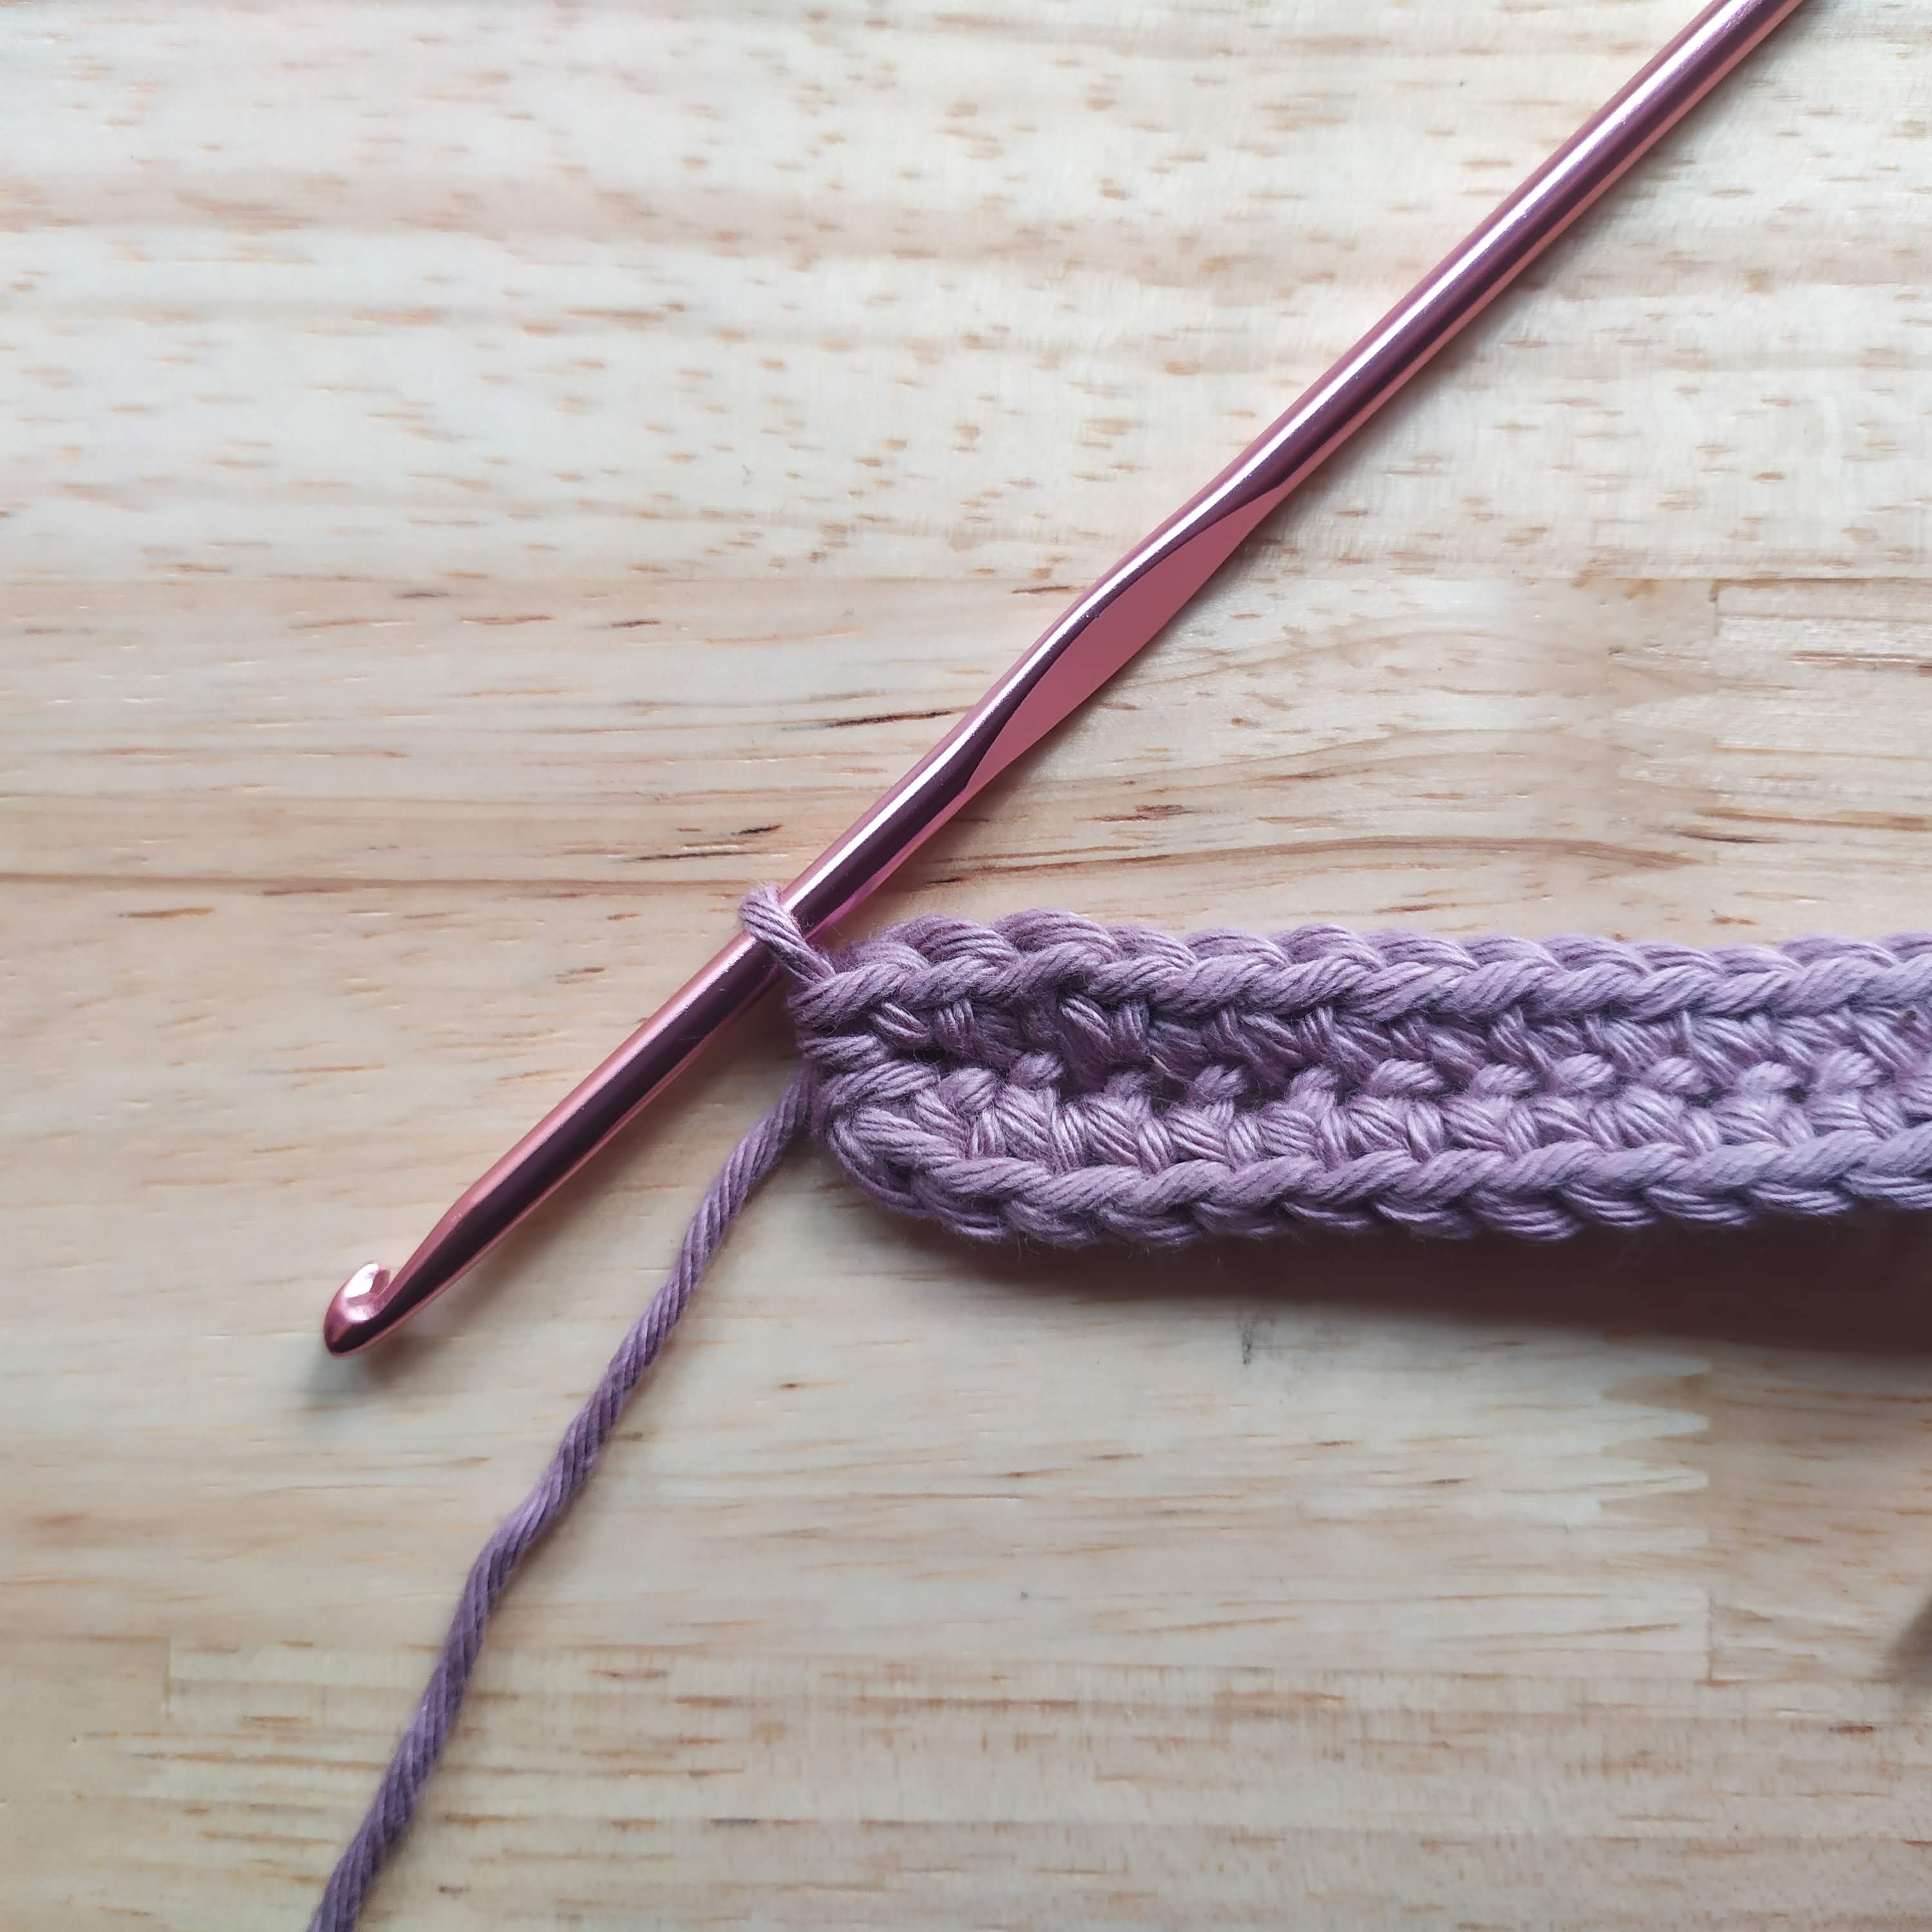 2DC into first loop (3 in total with the first stitch),
 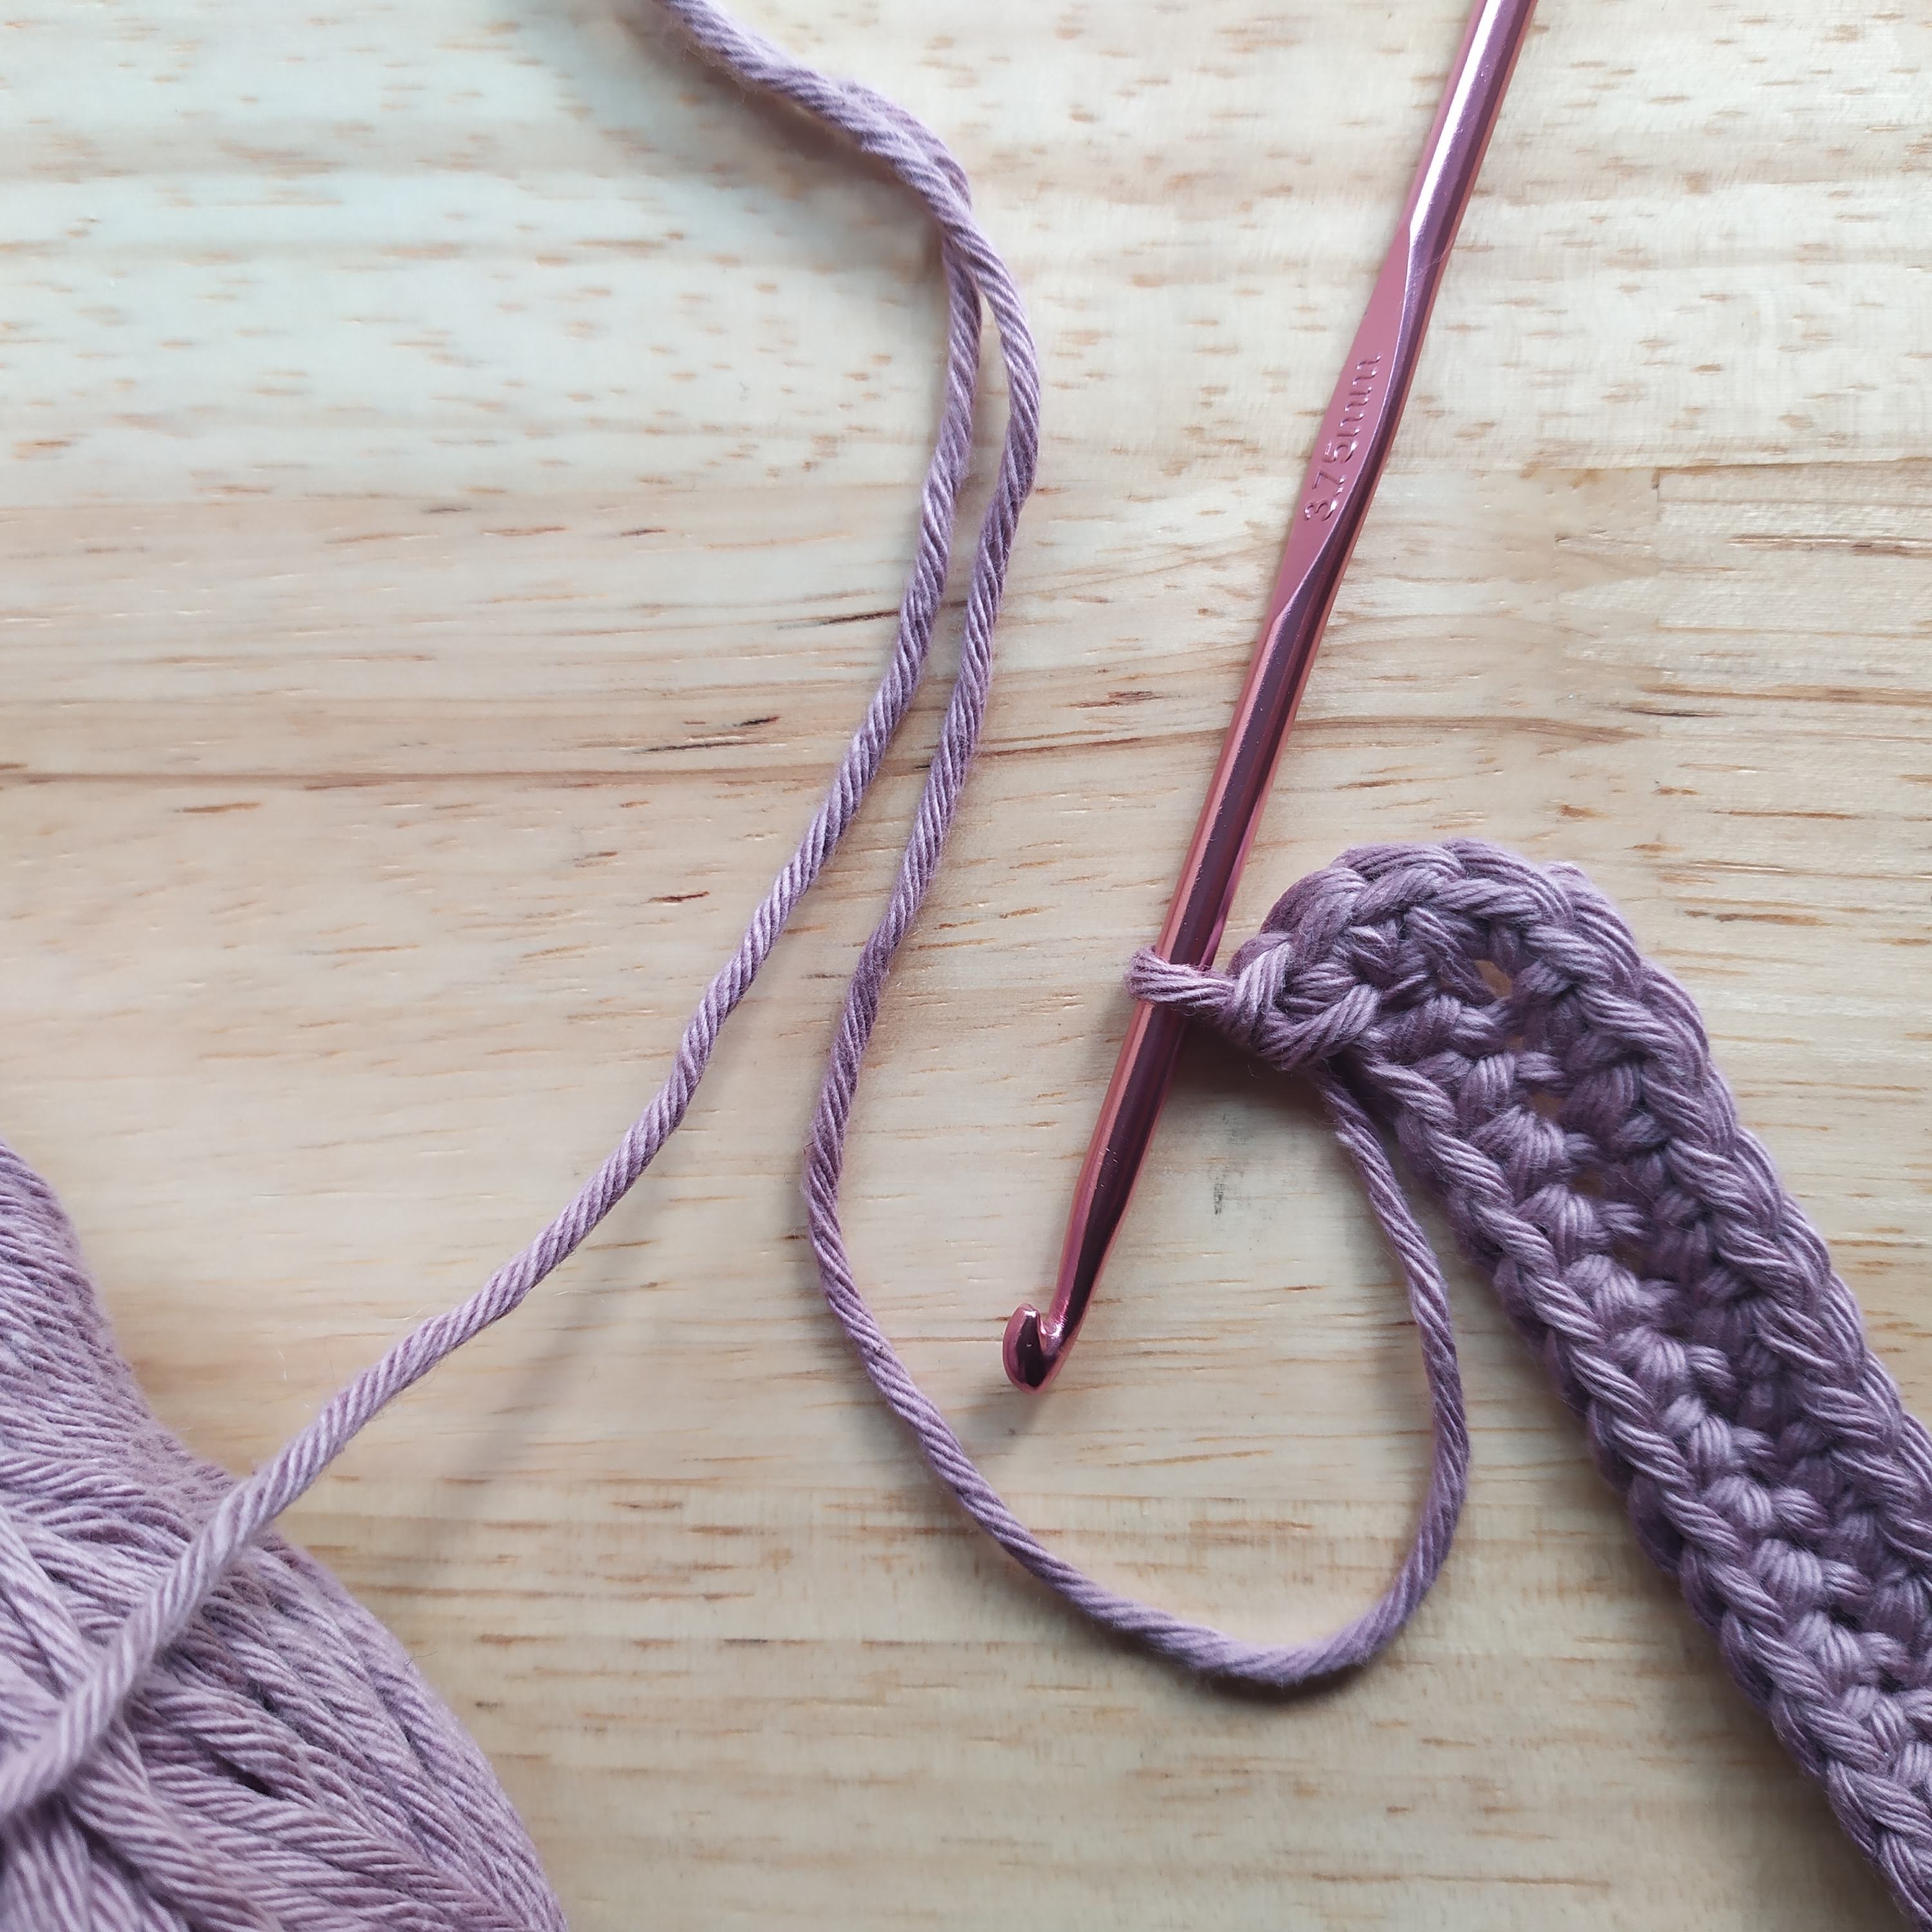 Continuing in a spiral 3DC into very first DC
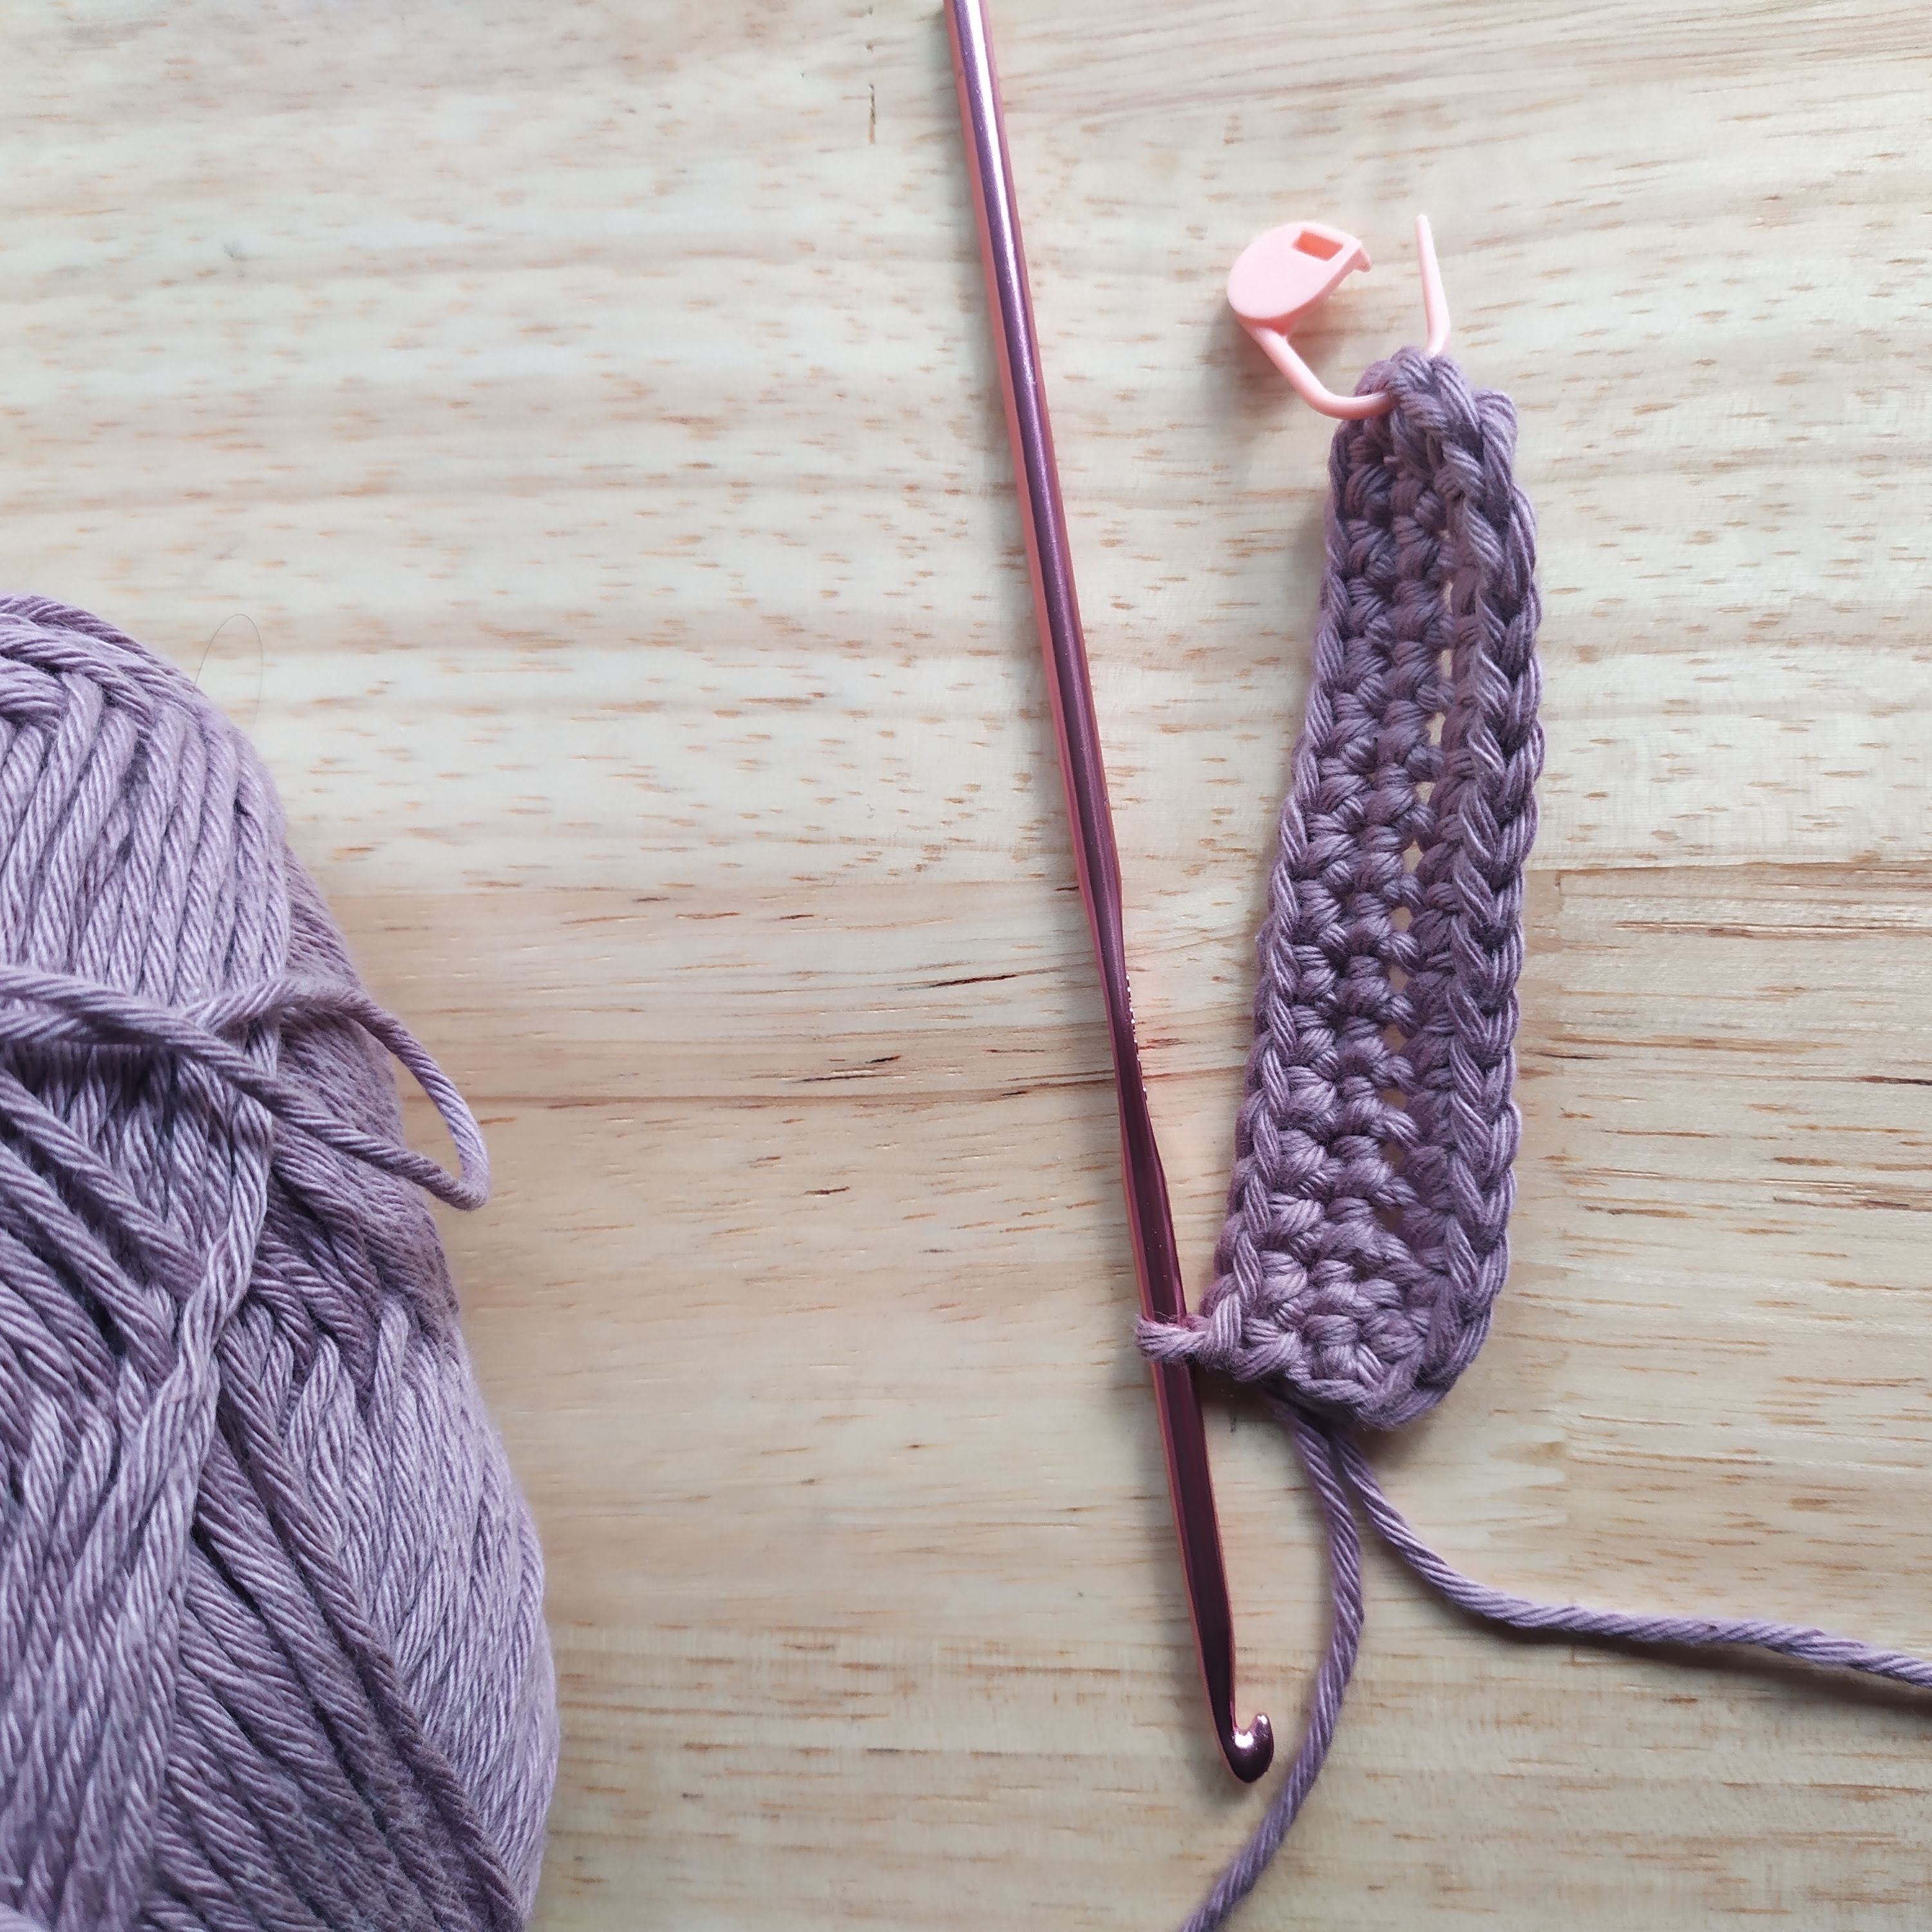 DC across
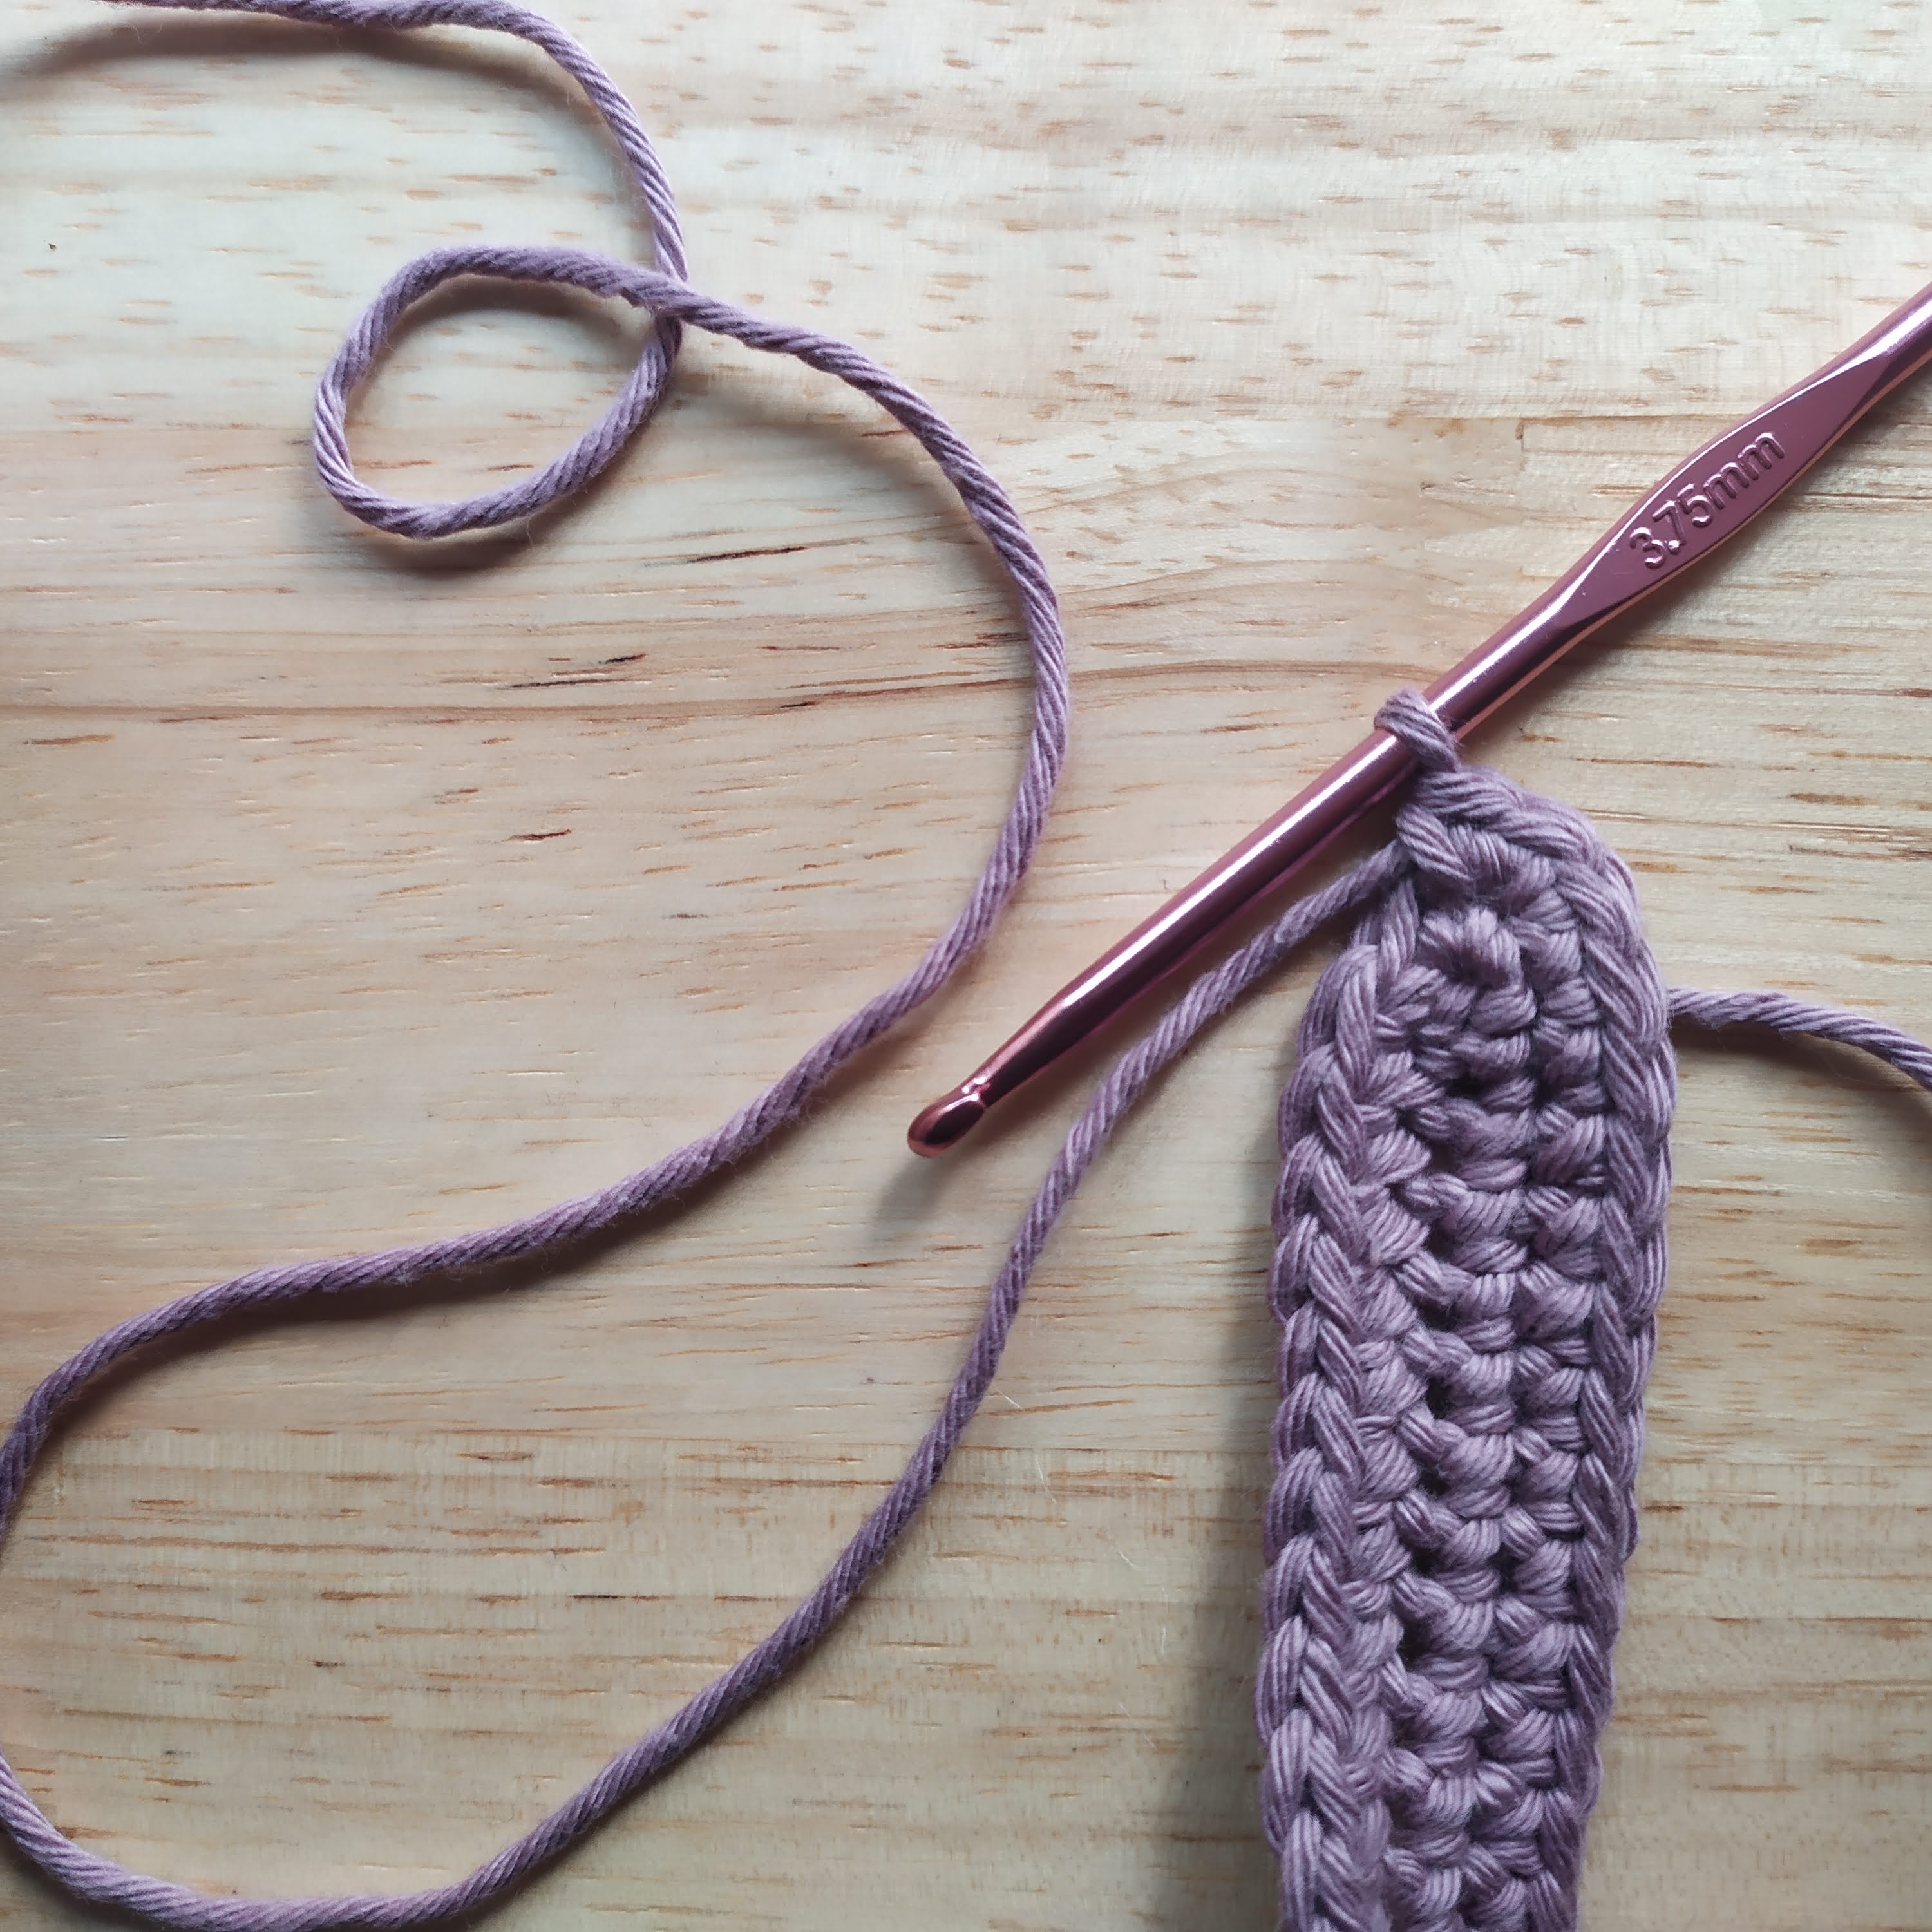 3DC in the centre stitch of 3DC below
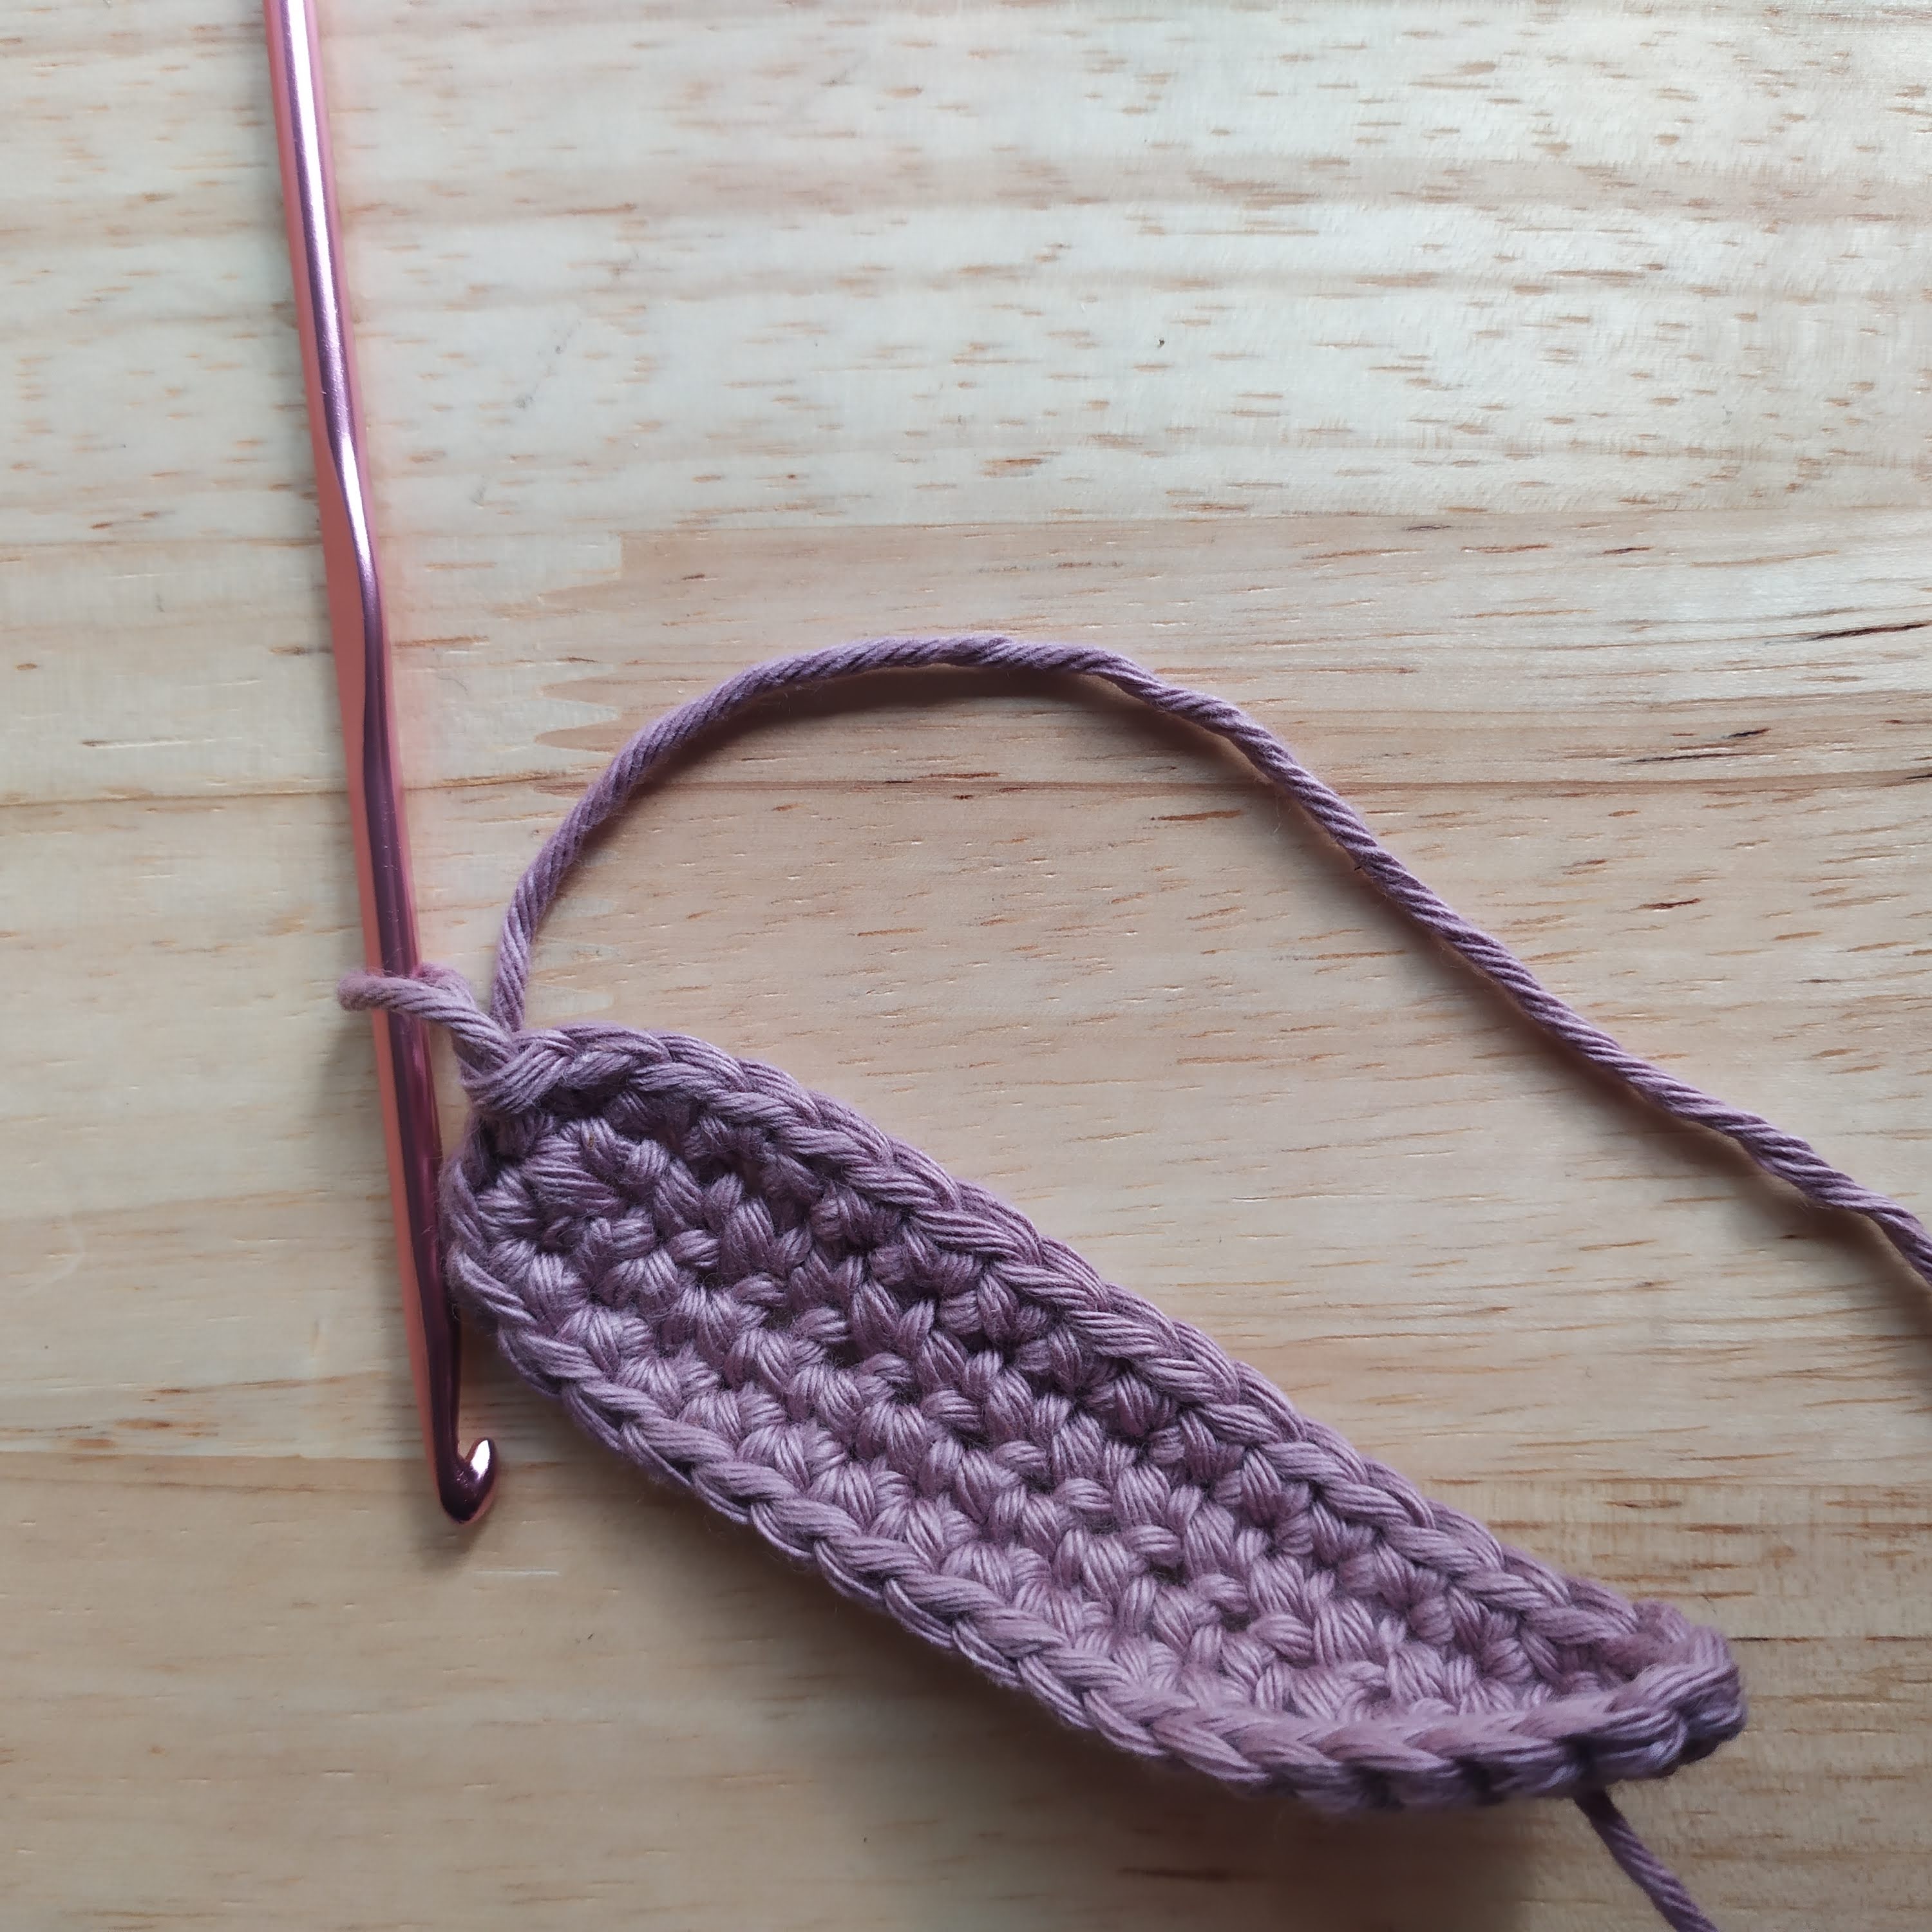 DC across and slip stitch to join
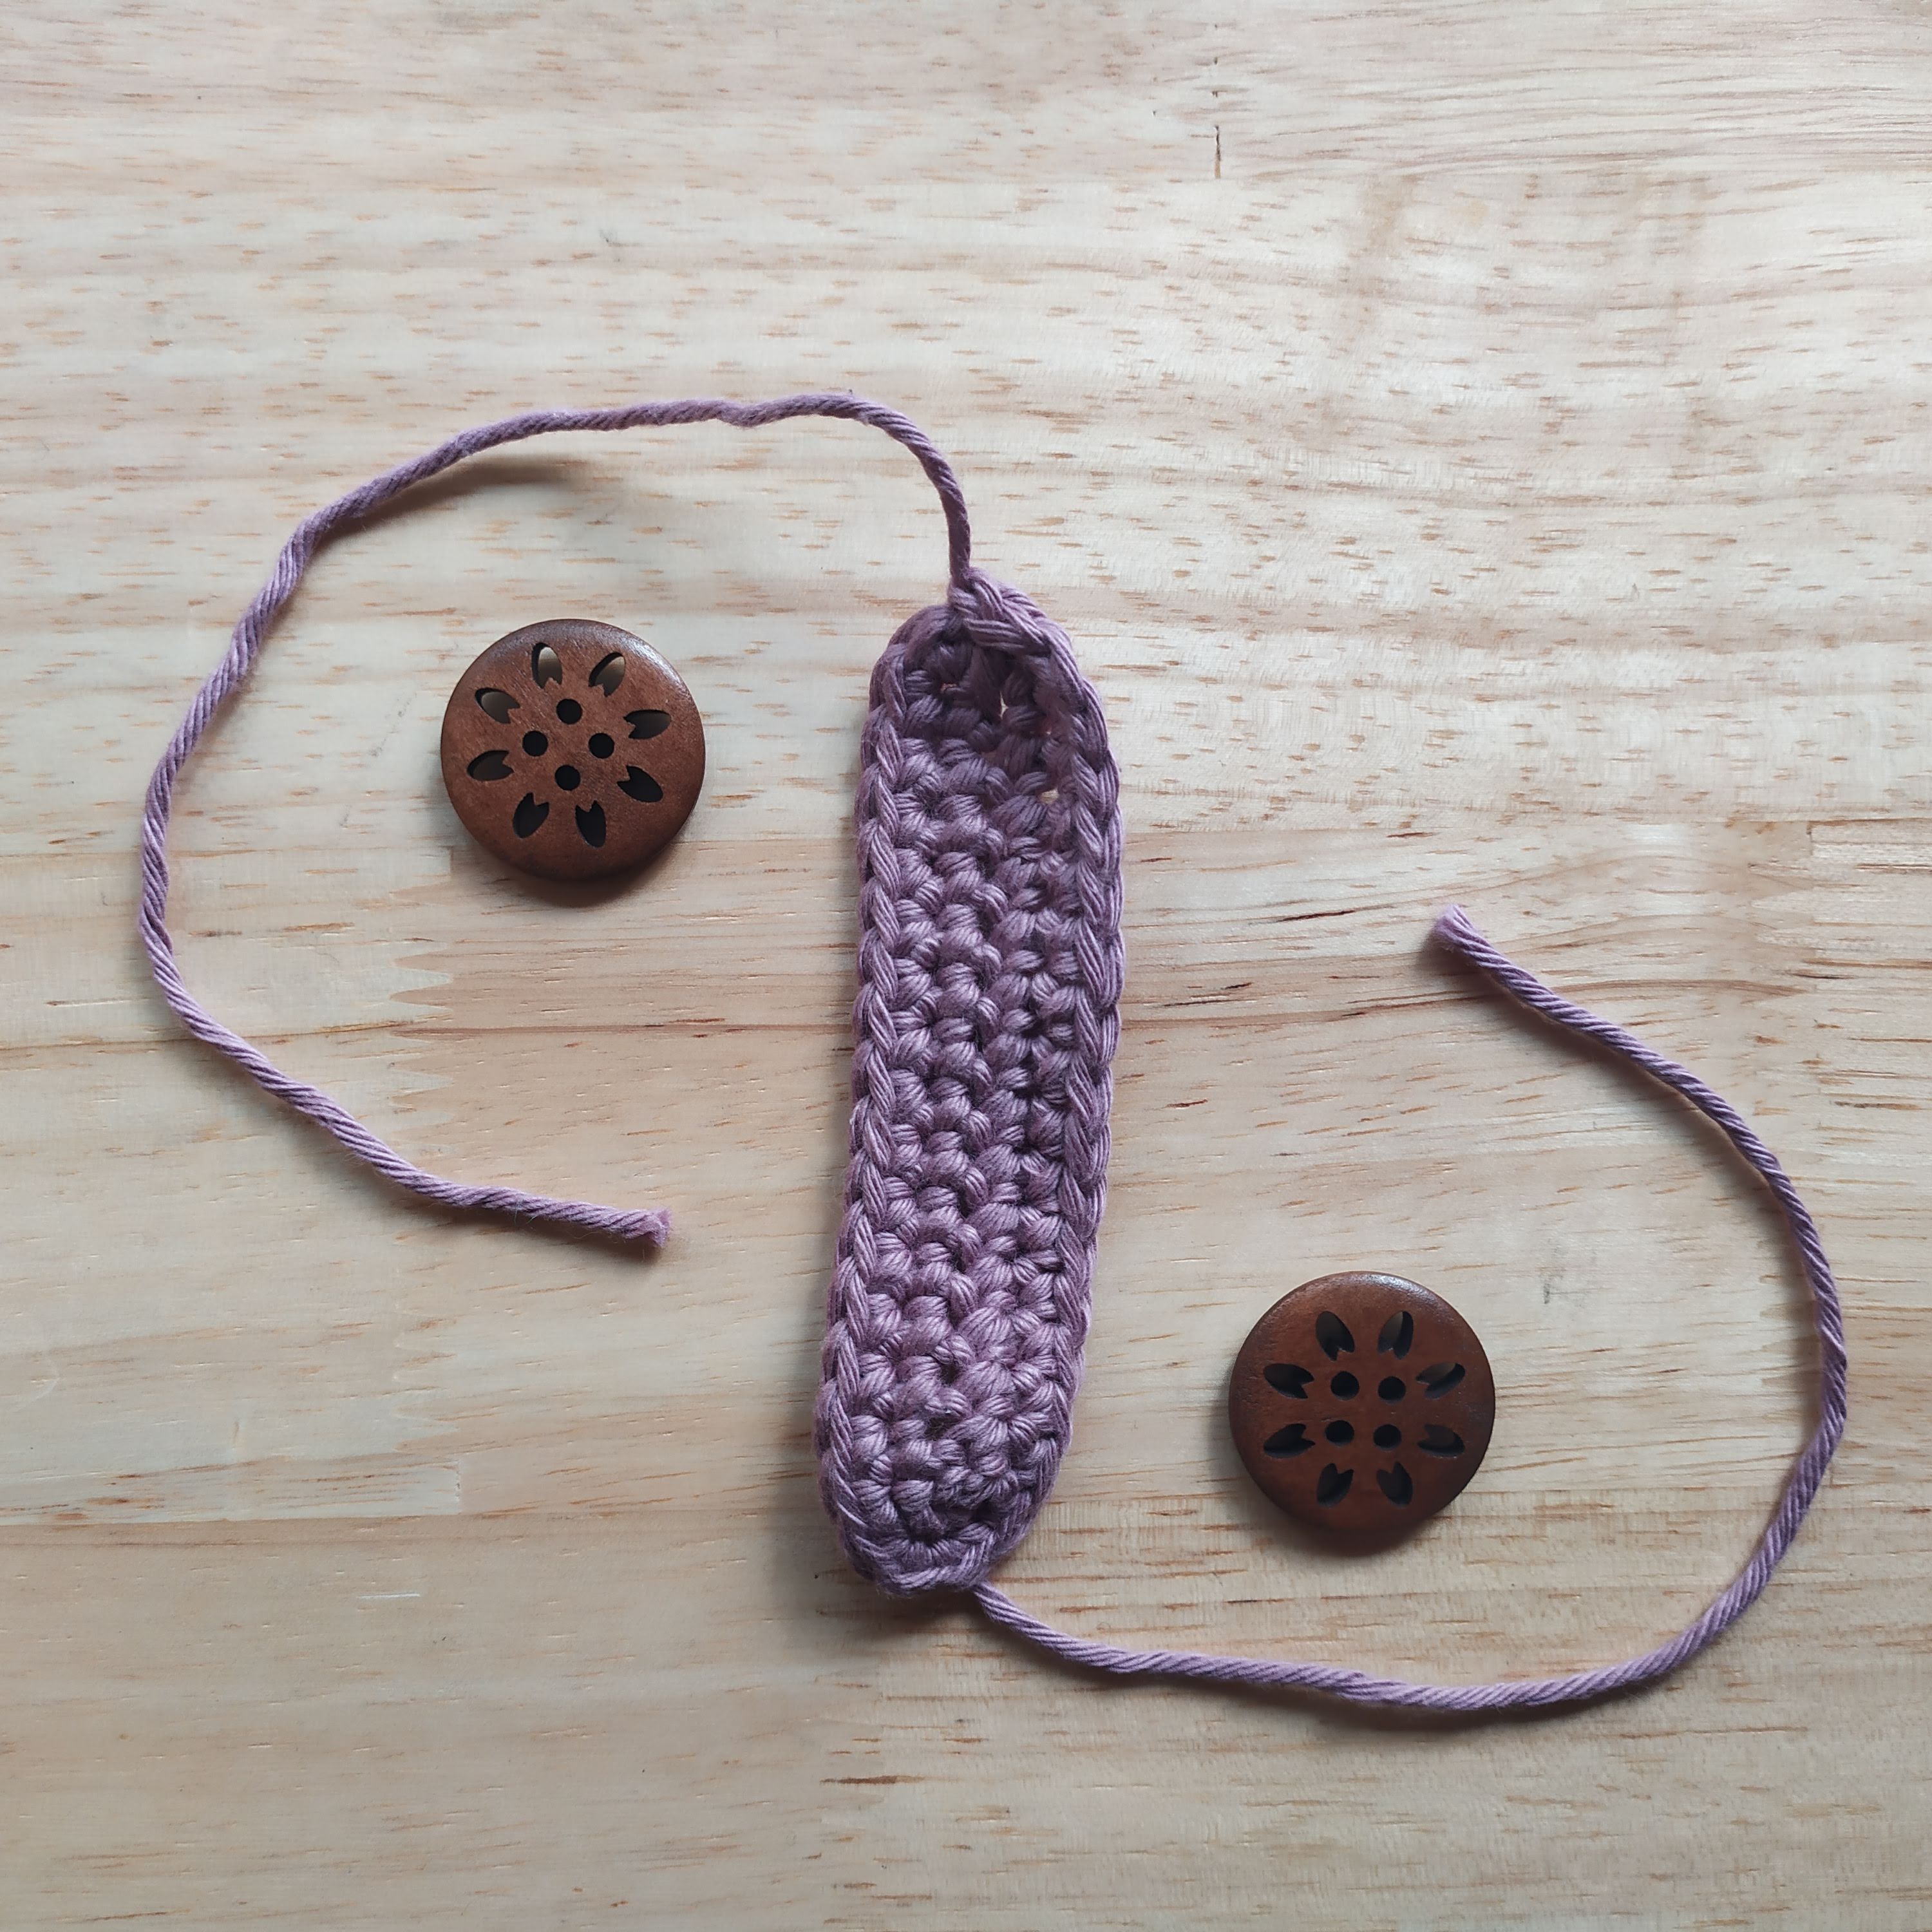 Sew a button on either end.